Loading ...
Loading ...
Loading ...
28 - English
OPERATION
Fig. 34
Fig. 33
Fig. 32
LOW
FENCE
RIP
FENCE
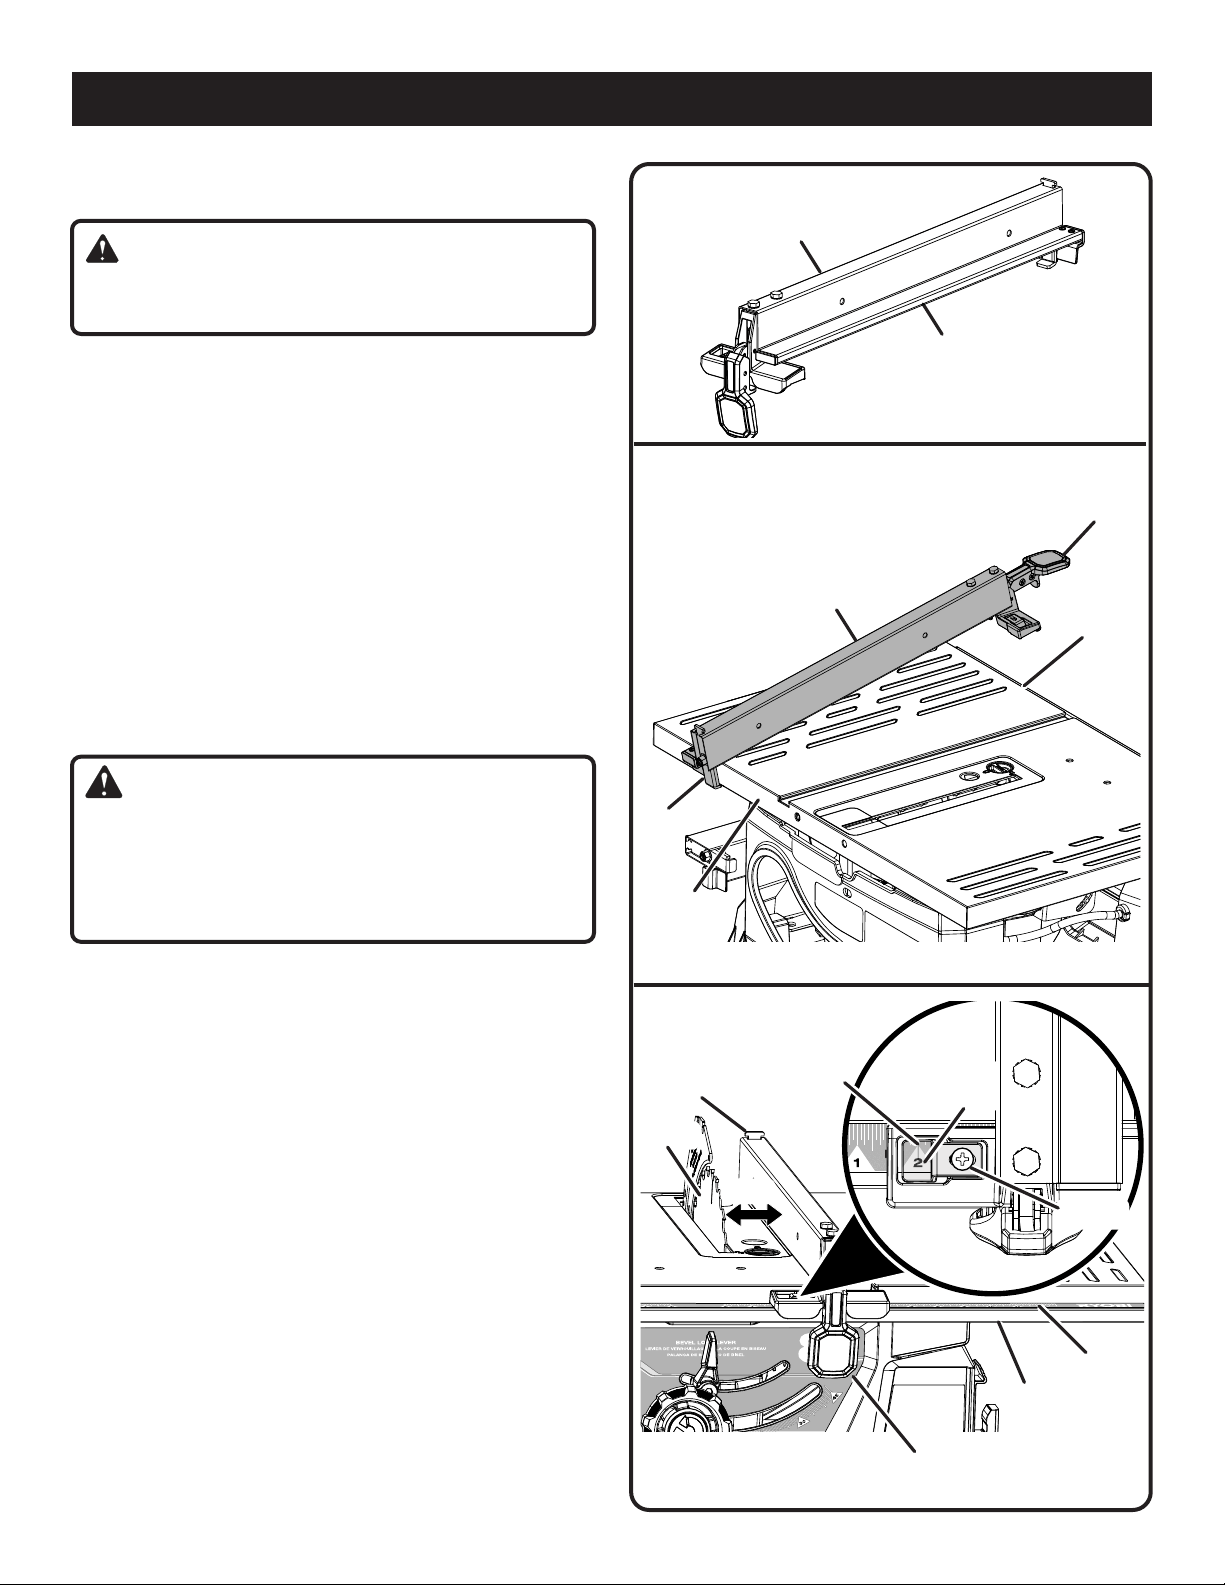
TO USE THE RIP FENCE
See Figures 32 and 33.
WARNING:
To reduce the risk of injury, always make sure the rip fence
is parallel to the blade before beginning any operation.
NOTE: The rip fence included with your saw has a low fence.
The low fence should face away from the blade when cutting
material greater than 3/4 inches thick. The low fence should
face toward the blade when cutting thin and/or narrow
workpieces. NEVER support the weight of the workpiece
on the low fence while making a cut.
Loosen the rip fence by lifting the locking lever.
Place the rear lip on the rear of the saw table and pull
slightly toward the front of the unit.
Lower the front end of the rip fence onto the guide
surfaces on top of the front rail.
Check for smooth gliding action.
Position the rip fence the desired distance from the blade.
With the rip fence flat on the saw table, push the fence
towards the front rail to align the fence to the blade.
WARNING:
Lock the fence at the intended cut size first then move the
work piece up to the fence. Do not place the work piece
first then move your fence up to it to lock the fence. This
may result in a misaligned fence which could pinch the
workpiece against the saw blade and create kickback.
Push the locking lever down to align and secure the
fence. When securely locked, the locking lever should
point downward.
NOTE: Ensure the locking lever secures the rip fence
in place. If adjustments are needed, see To Check
the Tightness of the Rip Fence Locking Lever in the
Adjustment section of this manual.
NOTE: If the rip fence is not parallel to the blade,
adjustments are needed. Refer to: To Check the Alignment
of the Rip Fence to the Blade in the Adjustment section
of this manual.
TO SET THE RIP FENCE SCALE INDICATOR
TO THE BLADE
See Figure 34.
Use the indicator on the rip fence to position the fence along
the scale on the front rail.
NOTE: The blade guard must be removed to perform this
adjustment. Reinstall the blade guard when the adjustment
is complete.
Begin with the blade at a zero angle (straight up).
FRONT
RAIL
RIP
FENCE
SCALE
LOCKING
LEVER
SCALE
INDICATOR
2 in.
2 in.
MARK
SCREW
BLADE
FRONT
RAIL
RIP
FENCE
LOCKING
LEVER
REAR OF
SAW
REAR
LIP
Loading ...
Loading ...
Loading ...