
Loading ...
Loading ...
Loading ...
19 - English
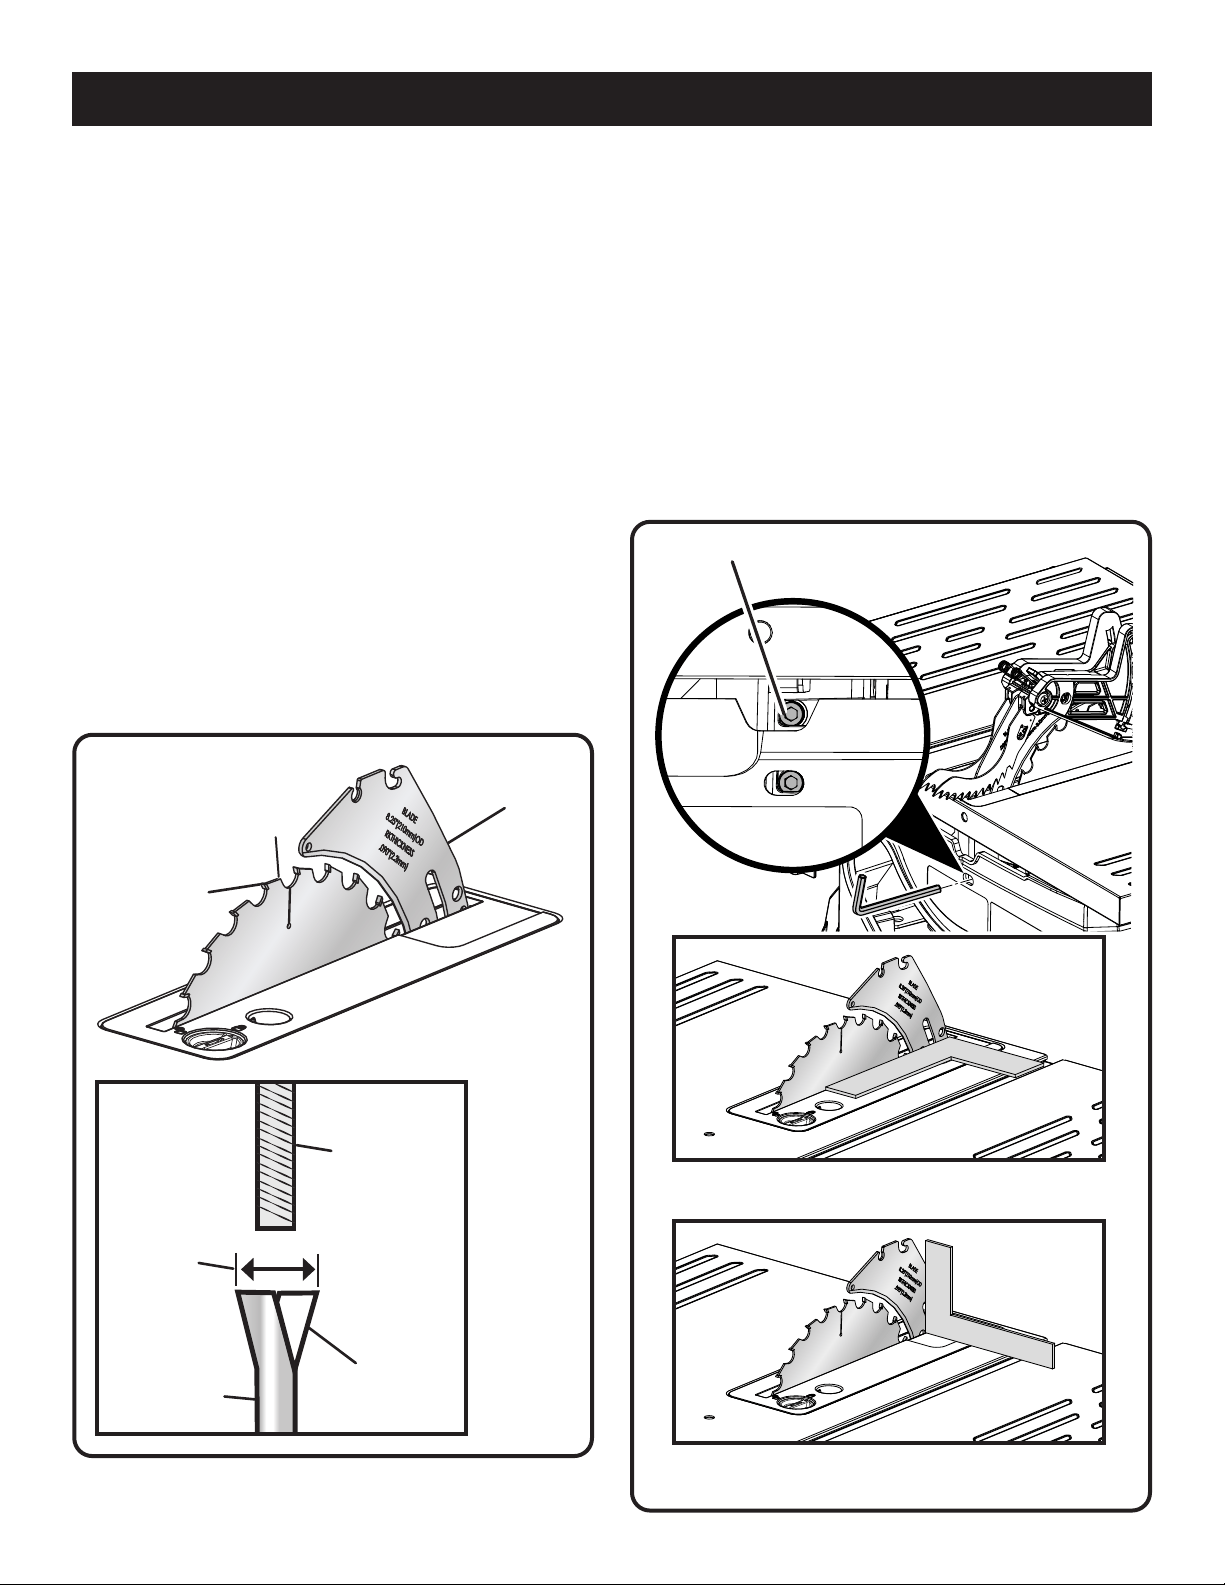
Fig. 14
ASSEMBLY
TO CHECK AND ALIGN THE RIVING KNIFE
AND SAW BLADE
See Figures 14 - 15.
To check alignment of the riving knife:
Remove the battery.
Raise the saw blade by turning the height/bevel adjusting
handwheel clockwise.
Adjust the bevel angle to 0° and lock the bevel locking
lever.
Remove the blade guard.
To check horizontal alignment, place a framing square
or straight edge against both the body of the saw blade
and the riving knife. The framing square should contact
both the blade body and riving knife evenly with no gaps.
Check the alignment with both sides of the blade body.
NOTE: The kerf or width of each tooth is wider than the
blade body. When the riving knife is properly aligned, it
will be centered on the kerf width.
To check vertical alignment, place a framing square beside
the riving kife. The edge of the square and the riving knife
should be parallel.
Fig. 15
HORIZONTAL ADJUSTMENT
VERTICAL ADJUSTMENT
BLADE
TOOTH
BLADE
BODY
RIVING
KNIFE
SCREWS
If the riving knife is out of alignment with the saw blade,
adjustment is needed. The riving knife must be in alignment
front to back (horizontally) and top to bottom (vertically).
To adjust (horizontally and vertically):
Raise the saw blade to its full height.
Remove the blade guard.
From the back of the saw, loosen the screws holding the
mounting bracket.
Reposition the riving knife left or right as needed to align
the riving knife with the saw blade.
Once properly aligned, securely retighten all screws.
Check again for squareness and continue to adjust if
needed.
BLADE
BODY
KERF
WIDTH
BLADE
TOOTH
RIVING
KNIFE
Loading ...
Loading ...
Loading ...