
Loading ...
Loading ...
Loading ...
18 - English
ASSEMBLY
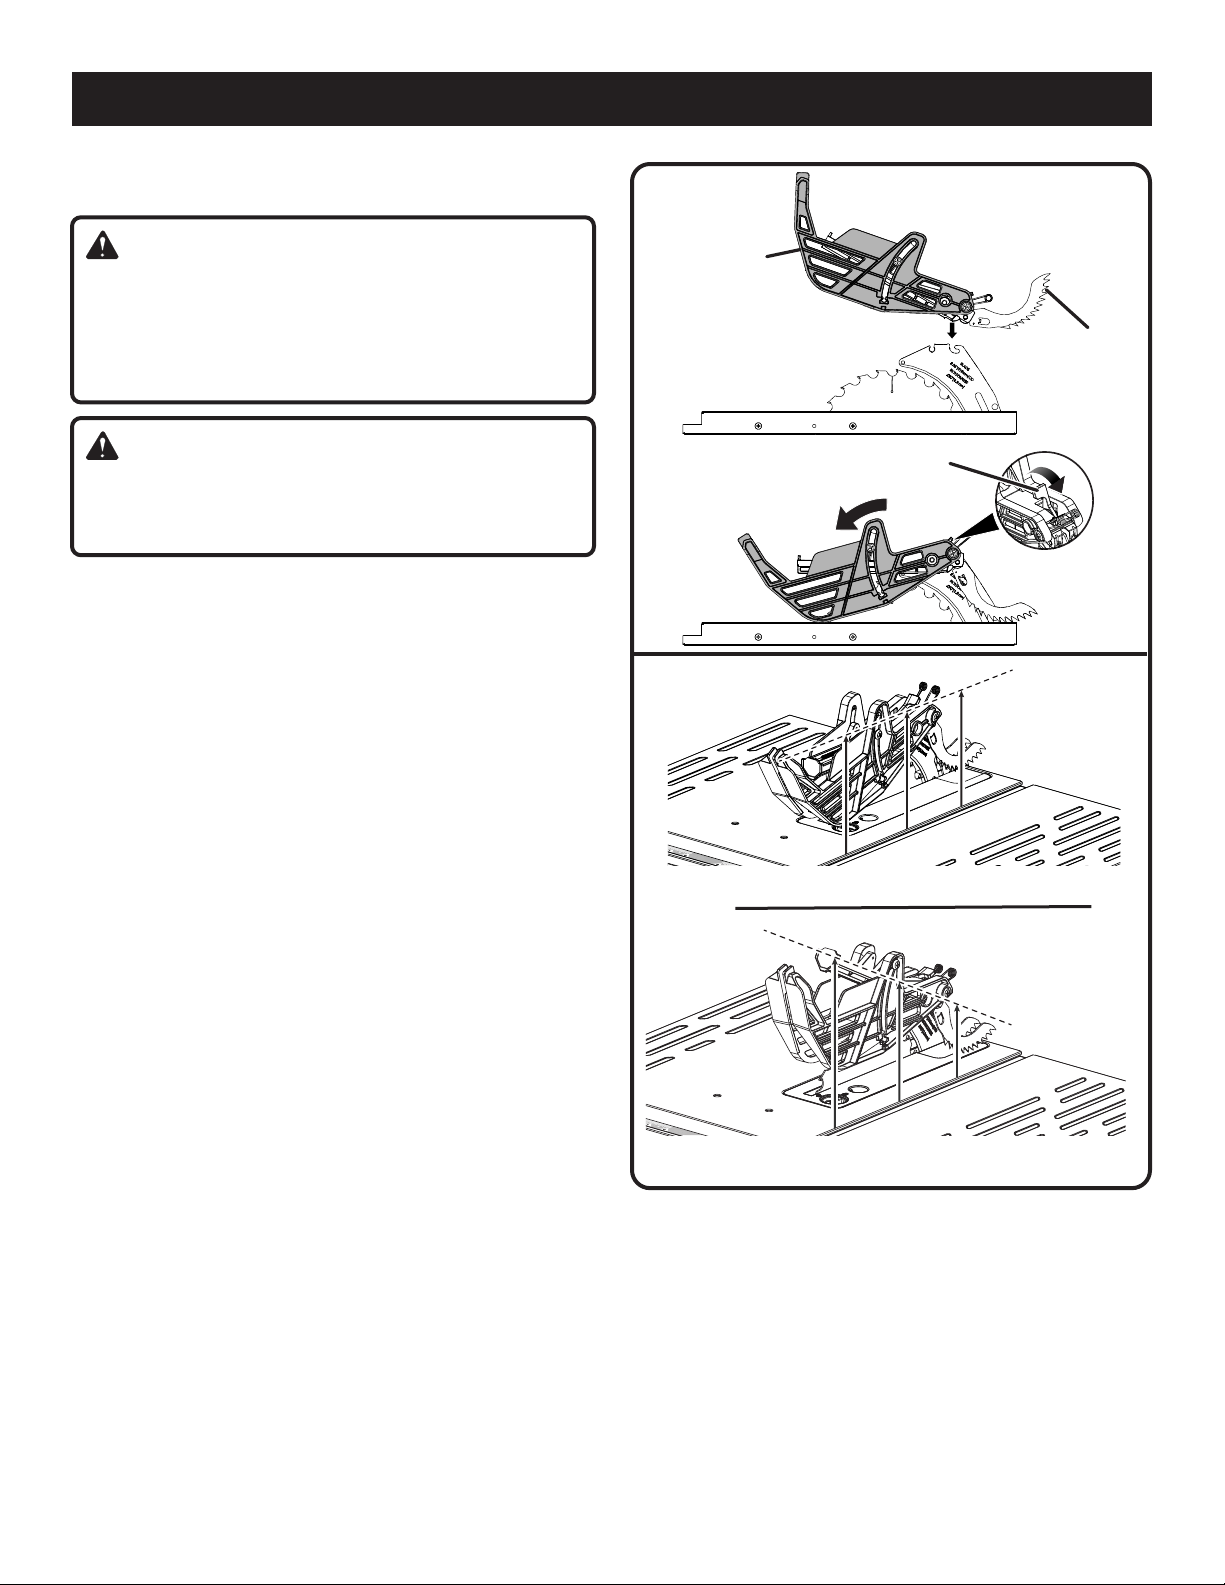
INSTALLING THE BLADE GUARD
See Figures 12 - 13.
WARNING:
Always install the blade guard onto the riving knife in the
“up” position to provide proper blade coverage. Installing
the guarding components onto the riving knife in any oth-
er position will prevent them from working as designed,
which could increase the risk of serious personal injury.
WARNING:
Replace the blade guard if the anti-kickback pawls are
dull or damaged. Dull or damaged pawls may not stop
a kickback increasing the risk of serious personal injury.
Anti-kickback pawls are part of the blade guard for this saw.
They should only be used for through cuts. When not needed,
they may be positioned to be out of the way.
Remove the battery.
Raise the saw blade by turning the height/bevel adjusting
handwheel clockwise.
Place riving knife in “up” position.
Reinstall the throat plate.
To install blade guard:
Lift the guard lever up to unlock.
With the front of the blade guard raised, lower the back
of the guard into the riving knife in the position shown.
Push the front of the guard down until the bar inside the
guard is parallel to the table (see figure 13). If the bar is
not parallel to the table, the riving knife is not in the “up”
position.
Lock the guard in place by pushing the guard lever down.
The blade guard side barriers may be lifted, then
positioned out of the way without being removed for
easier measurement.
NOTE: Blade alignment can be adjusted for different kerf
widths. Refer to: To Check and Align the Riving Knife and
Saw Blade. Check the blade guard assembly with kickback
pawls for clearances and free movement.
BLADE
GUARD
GUARD
LEVER
ANTI-
KICKBACK
PAWLS
Fig. 12
Fig. 13
INCORRECT
CORRECT
Loading ...
Loading ...
Loading ...