Loading ...
Loading ...
Loading ...
24
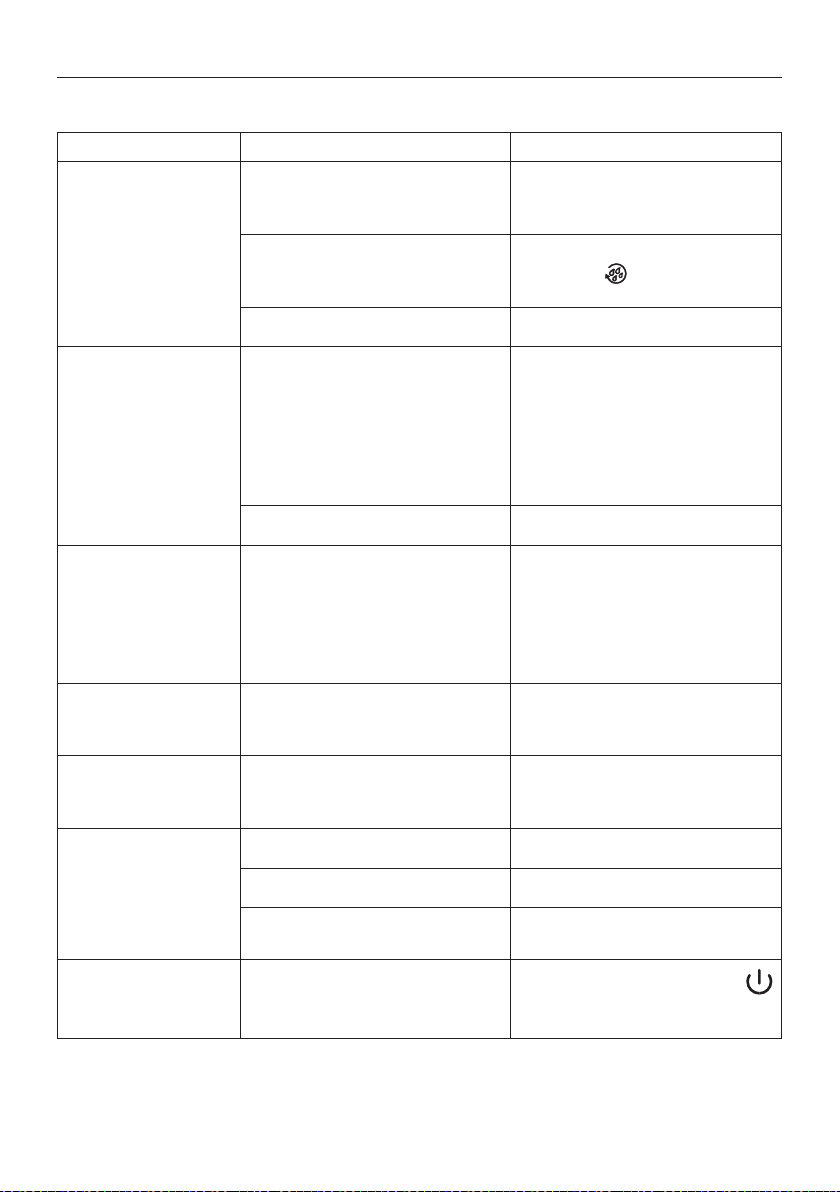
21. TROUBLESHOOTING
Below is a list of some of the possible malfunctions.
If the problem cannot be resolved as described, contact Customer Services.
PROBLEM POSSIBLE CAUSE REMEDY
The coee is not hot. The cups were not preheated. Warm the cups by rinsing them with hot
water (Please note: you can use the hot water
function).
The internal circuits of the appliance have
cooled down because 2/3 minutes have
elapsed since the last coee was made.
Before making coee, rinse the internal circuits
by pressing the
button (B5).
A low coee temperature is set. Set a higher coee temperature in the menu.
The coee is weak or not
creamy enough.
The coee is ground too coarsely. Turn the grinding adjustment dial (A5) one
click anticlockwise towards 1 while the coee
mill is in operation (g. 7). Continue one click
at a time until coee delivery is satisfactory.
The eect is only visible after delivering 2
coees (see section “10.1 Adjusting the coee
mill”
).
The coee is unsuitable. Use pre-ground coee for espresso machines.
The coee is delivered too
slowly or a drop at a time.
The coee is ground too nely. Turn the grinding adjustment dial (A5) one
click clockwise towards 7 while the coee mill
is in operation (g. 7). Continue one click at a
time until coee delivery is satisfactory. The
eect is only visible after delivering 2 coees
(see section “10.1 Adjusting the coee mill
”).
The appliance will not make
coee
The appliance has detected impurities in its
internal circuits. "Please wait" is displayed.
Wait for the appliance to be ready for use again
and reselect the required beverage. Contact
Customer Services if the problem persists.
Coee does not come out of
one or both of the spouts.
The coee spouts (A9) are blocked. Clean the spouts with a toothpick (g. 24B).
The appliance does not come
on
It is not plugged into the mains socket. Plug into the mains socket (g. 1).
The main switch (A22) is not turned on. Place the main switch in the I position (g. 2).
The power cord (C7) connector is not inserted
correctly.
Insert the connector as far as it will go in the
socket at the back of the appliance (g. 1).
The infuser cannot be
extracted
The appliance has not been turned o correctly
Turn the appliance o by pressing the
button (A7) g. 6) (see section “7. Turning the
appliance o”
).
Loading ...
Loading ...