Loading ...
Loading ...
Loading ...
2. Preparation
24
Attaching a Viewfinder
Available viewfinders for the unit
DVF-EL200: OLED color viewfinder
Viewfinders are available separately.
This section describes attachment of the
DVF-EL200 as an example.
For details about attaching each viewfinder, refer to the
operating instructions of the viewfinder.
[CAUTION]
Do not leave the unit with the eyepiece of the
viewfinder facing the sun. Direct sunlight can
enter through the eyepiece, be focused in the
viewfinder, and cause fire.
[Notes]
Attach/remove the viewfinder while the unit is turned
off.
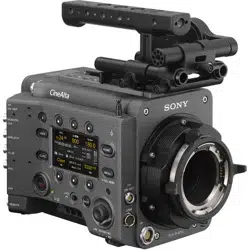
Attaching a Viewfinder
1 Align the viewfinder shoe with the groove
of the viewfinder mount on the VF
attachment, and attach the viewfinder.
2 Turn the viewfinder lock lever in the LOCK
direction to secure it in position.
2
1
Lock lever
3 Connect the viewfinder and unit using the
VF connection cable.
Viewfinder side:
Position the connector with the mark (red)
at the top, and fully insert the connector.
Camera side:
Alight the concave part of the VF
connector with the connector mark (red),
and fully insert the connector.
Clamper
[Note]
Secure the cable in the clamper as required.
To remove the viewfinder
1
Disconnect the VF connection cable from
the viewfinder and unit.
2 Turn the lock lever in the direction
opposite to LOCK, then remove the
viewfinder from the VF attachment.
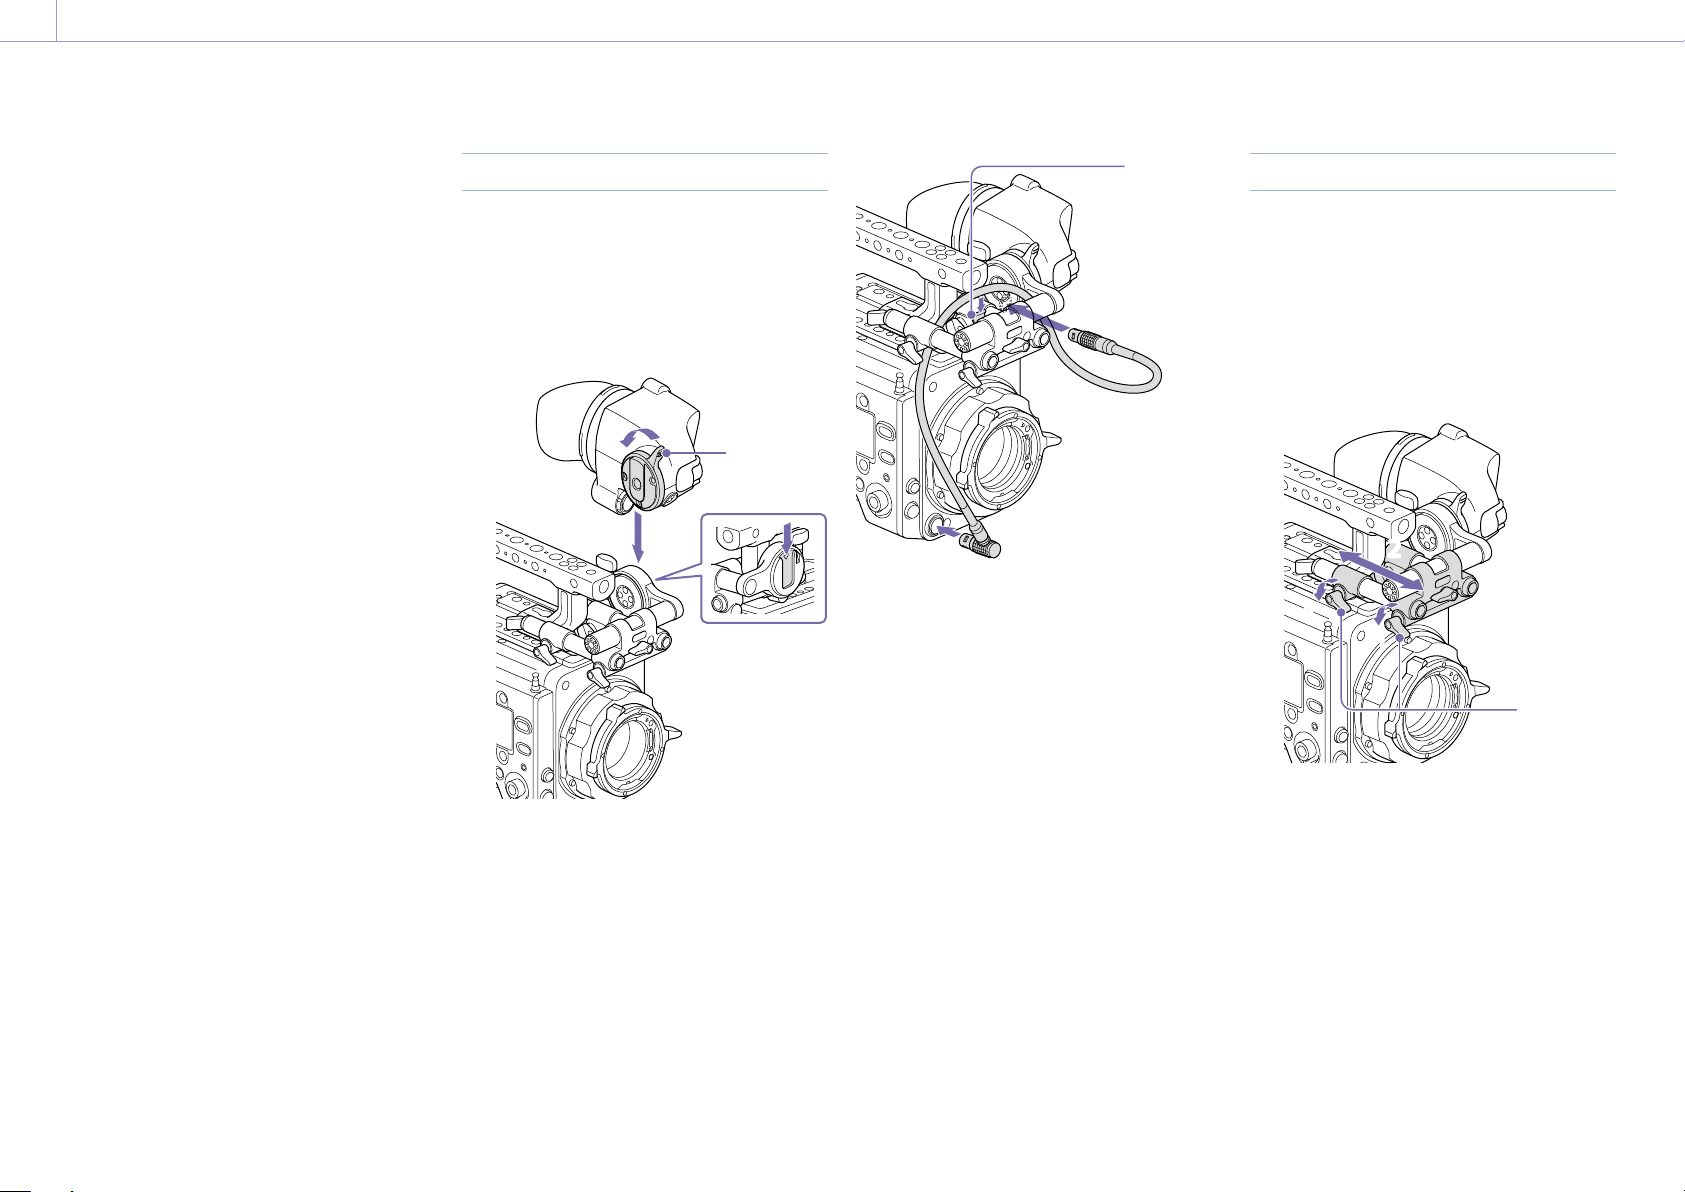
Adjusting the Viewfinder Position
To adjust the front/rear position
1 Loosen one or both of the front/rear rod
lock levers of the VF attachment.
2 Slide the VF attachment forward/rearward
to adjust the viewfinder position.
11
11
2
2
Rod lock
levers
3 Tighten the rod lock levers.
[Note]
If a rod lock lever is difficult to turn, pull the lever
out, turn it to a position where it is easier to
operate, and then push the lever back in.
Loading ...
Loading ...
Loading ...