Loading ...
Loading ...
Loading ...

14 15
by using the optional accesory CAF22, Fine Grate Plate. In the
absence of this plate, the S-blade may be used.
Dicing Plates
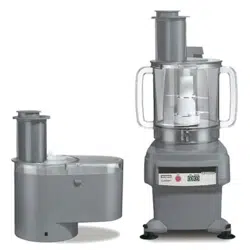
Your FP2200 is equipped with two dicing plates, including a ½"
grid and a ¾" grid. The dicing kit is available for use only with the
continuous feed chute. Since the dicing process requires both
horizontal slicing and vertical cutting, a slicing plate is required to
be used in tandem with a dicing plate. The dimensions of the nal
diced product vary according to the combination of slicing plate
and dicing plate chosen.
Refer to the assembly instructions for the continuous feed bowl.
Position the bowl on the motor base, then attach the slinger, a
dicing plate above the slinger, and the appropriate slicing plate on
top of the dicing plate. Attach the cover and rotate the feed chute
counterclockwise until it locks into position.
Load product into the feed tube using either the large or small
pusher to push the product toward the dicing grid. Use moderate,
steady pressure on the food pusher to push the items down when
the plate starts turning. If the pressure is not steady, the cut items
may vary in thickness. Avoid heavy pressure, which may deform
the plate.
The smaller the dice desired, the more difcult the cut is to
successfully attain. Soft or juicy produce with get mushy if the
product is too small.
DO NOT ATTEMPT TO DICE CHEESES OR RAW MEATS.
Damage could occur to the motor and/or the blades; such
damage will not be covered under warranty.
A noticeable change in the diced produce will occur when the
dicing grid needs cleaning. When that happens, press the OFF
switch, unplug the unit, and remove the cover and slicing plate.
Then use a stiff bristle brush to force through any produce that is
stuck in the dicing grid. Reassemble the unit and continue dicing.
cover, and use a rubber spatula to scrape the meat from the sides
of the bowl and back into the blade area. Replace the cover and
continue pulsing until the desired texture is achieved.
To chop cooked meat: Proceed as for raw meat in the preceding
paragraph, using up to 4 lbs. of cooked meat. You may achieve
a range of textures suitable for hash, for sandwich llings, or for
stufng green peppers, etc. You may chop potatoes, onions, or
other ingredients with the meat, as desired.
To chop onions, mushrooms, parsley, and other soft
vegetables: Cut large onions into quarters; cut other vegetables
into 2- to 3- inch pieces. Put up to 16 cups of quartered onions
in the bowl, or up to 8 cups of softer produce. Attach the cover,
rotate bowl and cover to lock, and press the PULSE switch
repeatedly for 3-4 seconds. Check the texture and resume
pulsing until the desired texture is achieved. As needed, press the
OFF sitch, remove the cover, and use a plastic spatula to scrape
down any pieces of vegetable that adhere to the side of the bowl.
To chop harder vegetables like carrots, potatoes and raw
turnips: Cut the vegetables in 2- to 3- inch pieces. Put up to 6
cups in the bowl, attach the cover, and rotate bowl and cover
to lock. After pressing the PULSE switch repeatedly for about 5
seconds, add up to another 6 cups through the feed tube, and
then PULSE until desired texture is reached. Note: if you turn the
machine on and let it run too long before stopping, the bottom
blade ingredients will be uneven consistency. If you put all the
pieces in at once before starting the motor, it might stall if a piece
of vegetable gets wedged between the cutting blade and the side
of the bowl. If that happens, press the OFF switch, unplug the
unit, and remove the cover. Then carefully lift out the S-blade and
remove contents of the bowl. Replace the S-blade in the bowl,
put contents back in the bowl, and make sure that it is seated
on the very bottom of the bowl before replacing the cover and
resuming chopping.
To chop or grate parmesan and other hard cheeses: Cut
well-chilled cheese into 1- to 2- inch chunks. Put up to 2.5 lbs. of
cheese chunks into the bowl, and process until the chunks are
reduced to pea size. (You may add up to 1 lb. more through the
feed tube after processing starts.) Then press the PULSE switch
repeatedly until the cheese reaches the desired consistency.
*Note: Fine grating of hard cheeses is done most effectively
Loading ...
Loading ...
Loading ...