Loading ...
Loading ...
Loading ...

8 9
Disassembly when removing an accessory disc
•Donotremovetheworkbowluntiltheaccessorydiscis
removed.
•Toremoveanaccessorydisc,placeyourngersinthetwo
holes on the blade designated for handling the blade, and lift
the disc. It should remove cleanly.
•Removetheworkbowlfromtheunitbyrotatingclockwise
to disengage the tabs on the bottom of the bowl platform
from the work bowl. When the bowl handles are positioned
at about the 11 and 5 o’clock positions you can gently lift the
bowl straight up and out.
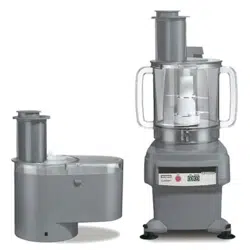
ASSEMBLY OF CONTINUOUS FEED
CHUTE PARTS
•Cleanandsanitizethemotorbase,andwash,rinse,and
sanitize the continuous feed chute, cover, slinger disc, food
pusher, food pusher insert and processing tools prior to initial
use.
•Placethebaseonacounterortableneara3-prongelectrical
outlet. Position it so that you are looking at the front of the
unit and can see the control panel. Be certain that the cord is
unplugged and that the controls are in the OFF position (the
red marker will be positioned over the OFF button). Do not
plug in the cord until the processor is completely assembled.
•Pickupthecontinuousfeedchute,holdingitinbothhands
with the chute pointing in the 4 o’clock position. Place the
chute on the base, tting its center opening over the motor
shaft.
•Pressthechutedownsotheroundlowerrimofthechutets
around the circular platform.
•Placetheslinger(orejectordisc)inthebowl,slidingitover
the metal motor shaft until it reaches the bottom of the chute.
•Selecttheappropriateaccessorydiscbycarefullyusingthe
holes designed for handling the blades or by holding the
processing tool by the non-sharp area of the tool.
•Carefullyguidethetooloverthemetalshaftsothatitis
properly seated on the shaft. The disc should easily drop
into place, but if not, gently rotate it until you feel it drop into
place. Do not put any food in the chute before placing the
accessory disc onto the shaft.
•Placethecoverontopofthechutewithcoverlockingtab
facing you. Twist the lock so that it holds the cover in place.
•Rotatetheentirechutecounterclockwiseuntilitclicksinto
place and engages the rear interlock.
•Theinterlocktabonthecoverwillslideintotheinterlock
slot on the cover and engage the magnetic safety interlock
switch. The interlock switch prevents operation of the
machine unless the cover is in the proper position. With this
switch engaged, the food processor will operate if the power
is on and the controls are turned to ON or PULSE.
NEVER ATTEMPT TO START THE FOOD PROCESSOR
WITHOUT THE CHUTE AND COVER LOCKED
INTO POSITION.
Two Pushers for Feed Tube
Pick up the large food pusher and the small food pusher. The
large pusher is for processing larger vegetables.
The smaller pusher nests in the larger pusher and can be used for
smaller vegetables, guiding long thin vegetables for more precise
cuts and for jobs like slicing pepperoni.
DISASSEMBLY OF CONTINUOUS FEED CHUTE PARTS–
ALWAYS UNPLUG THE CORD BEFORE
DISASSEMBLING.
•Turnthecoverclockwiseuntilthesafetyinterlocktabonthe
cover is disengaged from the safety interlock switch on the
chute, and the tabs are clear of the tabs on the cover.
•Whenthechuteisinthe4o’clockposition,youcanremove
the cover by twisting the locking mechanism so that it is
horizontal. Next you may remove the cover of the chute.
•Removethelargefoodpusherfromthefeedtube.Remove
the small pusher from the large pusher by rotating it
counterclockwise.
•Toremoveanaccessorydiscfromthecontinuousfeed
chute, place ngers in each hole designated for handling the
Loading ...
Loading ...
Loading ...