Loading ...
Loading ...
Loading ...

6 7
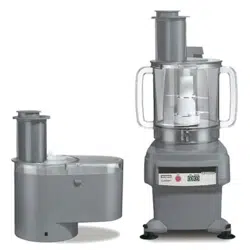
ASSEMBLY OF BATCH BOWL PARTS
We will use the terms bowl, work bowl and batch bowl
interchangeably throughout this instruction book. They mean the
same thing.
•Cleanandsanitizethemotorbase,andwash,rinse,and
sanitize the bowl, cover, food pusher, food pusher insert and
processing tools prior to initial use. USE CAUTION AS THE
BLADES ARE EXTREMELY SHARP.
•Placethebaseonacounterortablenearanoutlet.Position
it so you look at the front of the unit and can see the control
panel. Be certain that the cord is unplugged and that the
control panel is in the OFF position (the red marker will be
positioned over the OFF button).
Do not plug in the cord until the processor is completely
assembled.
•Pickupthetransparentworkbowl,holdingitinbothhands
with the handles pointed outward to the left and right.
•Placethebowlonthebase,ttingitscentraltubeoverthe
motor shaft on the base and placing the handles at about the
11 o’clock and 5 o’clock positions.
•Pressthebowldownsothelowerrimtsaroundthecircular
platform.
•PositiontheS-bladeoraccessorydisconthedriveshaft.
Be sure that the processing tool is completely seated before
assembling the batch bowl. Note: Do not put any food into
the bowl before placing the S-blade onto the shaft.
•Positionthecoveronthetopofthebatchbowlbymatching
up the two tabs with the two gaps in the rim. Once
positioned turn the cover counterclockwise (while holding the
bowl still) until the feed chute is centered with the left handle.
•Turnthebowlcounterclockwiseuntilthebatchbowlis
snapped into place.
NEVER ATTEMPT TO START THE FOOD
PROCESSOR WITHOUT THE COVER LOCKED
INTO POSITION.
Two pushers for feed tube
The large pusher is for processing larger vegetables. The smaller
pusher nests in the larger pusher and can be used for smaller
vegetables, guiding long thin vegetables for more precise cuts,
or for jobs like slicing pepperoni.
Large pusher
Insert the small food pusher into the large food pusher opening.
When it is fully inserted, rotate the small pusher counterclockwise
to lock it into place. Now you are ready to insert the large pusher
into the feed tube opening.
Small pusher
To use the small pusher, rotate it counterclockwise to disengage
the locking feature. Now you can lift the small pusher up and
out of the large pusher. When using the small pusher, the large
pusher becomes the feed tube for the small pusher.
DISASSEMBLY OF BATCH BOWL PARTS–
ALWAYS UNPLUG THE CORD BEFORE
DISASSEMBLING.
•Removethebatchbowlcoverbyturningclockwiseuntilthe
tabs have cleared the rear upright.
•Removethelargefoodpusherfromthefeedtube.Remove
the small pusher from the large pusher by turning it
counterclockwise.
Disassembly when removing the S-blade:
•Removetheworkbowlfromtheunitbyrotatingclockwiseto
disengage the tabs on the bottom of the bowl platform from
the work bowl. When the bowl handles are at about the 11
and 5 o’clock positions, you can gently lift the bowl straight
up and out.
It is recommended that you remove the bowl from the motor
base before you remove the S-blade. WHEN REMOVING THE
S-BLADE USE CAUTION BECAUSE THE BLADES ARE VERY
SH AR P.
Loading ...
Loading ...
Loading ...