Loading ...
Loading ...
Loading ...
12 www.petsafe.net
•ChainLinkFence(7A): Weave Boundary Wire through the links or use plastic quick ties.
•WoodenSplitRailorPrivacyFence(7A):Use staples to attach Boundary Wire. Avoid puncturing the
insulation of the Boundary Wire.
• Double Loop with an Existing Fence: Run the Boundary Wire on top of the fence and return it on the bottom
ofthefencetogetthe1to1.5m(3to5ft)separationneeded.
•Gate (Single Loop) (7B): Bury the Boundary Wire in the ground across the gate opening. Note: The signal is still
active across gateway when the gate is open, so your cat is still deterred from leaving the Pet Area.
•Gate (Double Loop) (7B): Bury both Boundary Wires across the gate opening while keeping them 1 to 1.5 m
(3to5ft)apart.
To Cross Hard Surfaces (driveways, sidewalks, etc.)
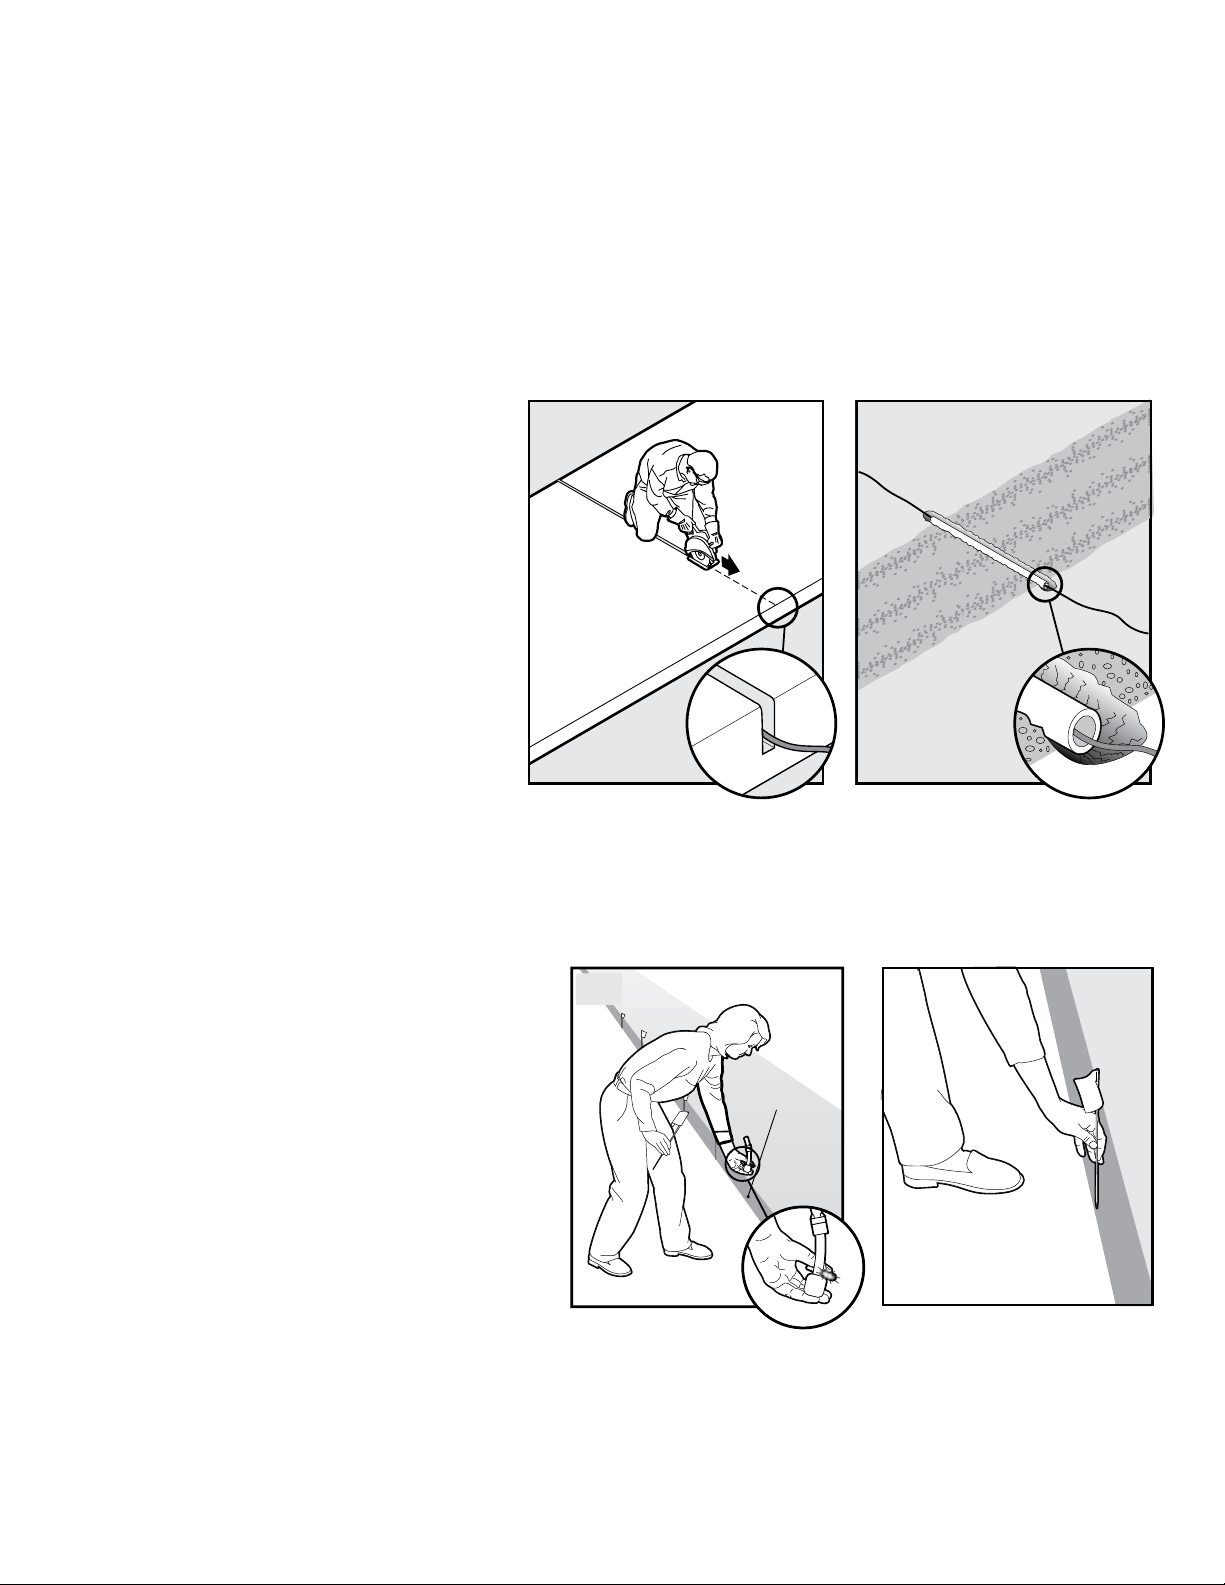
•Concrete Driveway or Sidewalk
(7C): Place the Boundary Wire in a
convenient expansion joint or create
a groove using a circular saw and
masonry blade. Place the Boundary
Wire in the groove and cover with an
appropriate waterproofing compound.
For best results, brush away dirt or
other debris before patching.
•Gravel or Dirt Driveway (7D): Place
theBoundaryWireinaPVCpipeor
water hose to protect the Boundary
Wire before burying.
7C
7D
__________________________________________________
Place the Boundary Flags
The Boundary Flags are visual reminders for your cat of where the Warning Zone is located.
1. Hold the Receiver Collar at your cat’s
neck height.
2. Walk towards the Warning Zone until the
ReceiverCollarbeeps(8A).
3.PlaceaBoundaryFlagintheground(8B).
4. Walk back into the Pet Area until the
beeping stops.
5. Repeat this process around the Warning
Zone until it is marked with Boundary
Flagsevery3m(10ft)orless.
Note: If you cannot hear the beep, see the Test
Light Instructions in Step 6.
Boundary
Wire
8A
8B
Step
8
Loading ...
Loading ...
Loading ...