Loading ...
Loading ...
Loading ...

English 13
You can find a QR Code
®
to call up an application video
in:
Illustration B
Trademarks
QR-Code
®
is a registered trademark of DENSO WAVE
INCORPORATED.
Environmental protection
The packing materials can be recycled. Please
dispose of packaging in accordance with the en-
vironmental regulations.
Electrical and electronic appliances contain valu-
able, recyclable materials and often components
such as batteries, rechargeable batteries or oil,
which - if handled or disposed of incorrectly - can
pose a potential threat to human health and the environ-
ment. However, these components are required for the
correct operation of the appliance. Appliances marked
by this symbol are not allowed to be disposed of togeth-
er with the household rubbish.
Notes on the content materials (REACH)
Current information on content materials can be found
at: www.kaercher.com/REACH
Accessories and spare parts
Only use original accessories and original spare parts.
They ensure that the appliance will run fault-free and
safely.
Information on accessories and spare parts can be
found at www.kaercher.com.
Scope of delivery
The scope of delivery for the appliance is shown on the
packaging. Check the contents for completeness when
unpacking. If any accessories are missing or in the
event of any shipping damage, please notify your deal-
er.
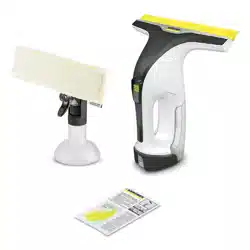
Description of the unit
For the illustrations, refer to the graphics page
Illustration A
1 Microfibre wipe cover
2 Place the wiping attachment
3 Adapter
4 Spray head
5 Detergent
6 *Charger (KÄRCHER Battery Power 4 V)
7 *Battery Pack (KÄRCHER Battery Power 4 V)
8 *Battery pack unlocking button
9 Type plate (visible when the waste water tank is re-
moved)
10 Waste water tank
11 Waste water tank lock (visible when the waste wa-
ter tank is removed)
12 Battery mount
13 Handle
14 ON/OFF button
15 Charge indicator
16 Separator
17 Suction nozzle
18 Clamping rail
19 Squeegee blade
20 Spray bottle
21 Spray lever
22 Spray nozzle
* additionally required and available separately
Mount device
1. Put the suction nozzle on the separator until it audi-
bly clicks into place.
Illustration C
Battery pack charging
1. Charge the battery pack (see operating instructions
and safety instructions for the battery pack and the
charger).
Inserting the battery pack
1. Press the battery pack into the battery mount on the
device until it you feel it latch into place.
Illustration D
Charge indicator
After the device has been switched on, the charging
state of the battery pack is displayed.
Illustration E
Removing the battery pack
Note
During longer work breaks, remove the battery pack
from the device and secure it against unauthorised use.
1. Press the ON / OFF button to switch off the device.
2. Press the battery pack unlocking button, and pull the
battery pack out of the battery mount.
Illustration F
Prepare spray bottle
1. Fit the spray head onto the wiping attachment.
Illustration G
2. Fill the detergent into the spray bottle.
Illustration H
3. Slowly fill clean water into the spray bottle up to the
MAX marking.
4. Close the spray bottle.
Illustration I
5. Attach the adapter to the wiping attachment on one
side and snap it into place on the other side.
Illustration J
6. Attach the microfibre wipe cover to the adapter.
Illustration K
7. For small areas, disengage and remove the adapter
on the wiping attachment.
Illustration L
8. Attach the microfibre wipe cover to the wiping at-
tachment and fold it back to the side.
Loading ...
Loading ...
Loading ...