Loading ...
Loading ...
Loading ...
51
31-1000600 Rev. 0
Installation Instructions - Single Integrated Installation
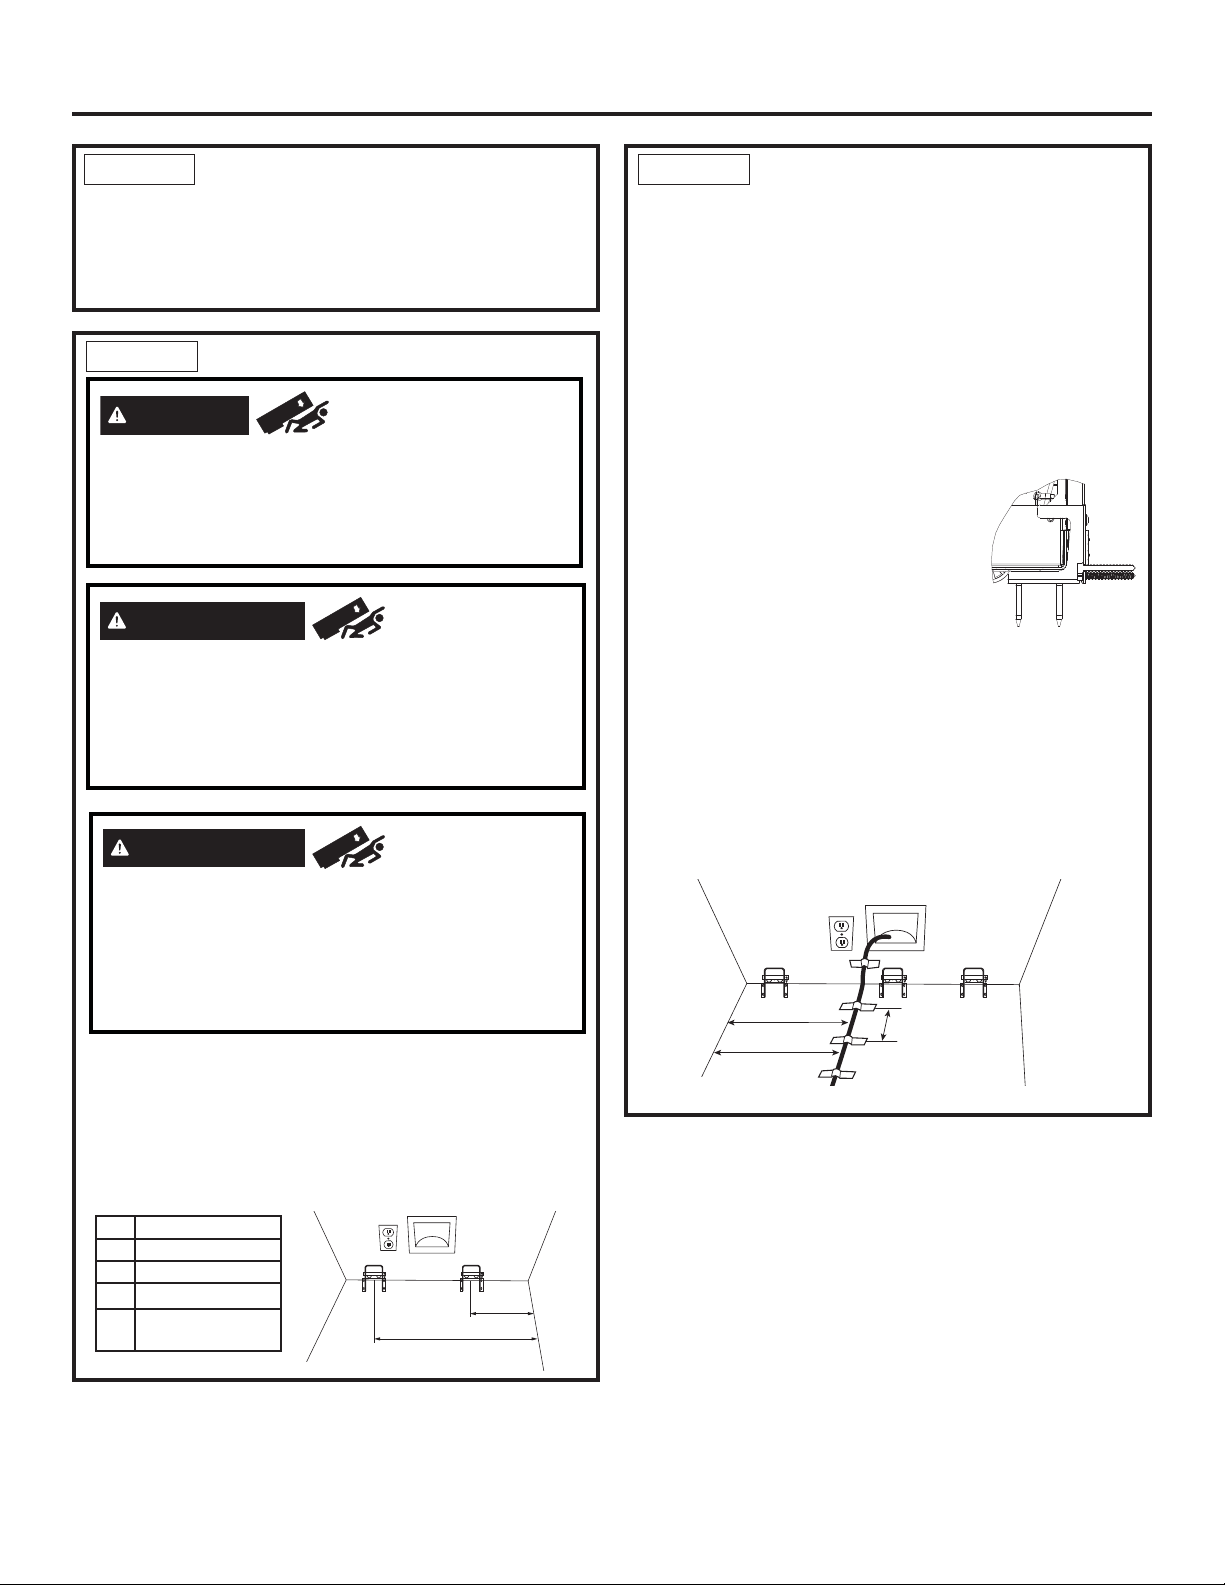
STEP 3 PREPARING UNIT FOR
INSTALLATION
Ŷ Place the unit in front of the installation opening in a
way that the unit is in front of the intended installed
location.
STEP 4
INSTALL ANTI-TIP BRACKET
Ŷ Measure and mark from the right side of the opening
per the table depending on the size of the unit you
are installing.
Ŷ Mount the anti-tip bracket centered about the mark
and flush to the floor as shown. Mark 3 holes for wall
mounting or 4 holes for floor mounting.
WOOD MOUNTING: Predrill with 3/16” drill bit, 2”
deep, then install lag bolts with a 7/16” driver.
CONCRETE MOUNTING: Predrill with a 5/32”
concrete bit, 2” deep, then install tapcon screws with
a 7/16” driver.
STEEL MOUNTING: Predrill with a
1/2” drill bit, insert toggle, then install
bolts with a 7/16” driver.
The bracket must be screwed to
either the FLOOR or REAR WALL.
Ŷ If the enclosure is deeper than 25
½”, the anti-tip bracket should be secured to the floor
25” from front of the enclosure.
Ŷ Tape the waterline to the wall and floor per
dimensions shown. Apply tape about every 5” toward
front of unit. This will keep the waterline away from
the anti-tip bracket(s) and prevent the unit from
rolling over the waterline during installation. Do not
tape near the cabinet front in order to keep tape
hidden under the unit.
STEP 4
INSTALL ANTI-TIP BRACKET
Ŷ Remove the anti-tip bracket from the hardware kit.
Ŷ Anti-tip bracket should be mounted against the back
wall or up to 25-1/2” (64.7 cm) maximum from front of
opening. Use floor mounting method if the bracket is
not against a wall (bracket hardware is provided for
mounting into wood, steel studs and concrete).
WARNING
Tip Over Hazard.
This appliance is top heavy, especially with any
doors open, and must be secured to prevent tipping
forward which could result in death or serious injury.
Read and follow the entire installation instructions
for securing the appliance with the anti-tip system.
36" 18" 24"
30"
36"
5"
10" (24", 30", 36" units)
5" (18" unit)
AVERTISSEMENT
Risque de
basculement.
Cet électroménager est lourd du haut.
Usez d’extrême prudence en le déplaçant afin de prévenir
un basculement susceptible d’occasionner des blessures
graves ou la mort.
Lisez et observez la totalité des
instructions d’installation pour connaître la façon de fixer
l’électroménager sur le dispositif antibasculement.
ADVERTENCIA
Riesgo de
Caídas Estos electrodomésticos son inestables, espe-
cialmente cuando una puerta se encuentre abierta, y
deben estar asegurados a fin de evitar caídas hacia
adelante que podrían resultar en la muerte o en lesiones
graves. Lea y siga las instrucciones de instalación en su
totalidad para asegurar el electrodoméstico con el sistema
anti volcaduras.
Unit From Enclosure
18" 8-7/8" (22.5cm)
24" 5-3/4" (1.46cm)
30" 5-3/4" (1.46cm)
36" 6'' (15.2 cm) &
29-3/4'' (75.6 cm)
2 req’d for 36"
Loading ...
Loading ...
Loading ...