Loading ...
Loading ...
Loading ...
33
31-1000600 Rev. 0
Installation Instructions - Dual Retro-Fit Installation
STEP 1 REMOVE PACKAGING
WARNING
Tip Over Hazard. This
appliance is top heavy. Use extreme caution with
moving to prevent tipping over which could result in
death or serious injury.
Ŷ Remove outer carton and external packing from units.
Ŷ Inspect for damage.
Ŷ If installation will require the door swing to be
reversed, follow the instructions in Reversing the
Door Swing section to reverse the door swing
BEFORE the unit is removed from the shipping skid.
Ŷ Ensure the flooring that the units are set is clean/
free of debris that could be collected on to, or
pinched in front of the wheels and damaging the
floor. Additionally, it is recommended that the floor
be protected with a plastic covering through out the
installation process.
STEP 1 REMOVE PACKAGING
Ŷ Remove hardware kit from top drawer.
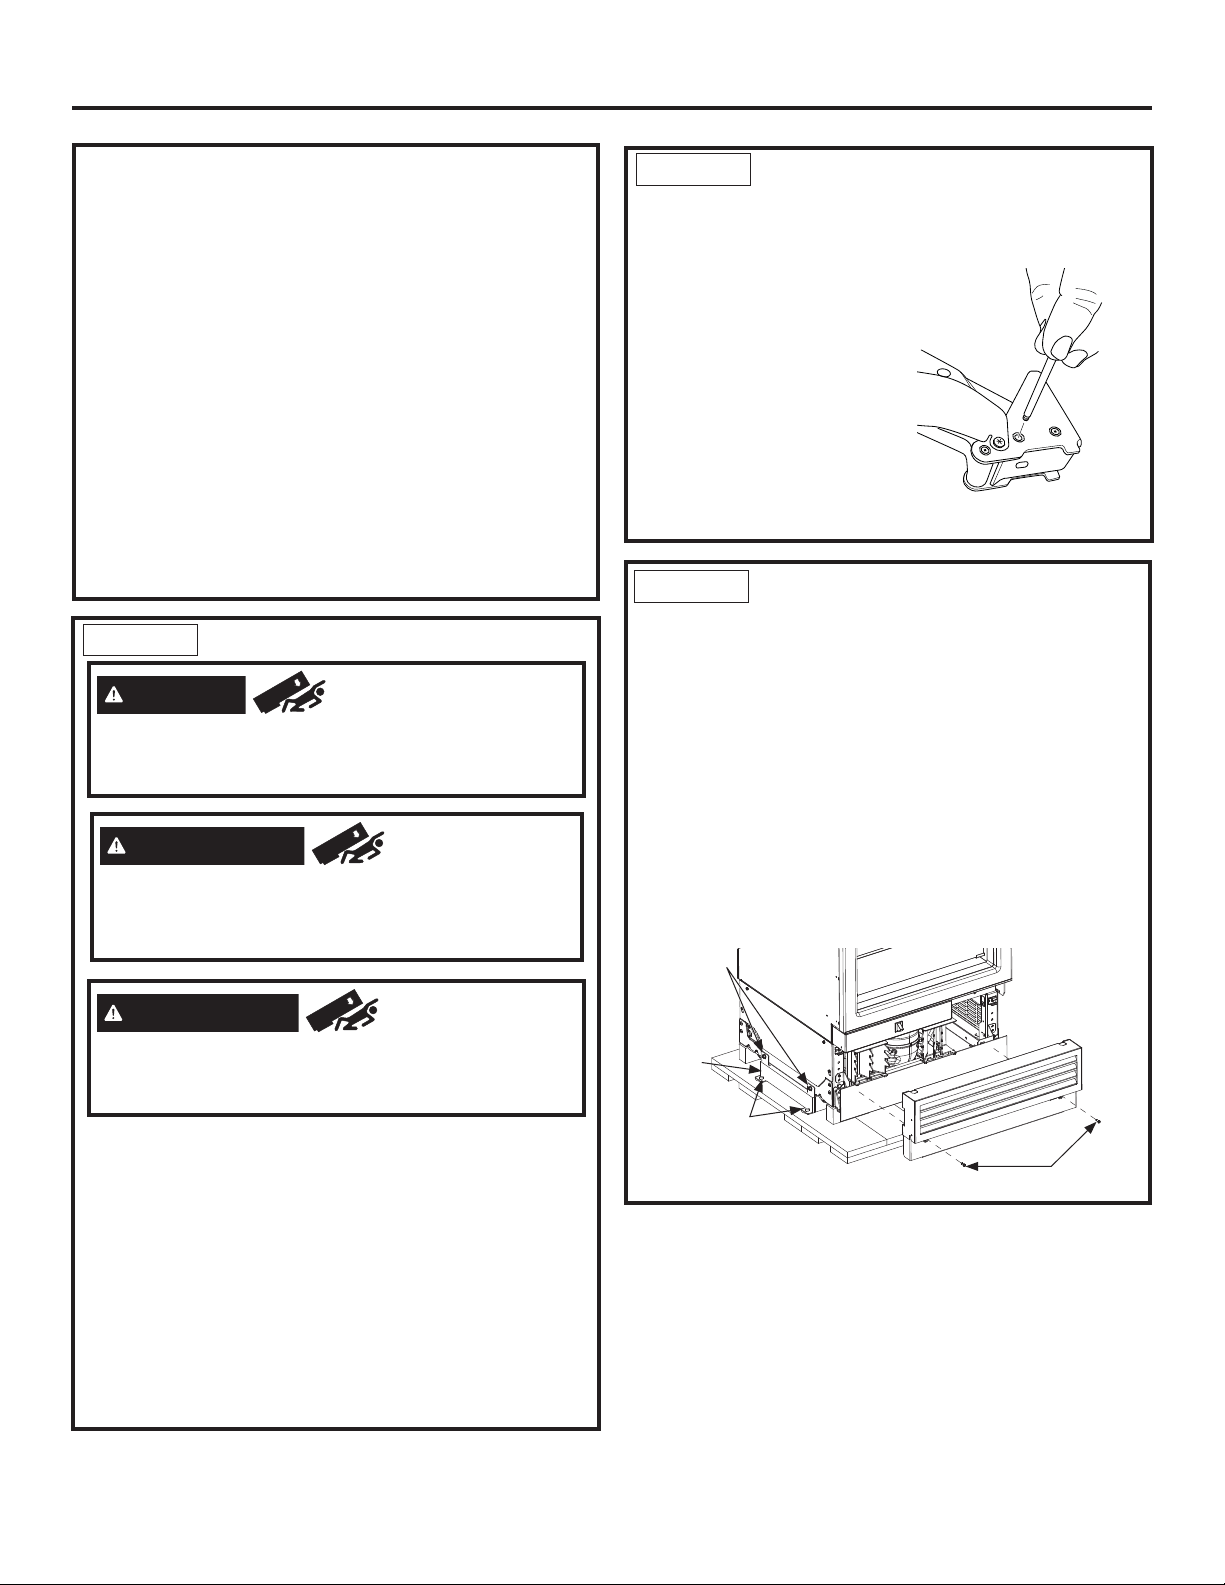
Ŷ If installation requires a 90° door opening, the hinge
limiter pin must be installed in the top hinge BEFORE
the unit is removed from the
shipping skid. Pin is located
in the hardware kit.
- Open the door
approximately 45°, but no
wider than 90°, to expose
the hole in the back hinge
bracket and install the
limiting pin. Pin must be
fully seated in the bracket
or the door will not close
properly.
STEP 1 REMOVE PACKAGING
(Cont.)
Ŷ Remove front access cover from unit by removing
two 1/4” Hex Screws (some models have access
cover in a box on the left side of the cabinet).
Place the cover and screws to the side for future
installation.
Ŷ Remove three 3/8” drive screws and two 7/16” drive
screws from each side of the unit to release it from
the shipping skid. Tip the unit from the side enough
to remove the shipping material from under the unit,
but above the shipping skid (both sides)
Ŷ CAREFULLY roll the unit off the back side of the
shipping skid.
Ŷ Handle from side only with a hand truck.
Top
hinge
Shipping
Bracket
7/16” Drive
Screws
1/4” Hex Screws
3/8” Drive
Screws
KIT ZKUN PARTS SUPPLIED:
Adhesive Heater
Transformer
Front Mullion
Trim Bracket
Top Unification Bracket
Bottom Front Unification Bracket
3 1/4” Hex Head 8-18 5/8” Long Screws
5 1/4” Hex Head 8-32 5/8” Long Screws
5 3/8” Hex Head 1/4-20 1/2” Long Screws
4 wire clips
Tools and Materials Required:
1/4” and 3/8” driver / sockets
#2 Phillips screwdriver
Rubbing alcohol
AVERTISSEMENT
Risque de
basculement.
Cet électroménager est lourd du haut.
Usez d’extrême prudence en le déplaçant afin de prévenir
un basculement susceptible d’occasionner des blessures
graves ou la mort.
ADVERTENCIA
Riesgo de Caída.
Este electrodoméstico es inestable. Tenga extremo
cuidado al moverlo, a fin de evitar caídas hacia adelante
que podrían resultar en la muerte o lesiones graves.
Loading ...
Loading ...
Loading ...