Loading ...
Loading ...
Loading ...

16
ADJUSTMENTS GUIDE
ADJUSTING THE BALANCE
In order to achieve a smooth and comfortable ride, you must
ensure that the stability of the bike is secured. If you notice that
the bike is unbalanced during use, you should adjust the foot
levelers located beneath the Front & Rear Stabilizers (No. 2 &
12). To do so, use Spanner (No. 84) to loosen Hex Nut (No. 3)
by turning it clockwise (direction A). With the Hex Nut (No. 3)
loosened, rotate Adjusting Foot Pad (No. 5) until it sits level
with the surface that the bike is on. When you have finished
adjusting the Adjusting Foot Pad (No. 5), use Spanner (No.
84) to re-tighten the Hex Nut (No. 3) by turning it counter-
clockwise (direction B). If required, repeat this process to adjust
the remaining feet.
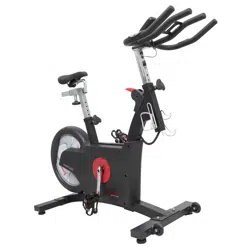
ADJUSTING THE RESISTANCE
Adjust the resistance of the bike using the Brake Handle (No.
71). Increase the level of resistance by pressing the Brake
Handle (No. 71) downward, decrease the level of resistance by
pressing the Brake Handle (No. 71) upward. Push down on the
Brake Handle (No. 71) for emergency brake.
ADJUSTING THE SEAT
An appropriate seat height helps to ensure your exercise
efficiency and reduce the risk of injury. Adjusting the seat
forward or backward can help you work out different body
muscle groups.
With one pedal in the upward position, place your foot in the toe
clip and get on the bike. If your leg is bent too much, you
should move the seat up. If your foot cannot touch the pedal or
your leg is too straight, you should move the seat down.
Loosen and pull out the T Shape Knob (No. 14) to raise or
lower Seat Post (No. 18) to the desired position. Make sure T
Shape Knob (No. 14) secures into the desired hole. Do not
raise Seat Post (No. 18) past the STOP mark on the post.
Loosen and pull out T Shape Knob (No. 14) to move the Seat
(No. 28) forward or backward to the desired position. Once the
position is located, firmly secure T Shape Knob (No. 14) by
turning clockwise.
12
2
28
Loading ...
Loading ...
Loading ...