Loading ...
Loading ...
Loading ...
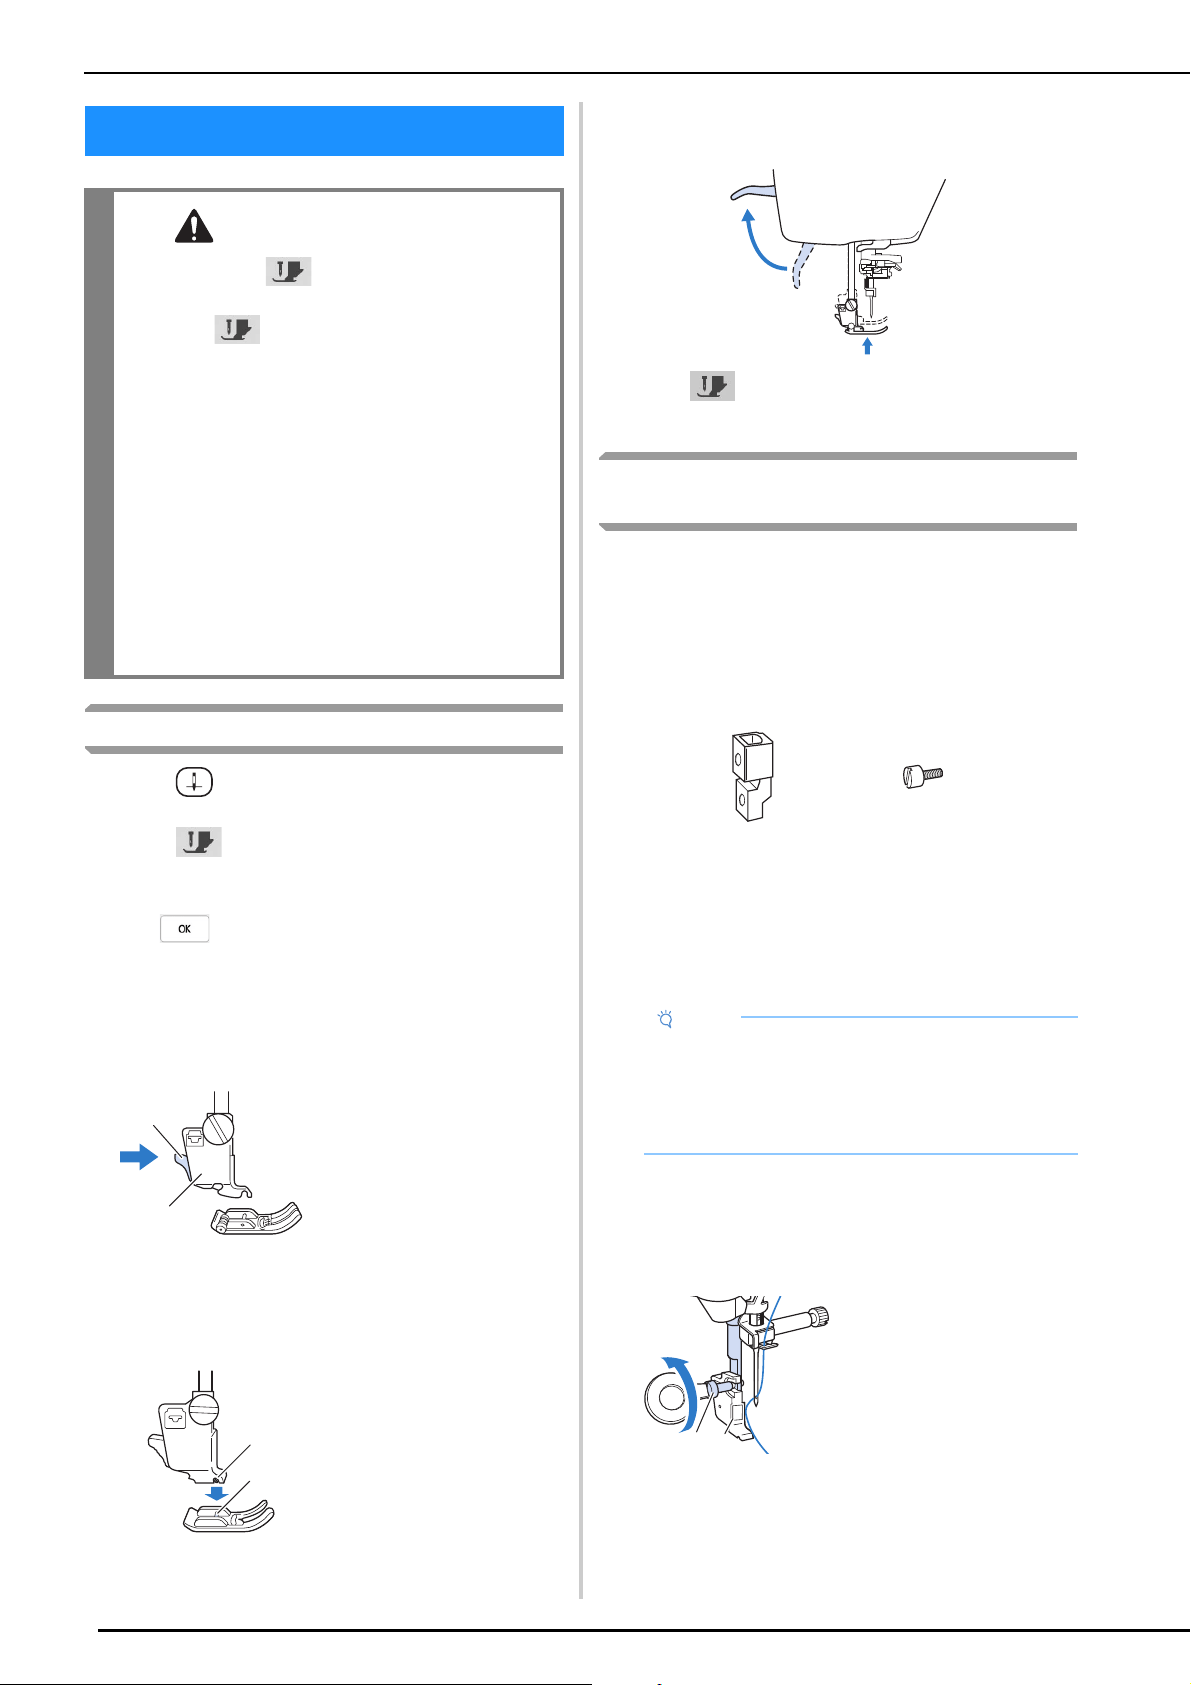
CHANGING THE PRESSER FOOT
50
Replacing the Presser Foot
a
Press (Needle position button) to raise the needle.
b
Press to lock all keys and buttons.
* If the message [OK to automatically lower the
presser foot?] appears on the LCD screen, press
to continue.
c
Raise the presser foot lever.
d
Press the black button on the presser foot holder and
remove the presser foot.
e
Place the new presser foot under the holder, aligning
the foot pin with the notch in the holder. Lower the
presser foot lever so that the presser foot pin snaps into
the notch in the holder.
f
Raise the presser foot lever to check that the presser
foot is securely attached.
g
Press to unlock all keys and buttons.
Attaching the Presser Foot with the Included
Adapter
You can attach the presser feet using the included
adapter and small screw.
For example, the walking foot, the free motion echo
quilting foot “E” and so on.
Following procedure shows how to attach the walking
foot as an example.
■ Attaching the Walking Foot (Sold Separately)
The walking foot holds the fabric between the presser foot
and the feed dogs to feed the fabric. This enables you to
have better fabric control when sewing difficult fabrics
(such as quilted fabrics or velvet) or fabrics that slip (such
as vinyl, leather, or synthetic leather).
a
Follow the steps in “Replacing the Presser Foot” on
page 50.
b
Loosen the screw of the presser foot holder to remove
the presser foot holder.
CHANGING THE PRESSER FOOT
CAUTION
• Always press on the screen to lock all
keys and buttons before changing the presser
foot. If is not pressed and the “Start/
Stop” button or another button is pressed, the
machine will start and may cause injury.
• Always use the correct presser foot for the
selected stitch pattern. If the wrong presser
foot is used, the needle may strike the presser
foot and bend or break, and may cause injury.
• Only use presser feet made for this machine.
Using other presser feet may lead to accident
or injury.
• Make sure that the presser foot is installed in
the correct direction, otherwise the needle
may strike the presser foot, breaking the
needle and causing injuries.
1 Black button
2 Presser foot holder
1 Notch
2 Pin
a
b
a
b
Note
• When sewing with the walking foot, sew at medium
to low speeds.
• The walking foot can only be used with straight or
zigzag stitch patterns. Do not sew reverse stitches
with the walking foot.
1 Presser foot holder
screw
2 Presser foot holder
a
b
Loading ...
Loading ...
Loading ...