Loading ...
Loading ...
Loading ...
ASSEMBLY
10 – English
Assembly
Assembling the blades
• Husqvarna blades are especially manufactured and
approved for freehand cutting with the K 4000 Cut-
n-Break. The blades have integrated belt pulley
halves and are to be changed in pairs.
• Loosen the nuts and clamping bolt which release the
bar. This will position the drive belt in a more
favourable position with regard to assembling the
new blades. The drive belt is not clamped so
easily.
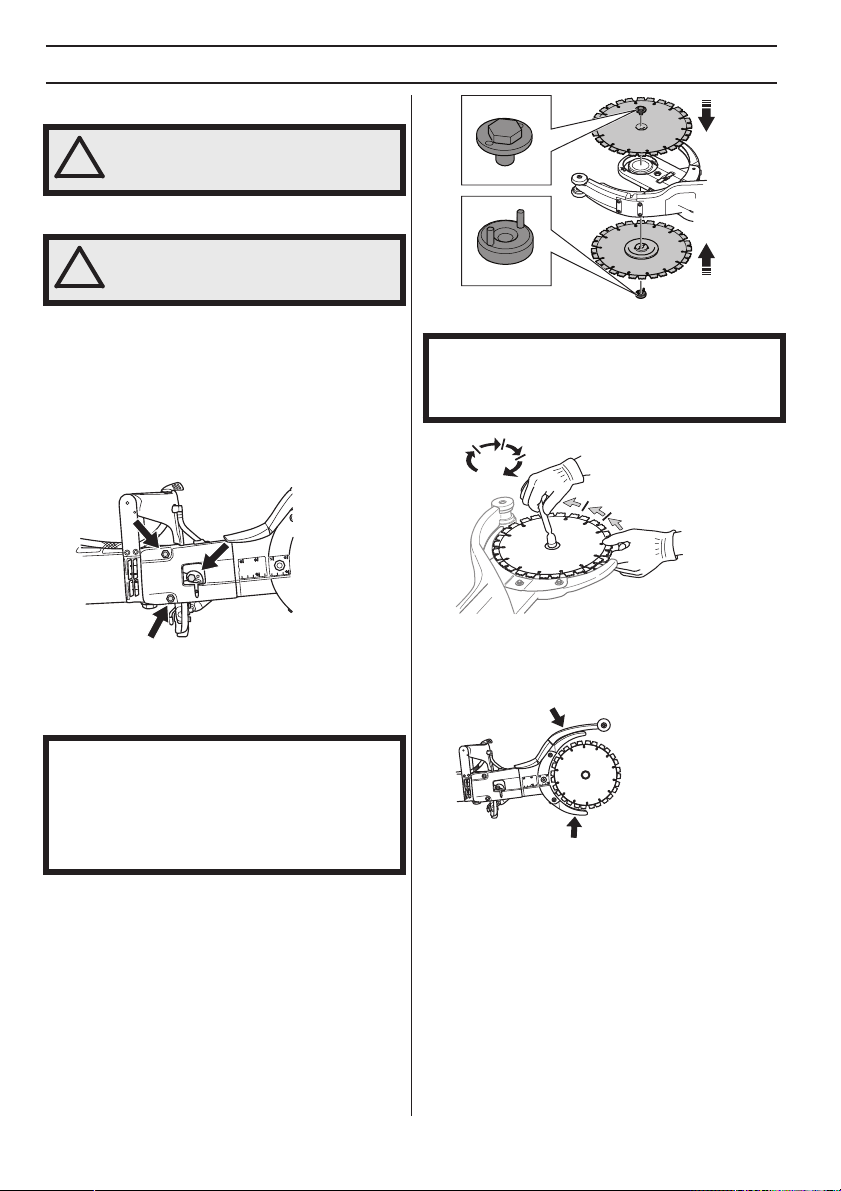
• Dismantle the old blades by loosening the centre nut.
Check the drive belt for wear when the blades are
dismantled. When changing the drive belt see the
instructions under the heading ”Replacing the drive
belt”.
• Place the blades on each side of the bar. Insert the
steering pins of the nut through the blades and the
bolt washer.
• Rotate the blades by hand while tightening the
blade bolt. This is especially important because it
assures the belt is not squeezed between the pulley
halves, which are incorporated into the blades.
Alternate between tightening the blade bolt and
rotating the blades until the blades are fully
tightened. Tighteningtorque for the bolt holding the
blade is: 130 in.lb (15 Nm).
Protection for the blades
• The guards should always be fitted on the machine.
Check that the guards are properly secured and work
before starting to cut.
!
WARNING! Always pull out the plug from
the outlet socket before cleaning,
maintenance or assembly.
NOTICE! It is very important that the blades rotate when
the nut is tightened. This is to ensure that the belt is not
clamped between the integrated drive belt halves on the
blades when the blades/drive belt are pulled together
with the nut. Ideally this is done alternately, i.e. tighten a
little, rotate a little and repeat until the blades are
secured.
NOTICE! Do not forget to tighten the belt and check the
belt adjustment before cutting. See the instructions
under the heading ”Inspecting and adjusting the drive
belt”.
!
CAUTION! You must replace the screw
kit when you replace the blade.
Loading ...
Loading ...
Loading ...