Loading ...
Loading ...
Loading ...
8. Install the nut (G). Hold the shaft of the wrench near
the blade guard as much as possible. To tighten
the nut, you must turn the wrench counterclockwise
which is the opposite direction of rotation. Tighten
the nut to a torque of 35-50 Nm (3.5-5 kpm).
To attach and remove the locknut
WARNING: Stop the engine, use
protective gloves and be careful around the
sharp edges of the cutting attachment.
A locknut is used to attach some types of cutting
attachments. The locknut has a left thread.
• To attach, tighten the lock nut in the opposite
direction to the direction of rotation of the cutting
attachment.
• To remove the locking nut, undo the lock nut in the
same direction as the cutting attachment rotates.
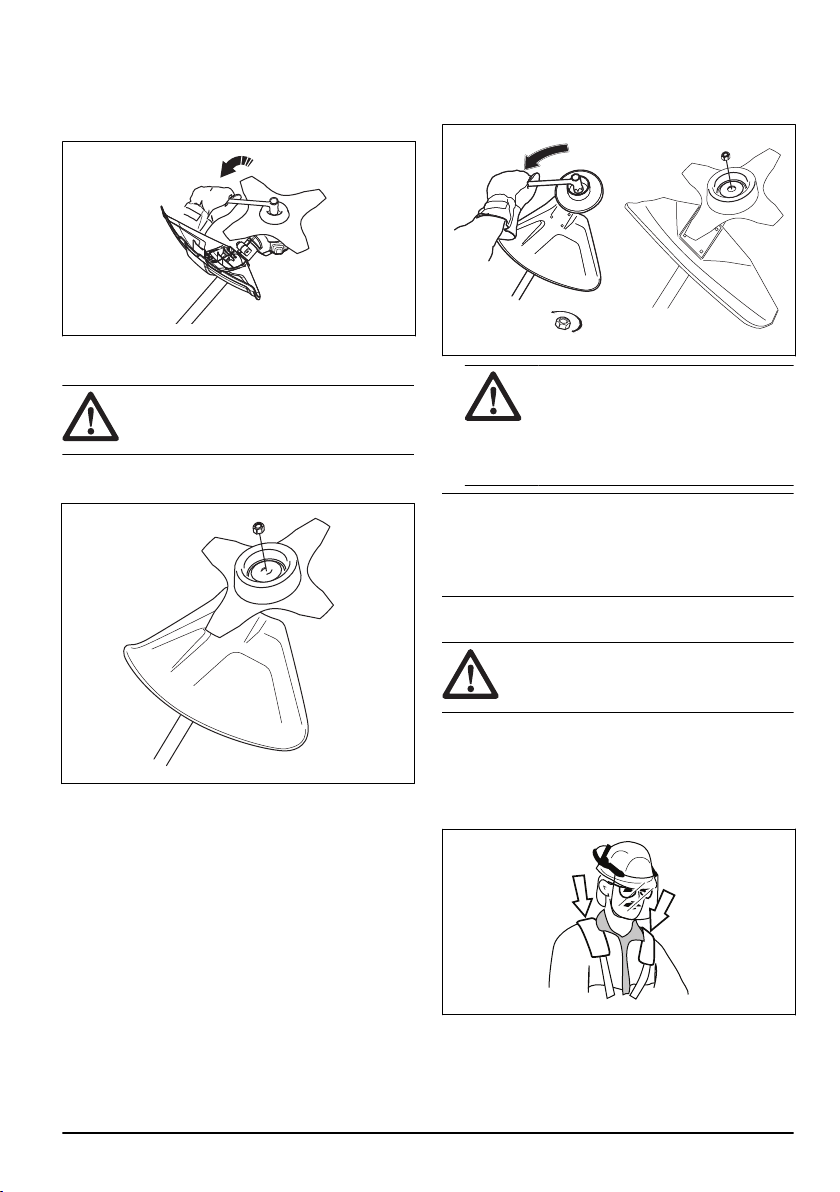
• To loose and tighten the locknut, use a socket
spanner with a long shaft. The arrow in the picture
shows the area where you should operate the socket
spanner.
WARNING: When you loose and
tighten the locknut there is a risk of
injury from the teeth of the saw blade.
You should therefore always ensure that
your hand is shielded by the blade guard
when you do this.
Note: Make sure that you can not turn the locknut by
hand. Replace the nut if the nylon lining does not have
a resistance of a minimum of 1.5 Nm. The nut should
be replaced after it has been put on approximately 10
times.
To adjust the harness
WARNING:
The product must always
be correctly attached to the harness. Do not
use a defective harness.
1. Put on the harness.
2. Connect the product to the harness.
3. Adjust the harness for the best work position.
4. Adjust the side straps to make the product weigh
equally on your shoulders.
5. Adjust the harness until the cutting attachment is
parallel to the ground.
757 - 007 - 09.11.2022
21
Loading ...
Loading ...
Loading ...