Loading ...
Loading ...
Loading ...
4
ACTIVATING THE BATTERY
Before powering on your sight for the rst time, you will need to open the battery
compartment and remove the protective sticker or plastic disc from the battery.
REPLACING THE BATTERY
Should your reticle grow dim or not light at all, replace the battery. To install a
new battery, unscrew the round battery compartment cover, using a coin. Insert
a new CR2032 lithium battery, noting the position of the positive and negative
sides (see below). Replace battery cover.
CAUTION: When replacing the battery cover, be sure that the O-ring is present
and not damaged. Failure to do so could result in water leakage into the battery
compartment.
Verify that red dot is present by switching the power on and increasing the brightness if necessary (see below).
SWITCHING POWER ON/OFF
To turn the sight’s power on and off, activate the illuminated dot by turning the rheostat knob to any numbered position.
Toswitch off the sight, select “0” (illumination level=zero).
ADJUSTING DOT BRIGHTNESS
To adjust the brightness level of the dot reticle, turn the rheostat knob clockwise to increase brightness, or
counterclockwise to decrease brightness. With the “1” lined up with the index mark, the dot will be the dimmest, and with a
setting of “11”, the dot is at the brightest illumination level.
SIGHTING IN/ZEROING YOUR PROPOINT™ SIGHT
WARNING! : SINCE THIS PROCEDURE INVOLVES LIVE FIRE, IT SHOULD BE DONE AT AN APPROVED RANGE
OR OTHER SAFE AREA. CHECK BORE FOR OBSTRUCTIONS. AN OBSTRUCTED BORE MAY CAUSE INJURY
TO YOU AND OTHERS NEAR BY. EYE & EAR PROTECTION IS RECOMMENDED.
Initial sighting in of the ProPoint can be done using a bore sighter per the manufacturer’s directions, or by visual bore
sighting through a ri e’s barrel with the bolt removed as follows, referencing a target at a 25 to 50 yard distance:
Positive (+) side facing up,
negative (-) facing down
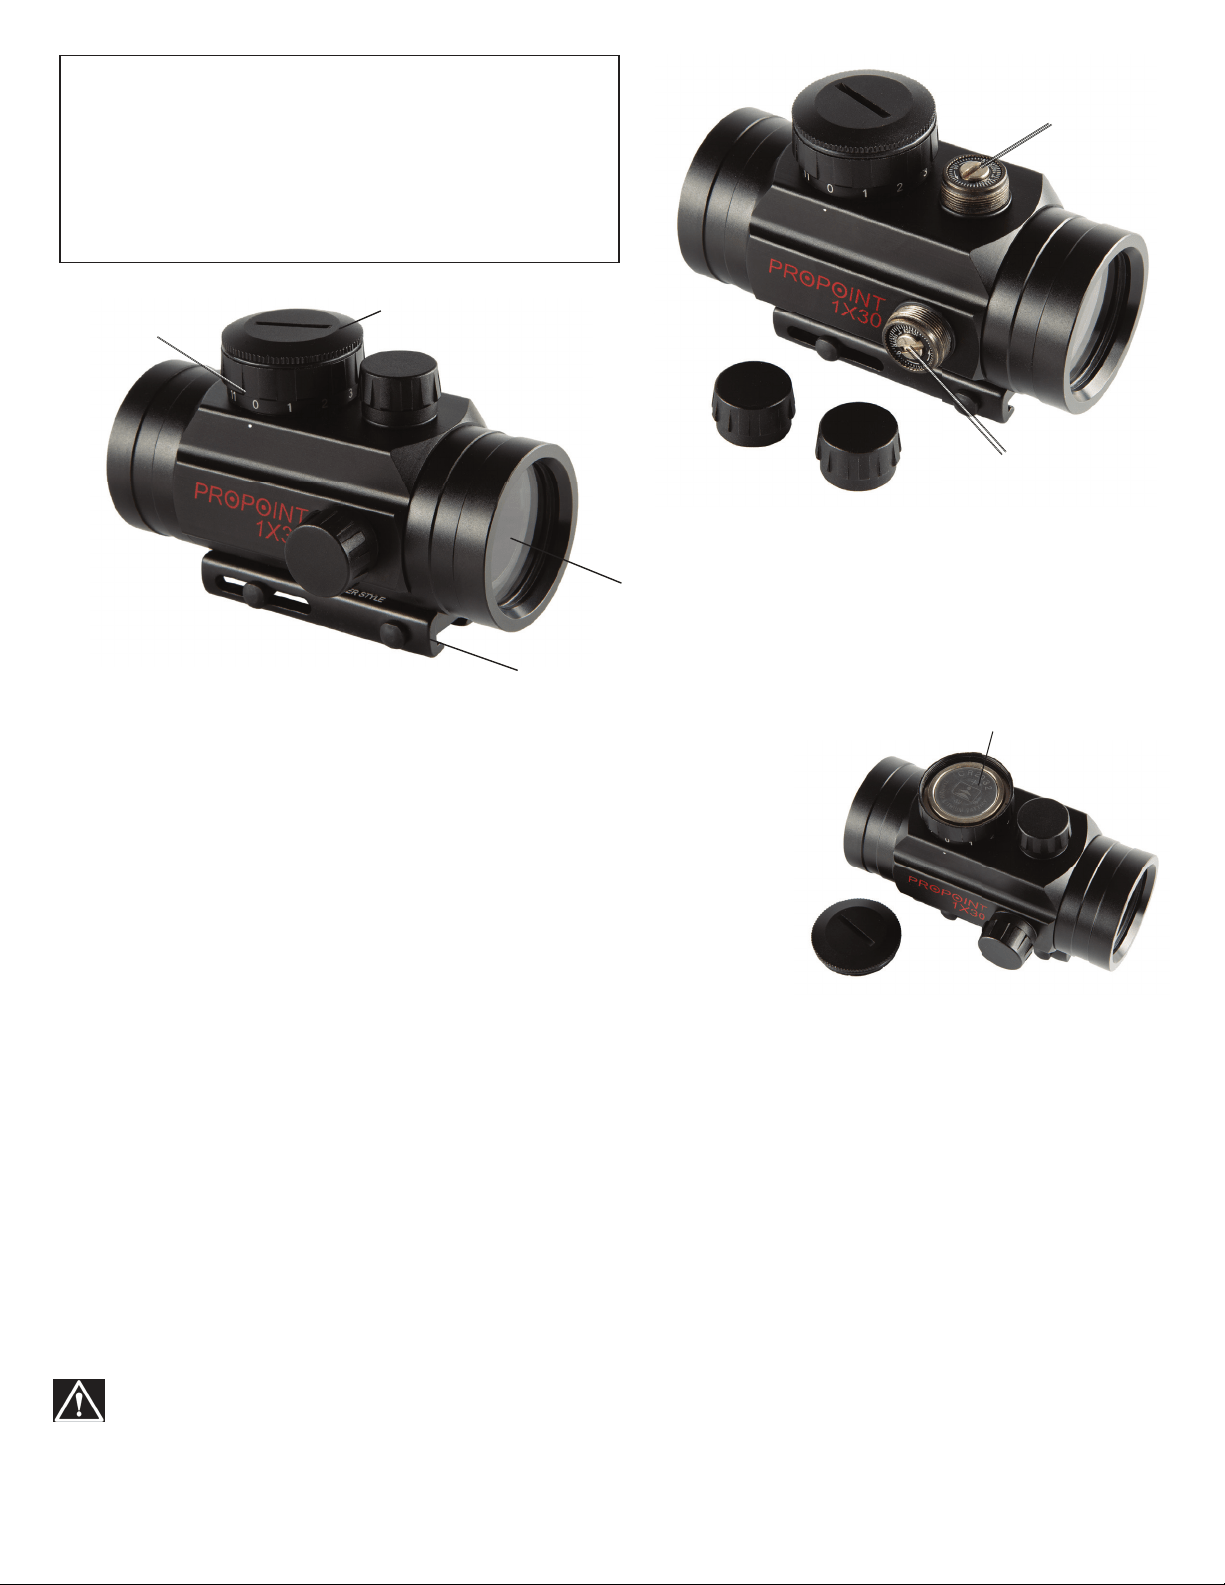
PARTS GUIDE
1. Battery Compartment
2. Mount
3. Lens
4. Elevation Adjustment (remove cap to access)
5. Windage Adjustment (remove cap to access)
6. Brightness Control (rheostat dial)
1
2
3
6
4
5
Loading ...
Loading ...
Loading ...