Loading ...
Loading ...
3
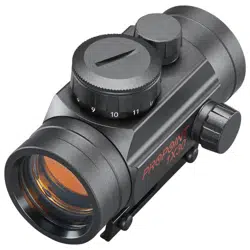
Thank you for purchasing your new Tasco® TRD130T ProPoint™ Red Dot Sight (illuminated optical sight).
This manual will help you optimize your viewing experience by explaining how to utilize the sight’s features and how to care
for it. Read the instructions carefully before using your sight.
WARNING! : DO NOT LOOK AT THE SUN THROUGH THE OPTICS, AS PERMANENT EYE DAMAGE OR EVEN
BLINDNESS MAY RESULT.
ABOUT THE TASCO® PROPOINT™ RED DOT SIGHTS
Tasco ProPoint red dot sights are state-of-the-art sights, engineered especially for competitive shooting and target shooting
or plinking with handguns, ries, and shotguns, as well as hunting at shorter ranges.
Your sight’s illuminated reticle has been pre-focused so the aiming point always appears in focus on the target. Bycomparison,
open sights force you to focus on the rear sight, front sight and target at the same time and bring the target into focus.
ProPoint Red Dot Sights can be easily used with both eyes open (eye relief is unlimited), increasing the shooter’s awareness
of the surrounding environment and providing faster target acquisition due to the parallax free design, as the dot follows the
movement of the user’s eye while remaining xed on the target. Engineered for greater speed and accuracy, these sights
allow you to focus on the target rather than a reticle, thus increasing accuracy.
The TRD130T is a dynamic red dot in a compact 3-inch package. It features a 5 MOA red dot reticle, with 11 brightness
level settings. This versatile sight is also very rugged, with waterproof, shockproof and fogproof construction. Battery life is
approx. 1000 hours at a brightness setting of “6”.
Note: battery life as listed will vary depending on the brightness settings used (stated life estimate is based on a typical,
medium brightness setting), freshness and quality of the battery, ambient temperature, and other factors.
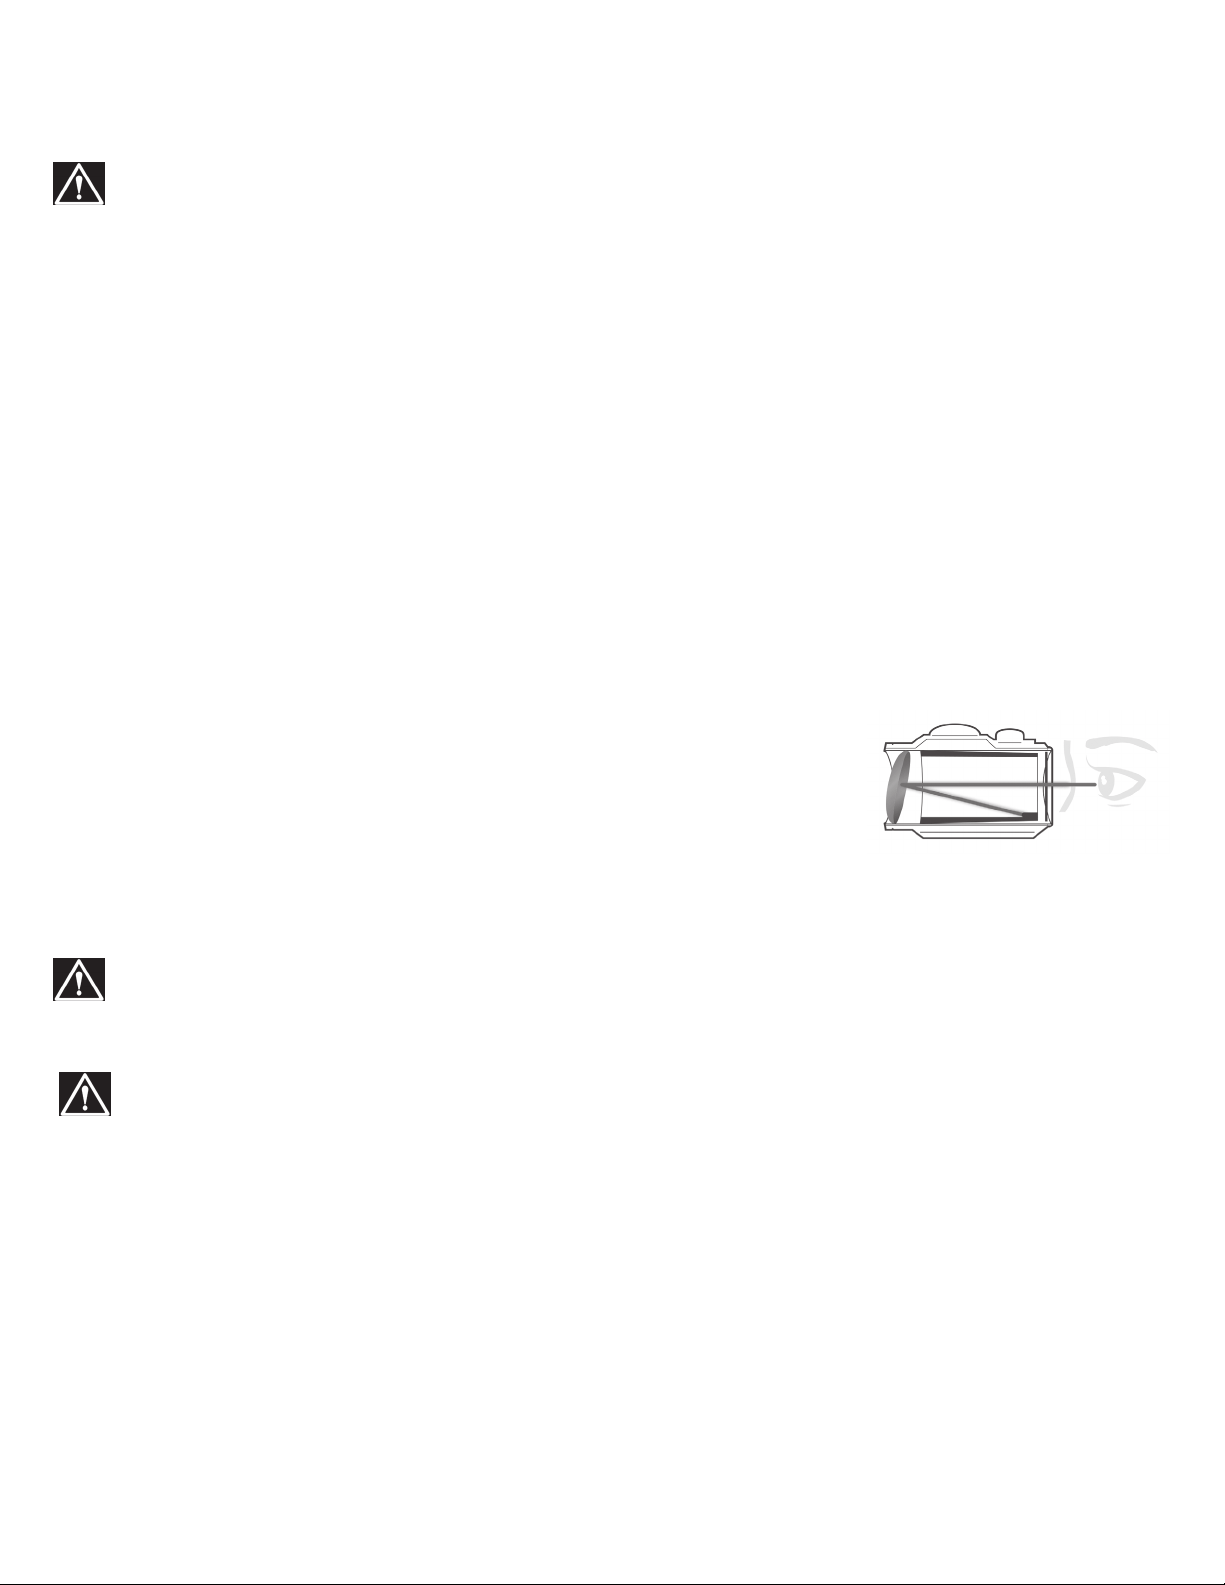
About Red Dot Lens Positioning
All red dot sights have an objective lens at the front of the unit that is spherical in shape.
However, unlike a conventional riescope with all lenses mounted perpendicular (at a 90
degree angle) to the axis of the tube, the objective lens in a red dot sight is positioned off
axis and appears to be tilted when looking at the sight (right). This angle of the front lens
allows the light generated by the battery powered LED light source inside the unit to be
reected back into the sight. The reected light becomes the “dot” or aiming reference
that the shooter sees when a red dot sight is switched on. This engineered “bending” of
light is what makes today’s red-dot sights so popular and easy to use.
MOUNTING YOUR PROPOINT™ SIGHT
WARNING! : BEFORE MOUNTING YOUR SIGHT, REPLACING ITS BATTERY, OR REMOVING OR PERFORMING
MAINTENANCE ON THE SIGHT, BE SURE ACTION IS OPEN, CLIP OR MAGAZINE IS REMOVED AND A ROUND
IS NOT IN THE CHAMBER. DO NOT ATTEMPT ANY WORK UNTIL THE GUN HAS BEEN CLEARED AND
DETERMINED TO BE SAFE.
WARNING: IF THE SIGHT IS NOT MOUNTED FAR ENOUGH FORWARD, ITS REARWARD MOTION MAY
INJURE THE SHOOTER WHEN THE RIFLE RECOILS.
Your new scope, even with its technologically advanced design and features, will not perform at its best if not properly
mounted. One of the most important contributing factors to the accuracy of your scope and rifle is the quality of the mount
and the care with which mounting is done. The Weaver style mount provided with the TRD130T ts Weaver or Picatinny rails,
attaching your scope solidly to the rifle to provide dependability and consistent accuracy.
The base or bases you use with your sight should be manufactured specically for your pistol, rie or shotgun and should
create a uniform horizontal and vertical mounting platform. Be sure they are properly installed and securely fastened
according to the manufacturer’s instructions for your safety. There is no set eye relief for your ProPoint sight; therefore, you
should provide at least three inches of clearance between the viewing lens and your eye when in the shooting position.
Set the mount onto the base or bases so that it aligns with the crosscut grooves. Work the mount into the base until the
crossbolt seats into the groove. Securely tighten the locking nut or mounting plate with a coin or screwdriver.
CAUTION: Do not overtighten.
Remember, not all scopes are compatible with all mounts on all rifles. If there is any doubt in your mind, you should seek
the advice of your local retailer or gunsmith.
Loading ...
Loading ...
Loading ...