Loading ...
Loading ...
Loading ...
10
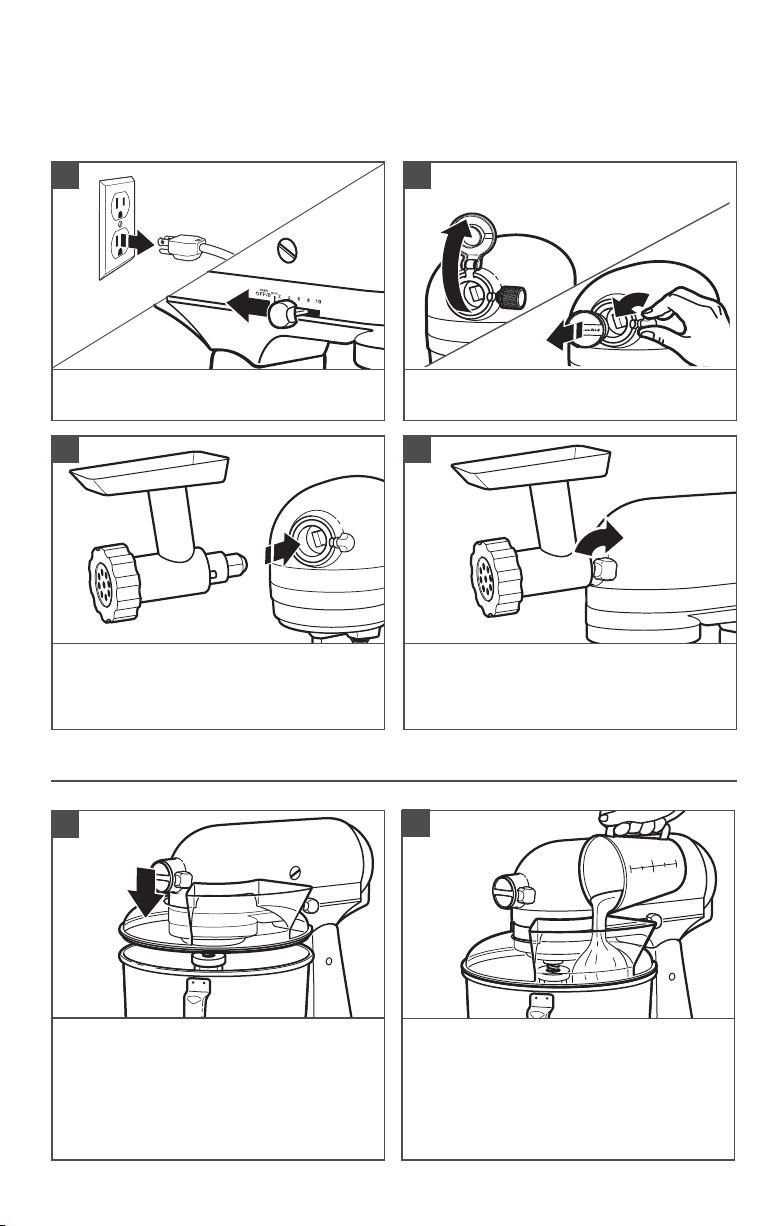
Insert attachment into attachment hub,
making certain that attachment power
shaft fits into the square attachment hub
socket.
3
Tighten the attachment knob by turning it
clockwise until the attachment is secured
to the Stand Mixer.
4
OPTIONAL ATTACHMENTS
USING THE POURING SHIELD*
For best results, rotate the Pouring
Shield* so the motor Head Covers the
U-shaped gap in the shield. The pouring
chute will be just to the right of the
Attachment Hub as you face the mixer
Pour ingredients into the bowl through
the pouring chute.
*Included with select models only. Also available as an optional accessory.
1
2
Turn the Stand Mixer to “0” (Off) and
then unplug the stand mixer.
1
KitchenAid offers a wide range of optional attachments such as the Spiralizer, Pasta
Cutters, or Food Grinder that may be attached to the Stand Mixer attachment power hub
as shown below.
Remove the attachment hub cover.
2
W11371189A.indd 10 6/6/2019 6:34:05 PM
Loading ...
Loading ...
Loading ...