Loading ...
Loading ...
Loading ...
E23
CLEANING AND CARE
AUTOMATIC SELF-CLEANING
WARNING
BURN HAZARD
• Do not touch the oven during the Self-
Clean cycle.
• Keep children away from oven during
Self-Clean cycle.
• Failure to take precautions can result in
burns.
This oven features a self-cleaning function that eliminates the
need to manually scrub the oven interior. During a Self-Clean
cycle, the oven uses very high temperatures, burning soil to a
powdery ash.
IMPORTANT: The health of some birds is extremely sensitive
to the fumes given off during the Self-Clean cycle. Exposure
to the fumes may result in death to certain birds. Always move
birds to another closed and well-ventilated room.
• Keep the kitchen well ventilated during the Self-Clean cycle
to help get rid of heat, odors and smoke.
• It is common to see smoke and/or an occasional ame-up
during the Self-Clean cycle, depending on the content and
amount of soil remaining in the oven. If a ame persists, turn
off the oven and allow it to cool before opening the door to
wipe up the excessive food soil.
• Do not block the oven vent(s) during the Self-Clean cycle.
Air must be able to move freely.
• Do not clean, rub, damage or move the oven door gasket.
• The door latch is automatically activated after selecting the
Self-Clean cycle. This ensures the oven door cannot be opened
while the oven interior is at clean temperatures.
• Suggested clean times are 2 hours for light soil and between
3.0 hours and 3.5 hours for average to heavy soil.
• The Self-Clean cycle stops automatically at the end of the
set cleaning time.
• When the oven heat drops to a safe temperature, the automatic
door lock will release and the door can be opened.
• The oven light does not operate during a Self-Clean cycle.
• Remove racks before running a Self-Clean cycle. Racks left
in during a Self-Clean cycle will lose their shiny nish and
permanently change to a metallic gray.
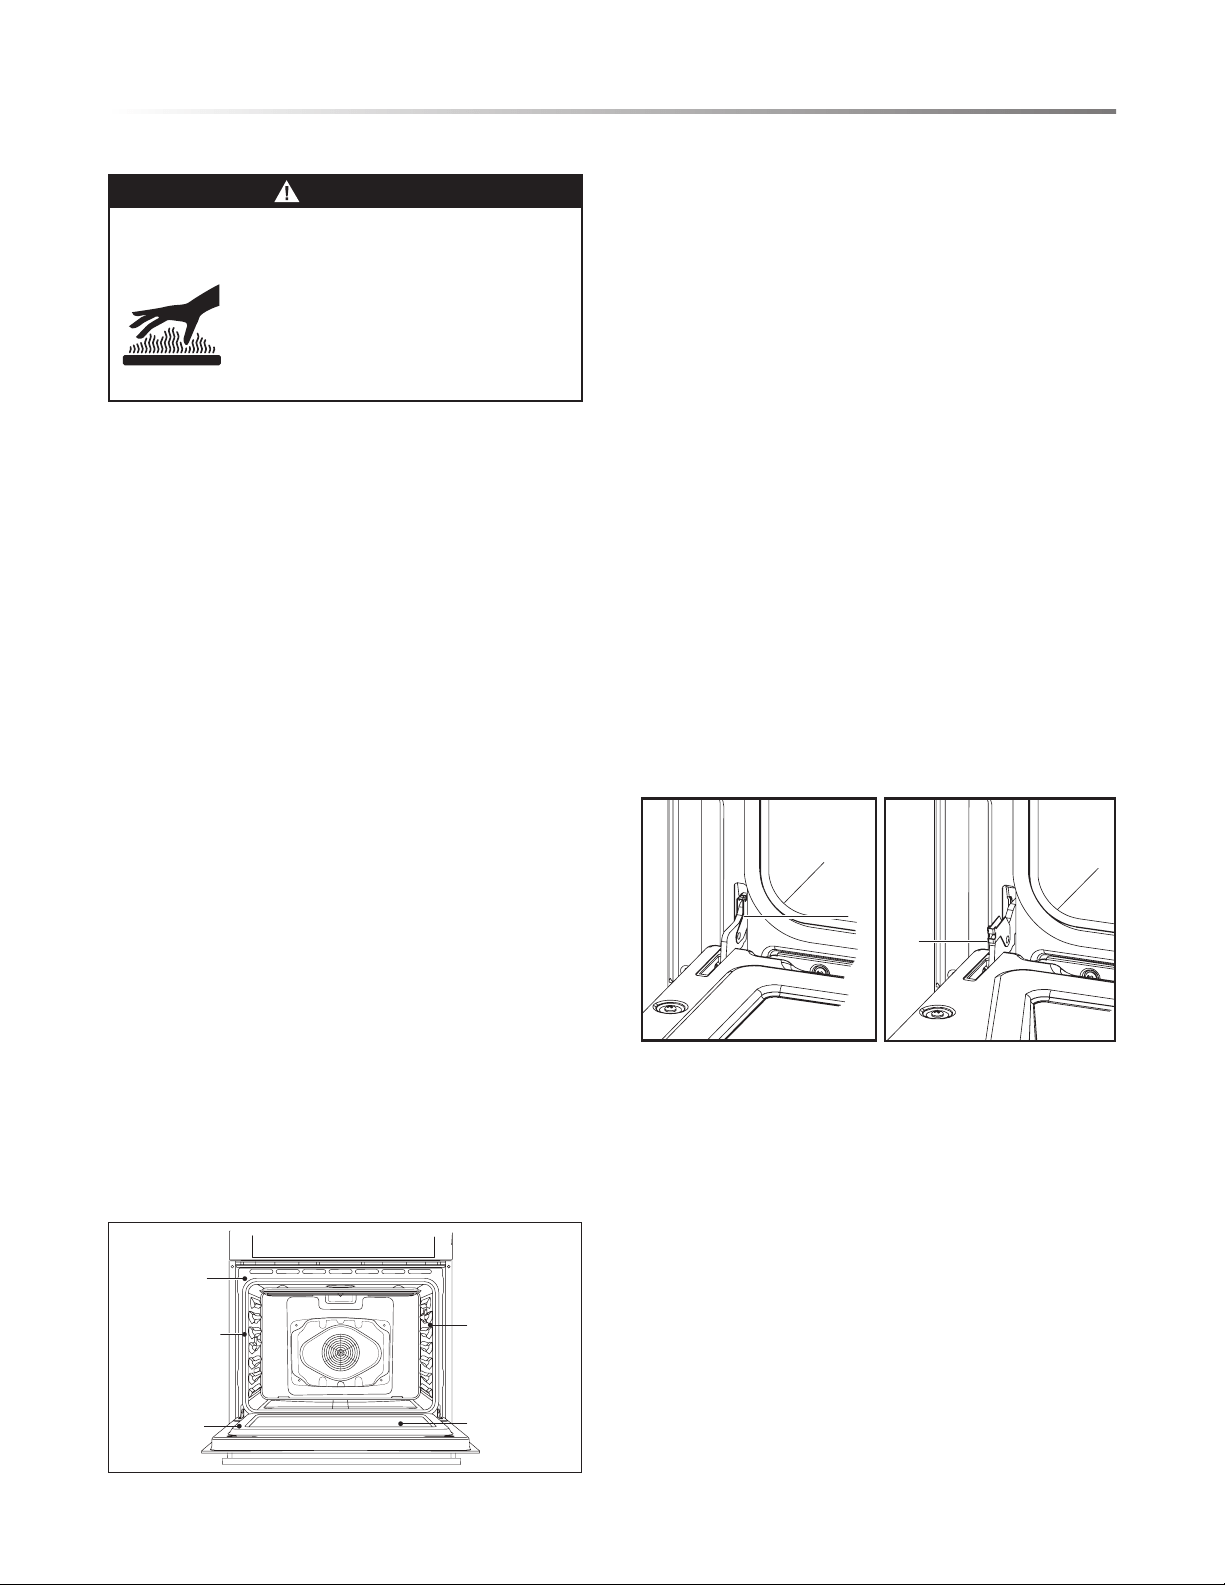
Hand clean
frame area
outside
gasket
Hand clean
1" from
rack guides
to front of
oven cavity
Hand clean
door window
Hand clean
door area
outside
gasket
DO NOT
hand clean
gasket
SELF-CLEAN CYCLE
A minimum 24-hour wait is recommended between cleaning
cycles.
TO SELF-CLEAN:
Open the SETTINGS menu and tap Oven Self-Clean. Follow
the instructions on the screen.
OVEN DOOR REMOVAL
For normal oven use, there is no need to remove the oven door.
However, should it become necessary to remove the door, follow
the instructions in this section.
IMPORTANT:
• Make sure oven is cool and that power to the oven has been
turned off before removing the door.
• The oven door is heavy and fragile, and the door front is
glass. To avoid oven door glass breakage, use both hands,
and grasp only the sides of the oven door to remove. Do not
grasp the handle.
• Be sure both levers are securely in place before removing
the door.
• Do not force the door open or closed.
TO REMOVE THE OVEN DOOR:
1 Open the door completely.
2 Flip up the hinge latch on each side.
A
A
A - Hinge Bracket
3 Holding the door rmly, close the oven door completely.
4 Grasping both sides, lift up on the oven door while pushing
it closed, and then pull it away from the door frame.
5 Place the door in a protected location.
Loading ...
Loading ...
Loading ...