Loading ...
Loading ...
Loading ...
Installation instructions en
35
3.
Check that the seals on the bypass nozzles are
seated correctly and work properly. Only use by-
pass nozzles with absolutely faultless seals.
4.
Insert the new bypass nozzles and tighten them se-
curely. Ensure that all bypass nozzles have been
fastened to the correct taps.
5.
At this stage, it is important to test for leaks. You
can find additional information about this in the sec-
tion entitled "Leak and function test" →Page36.
Fitting the control panel
To reassemble, proceed in the reverse order of disas-
sembly.
1.
Take hold of the front panel with both hands and
carefully fit it into place. Ensure that the cables are
not damaged and the connections do not come
loose. Lower it slightly and insert it into the front
panel.
2.
Insert the screws (T15) (M4) that were removed
from the control panel.
3.
Insert and tighten the screws (T20) that were re-
moved from the front profiles on the right and left.
Attach the plastic covers.
4.
Carefully install the hob. Ensure that the plastic
parts which must remain underneath the screws do
not fall out. Unscrew the two screws (T20) on the
front left and right on the hob. If there are any
burner connection screws, screw them all into the
cooktop.
5.
Install the burner bases in their respective positions
according to their size. Make sure that the ignition
plugs are placed in the appropriate openings next
to the burner bases. Place the enamelled burner
lids onto the centre of the appropriate lower parts of
the burner and, in doing so, note the sizes.
‒ Fit the pan support grids and the pan support
racks. Ensure that the 80 mm pan support is fit-
ted on the auxiliary burner.
6.
If the appliance has a covering plate, hold it vertic-
ally by both sides and slowly reinsert it into the
holder.
7.
Carefully insert the knobs.
‒ At this stage, it is important to check that the gas
burners are burning correctly. You can find addi-
tional information about this in the section en-
titled "Checking the correct burner behaviour"
→Page37.
8.
Check whether the appliance is working correctly.
Replacing the oven gas burner
Preparation
¡ Switch off all of the knobs on the control panel.
¡ Close the gas connection shut-off.
¡ Disconnect the appliance from the mains.
Replacing the oven's lower gas burner nozzle
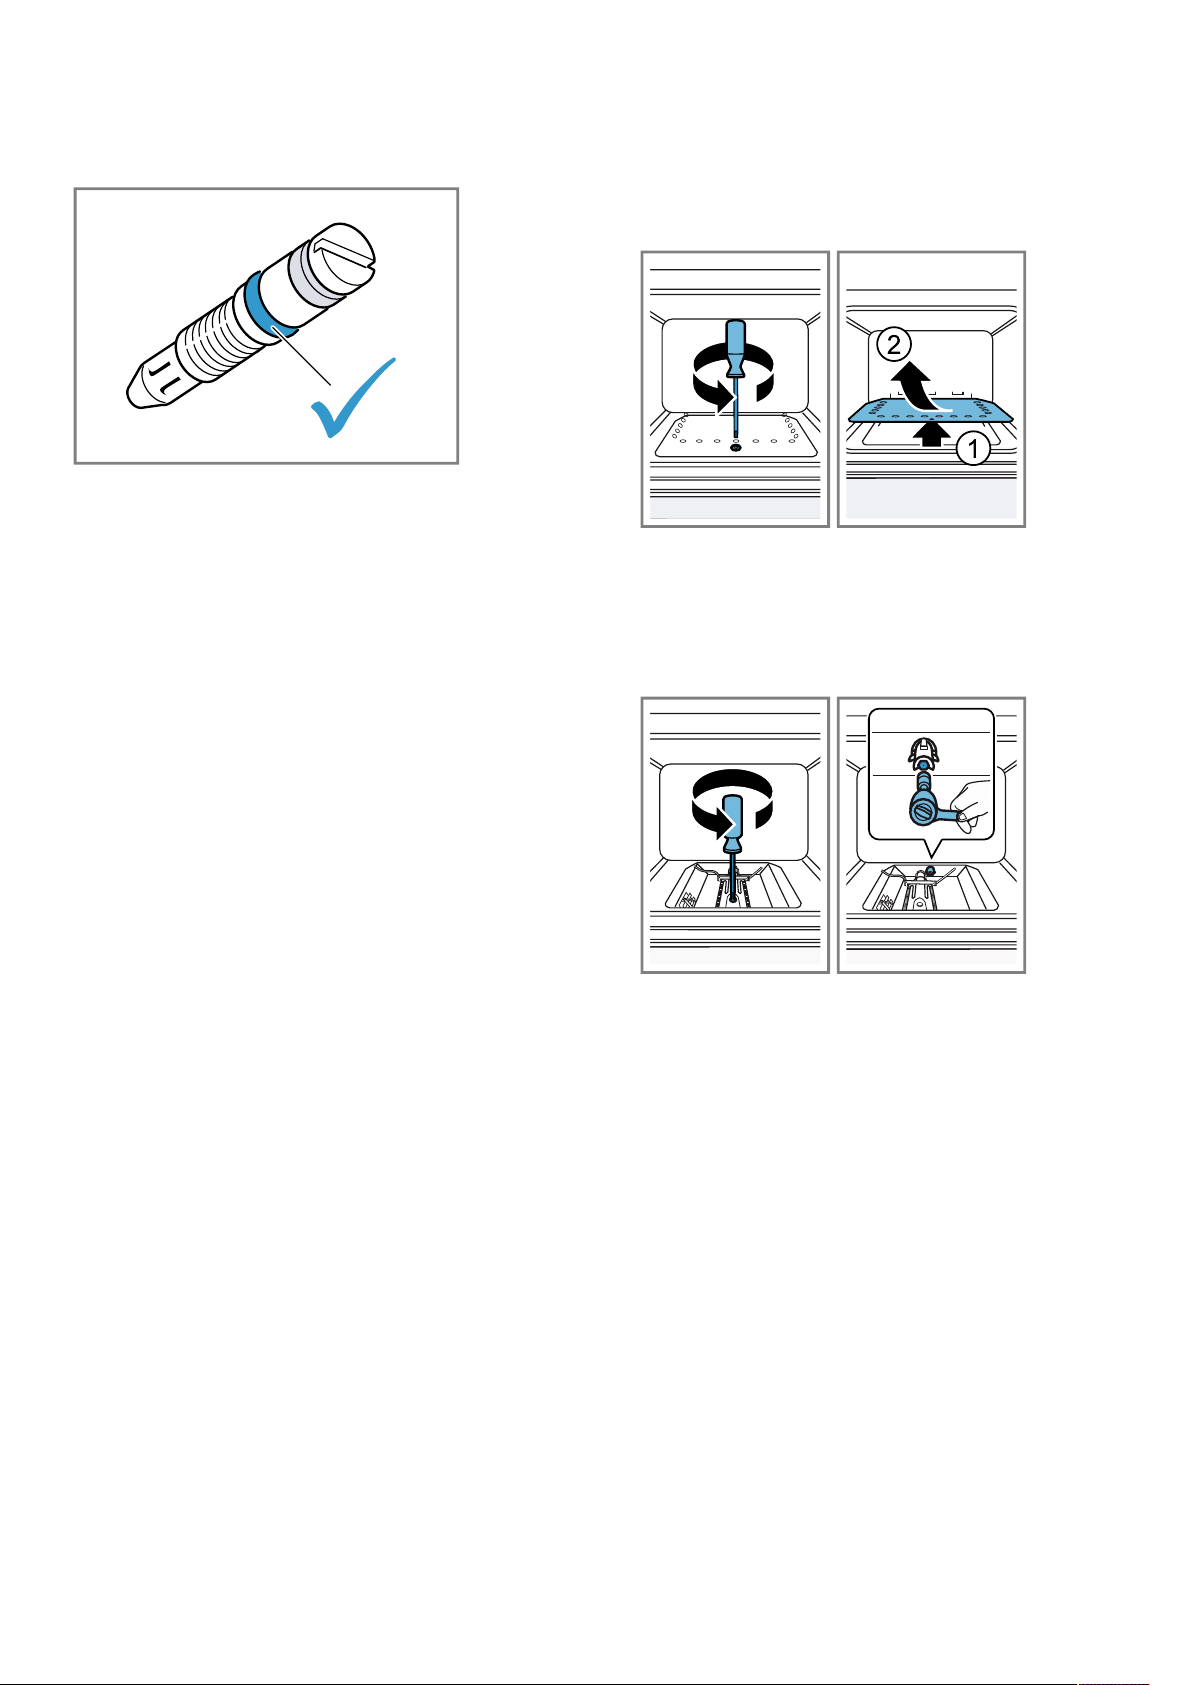
1.
Open the appliance door.
2.
Undo the front screw on the appliance base plate.
‒ Raise the front of the tray, pull it and remove it.
3.
Undo the screw on the burner and carefully pull the
burner forwards. You should now be able to access
the burner nozzle. Ensure that the connections for
the thermocouple and the spark plugs are not dam-
aged.
‒ Remove the nozzle on the burner input in the
rear area of the oven using the socket wrench 7.
4.
Select the appropriate nozzle from the table de-
pending on the new gas type. You can find addi-
tional information about this in the section entitled
"Technical data – Gas" →Page37.
‒ Insert and tighten the new nozzle.
‒ At this stage, it is important to test for leaks. You
can find additional information about this in the
section entitled "Leak and function test"
→Page36.
5.
Insert the oven burner, making sure that the connec-
tions for the thermocouple and the spark plugs are
not damaged. Screw in the loosened screw.
6.
At this stage, it is important to check that the burner
is burning correctly. You can find additional informa-
tion about this in the section entitled "Checking the
correct burner behaviour →Page37".
7.
Insert the bottom panel of the oven's housing and
screw it firmly in place.
Replacing the gas grill burner nozzle on the oven
1.
Open the appliance door.
Loading ...
Loading ...
Loading ...