Loading ...
Loading ...
Loading ...
Installation instructions en
33
1.
In order to gain access to the bypass nozzles, re-
move the control panel. You can find additional in-
formation about this in the section entitled "Remov-
ing the control panel" →Page33.
2.
Tighten the bypass nozzles as far as it will go.
3.
Then carry out the steps described in the section
entitled "Installing the control panel" →Page35.
For ovens – converting the appliance from
natural gas to liquefied gas
If the appliance was set to natural gas at the time of
delivery (factory setting) (NG: G20, G25) and is now
being converted to liquefied gas for the first time (LPG:
G30, G31):
1.
In order to gain access to the bypass nozzles below
the burner tap, remove the control panel. You can
find additional information about this in the section
entitled "Removing the control panel" →Page33.
2.
Then tighten the bypass nozzle on the oven burner
as far as it will go.
3.
Then carry out the steps described in the section
entitled "Installing the control panel" →Page35.
Converting the appliance from liquid gas to
natural gas
If you convert the appliance from liquefied gas
(LPG:G30,G31) to natural gas (NG:G20,G25) or if
you already carried out this conversion and then undo
this:
1.
Replace all of the bypass nozzles in the appliance.
You can find additional information about this in the
section entitled "Removing the control panel"
→Page33.
2.
Then carry out the steps in the section entitled "Re-
placing the bypass nozzles" →Page34.
3.
Then carry out the steps described in the section
entitled "Installing the control panel" →Page35.
Removing the control panel
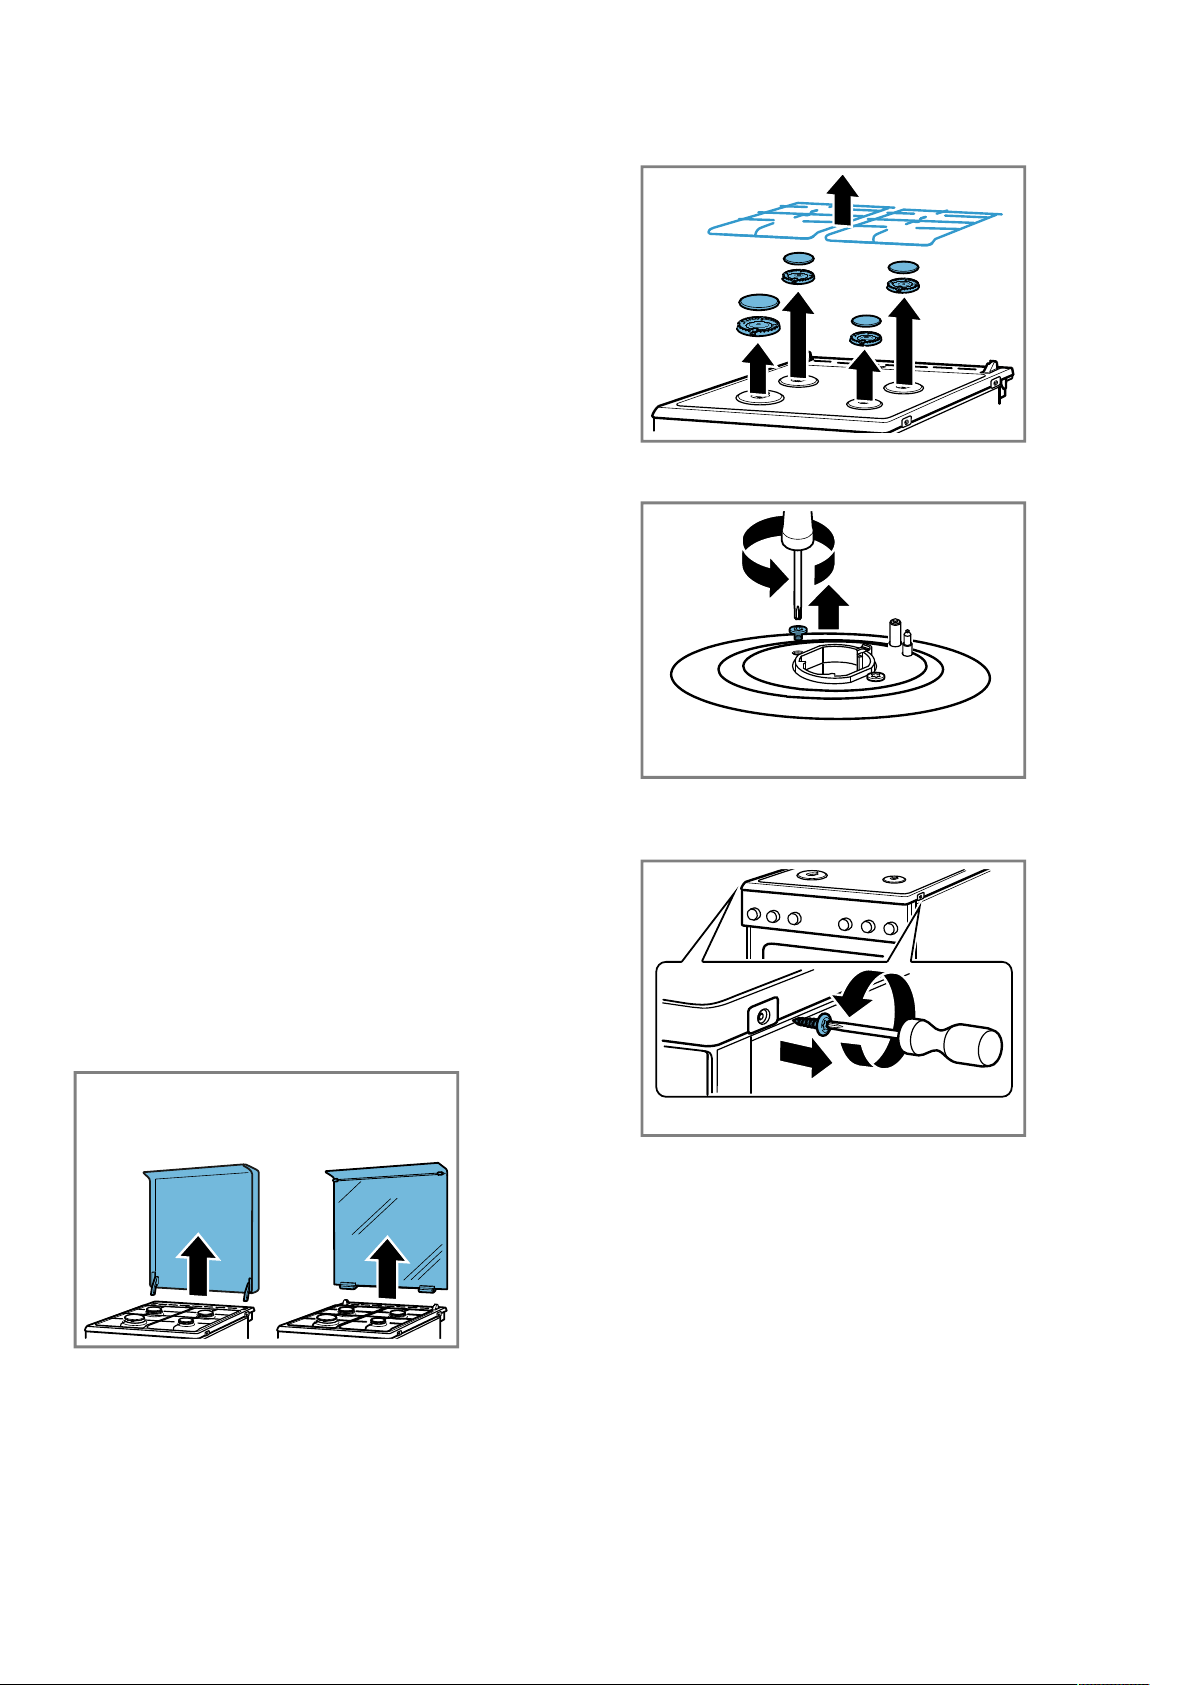
1.
If the appliance has an upper cover, remove this.
‒ To do this, open the hob cover, grip the sides
with both hands and pull it upwards. Ensure that
you do not lose the hinges.
2.
Remove the pan support grids or the pan support
racks and the burner parts.
3.
If burner connection screws are present on the hob,
remove all of these.
4.
Remove the two screws (T20) at the front right and
left of the hob panel. Do not remove the plastic
parts that are located below these.
Loading ...
Loading ...
Loading ...