Loading ...
Loading ...
Loading ...
Installation instructions en
31
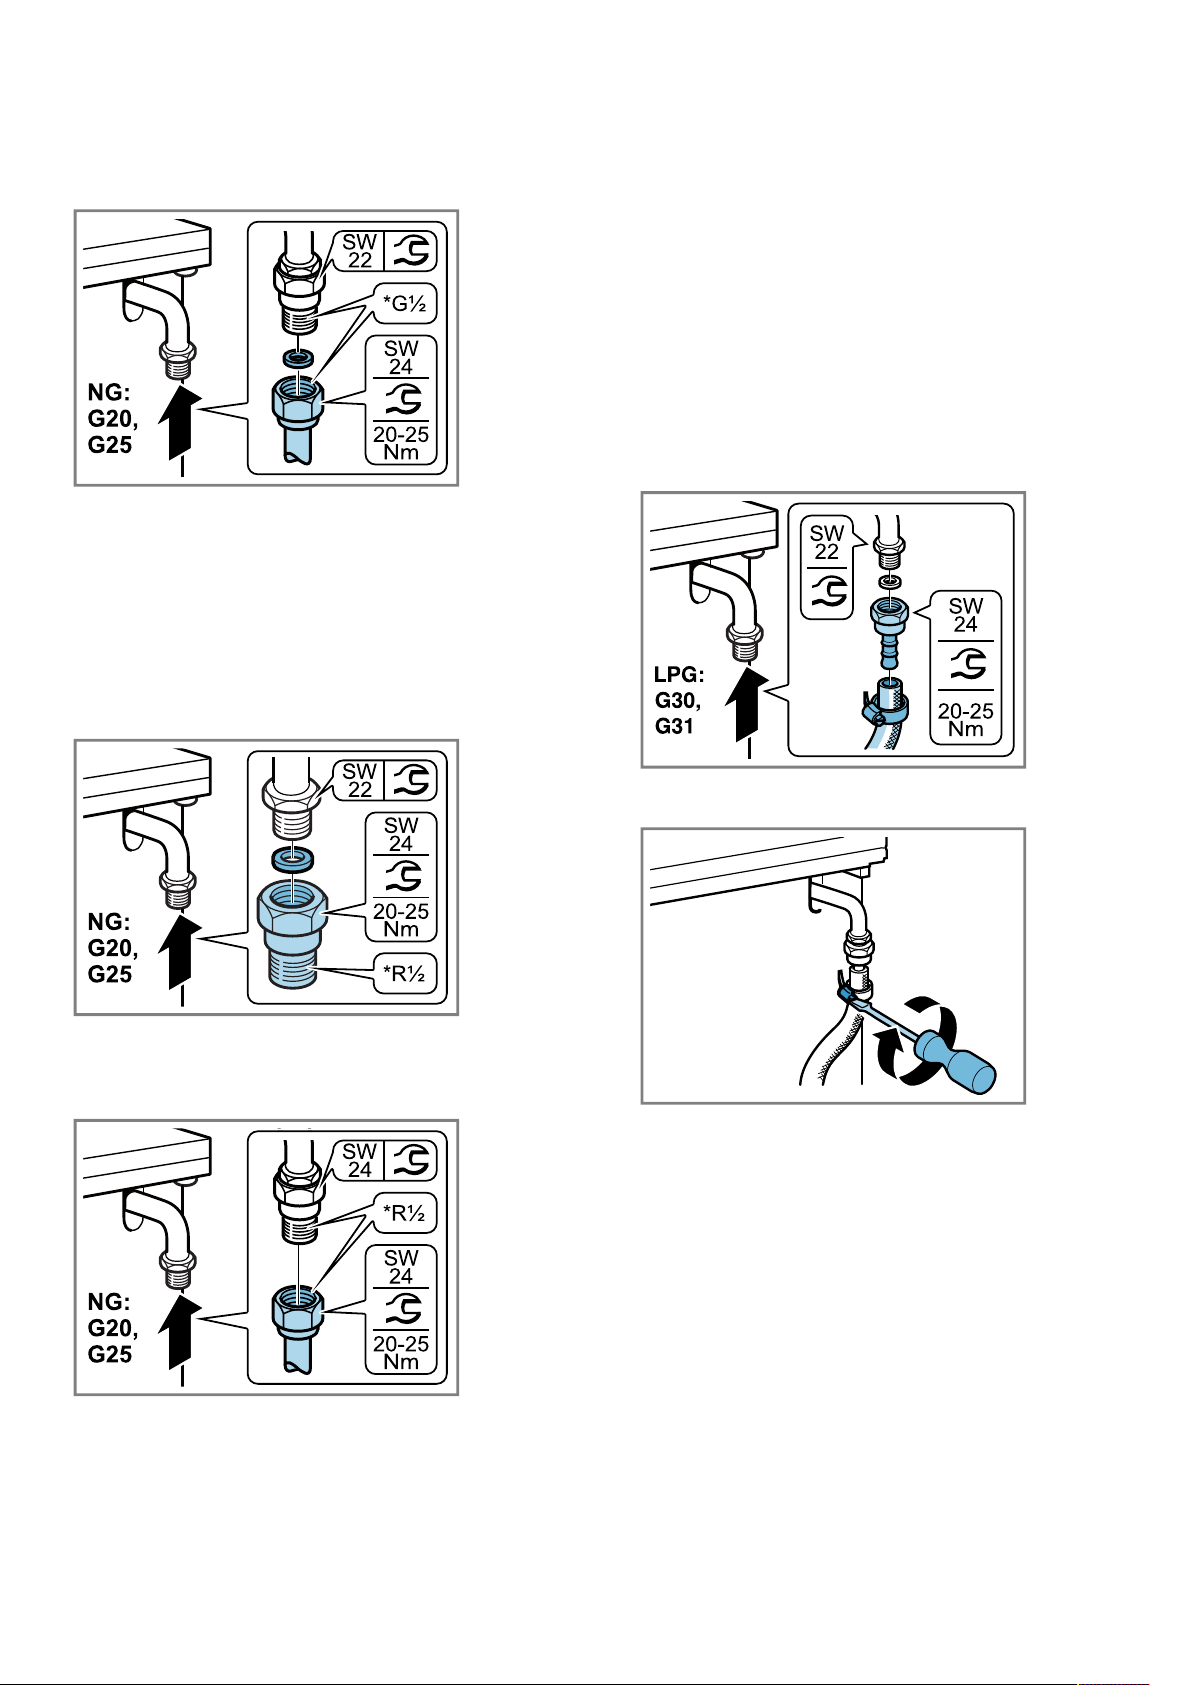
4.
Secure the connecting piece using a 24 mm span-
ner. Use a 24 mm spanner to place the threaded fit-
ting of the gas pipe or safety gas hose on the con-
necting piece and tighten it firmly.
5.
Open the gas connection shut-off. Carry out a leak
test →Page36.
Connection in accordance with EN 10226-1 R½ (TS
61-210 EN 10226-1 R½)
1.
Insert the new seal in the connecting piece. Ensure
that the seal is seated correctly.
2.
Secure the gas connecting piece to the appliance
using a 22 mm spanner and place the connecting
piece into the connecting piece using a 24 mm
spanner.
3.
Secure the connecting piece using a 24 mm span-
ner. Use a 24 mm spanner to place the threaded fit-
ting of the gas pipe or safety gas hose on the con-
necting piece and tighten it firmly.
4.
Open the gas connection shut-off. Carry out a leak
test →Page36.
Liquefied gas connection (LPG)
If you use liquefied gas (LPG), establish the gas con-
nection via a gas hose or a fixed connection.
Observe the specific guidelines for each country.
If you are using a gas hose, observe the following:
¡ Use a safety gas hose or a plastic gas hose with a
diameter of 8 or 10mm.
¡ Secure the hose to the gas connection using an ap-
proved connecting device, e.g. a hose clamp.
¡ The hose must be short and completely leak-tight.
The hose must not be longer than 1.5m. Observe
the applicable guidelines.
¡ Replace the gas hose once a year.
Connection with the gas hose
1.
Insert the new seal in the connecting piece. Ensure
that the seal is seated correctly.
2.
Secure the gas connecting piece to the appliance
using a 22 mm spanner and place the connecting
piece into the connecting piece using a 24 mm
spanner.
3.
Fit the safety gas hose and use a pipe union or
cable clamp to tighten it securely.
4.
Open the gas connection shut-off. Carry out a leak
test →Page36.
20.5 Converting the gas type
You can convert the type of gas that has been set for
the appliance.
Note:You can find more information about which gas
types can be used with the appliance and the appropri-
ate gas nozzles in the section entitled "Technical data –
Gas" →Page37. The numbers on the burners refer to
their diameter.
Converting the gas type
¡ Replacing the gas connection part.
¡ Replace the burner nozzles.
¡ Depending on the gas setting that is configured at
the factory, replace or tighten the bypass nozzles of
the burner taps.
¡ If the nozzles for the oven burner and the grill
burner are present, replace these.
Loading ...
Loading ...
Loading ...