Loading ...
Loading ...
Loading ...
en Installation instructions
32
After conversion
¡ Always test for leaks after converting the appliance
to a different gas type. You can find additional in-
formation about this in the section entitled "Leak
and function test" →Page36.
¡ The burning behaviour must be checked after the
product has been converted to a different gas type.
You can find additional information about this in the
section entitled "Checking the correct burner beha-
viour" →Page37.
¡ Enter the newly set type of gas and gas pressure in
the table. You can find additional information about
this in the section entitled "Appliance information"
→Page30.
ATTENTION!
After converting the type of gas, label the type of gas
that is now set.
▶
After converting the type of gas, affix the label with
the specification of the gas type and the star shape
at the designated location on the appliance's rating
plate.
Parts for the gas conversion
The parts that you need for the gas conversion proced-
ure described here are listed below.
Note:
The accessories supplied may differ depending on the
appliance model.
¡ The gas connecting piece may vary depending on
the gas type and the country-specific regulations.
¡ In the "Technical data – Gas" →Page37 table, de-
termine the correct nozzle diameter.
¡ Always use a new seal.
¡ (*) Never establish a gas connection without these
parts.
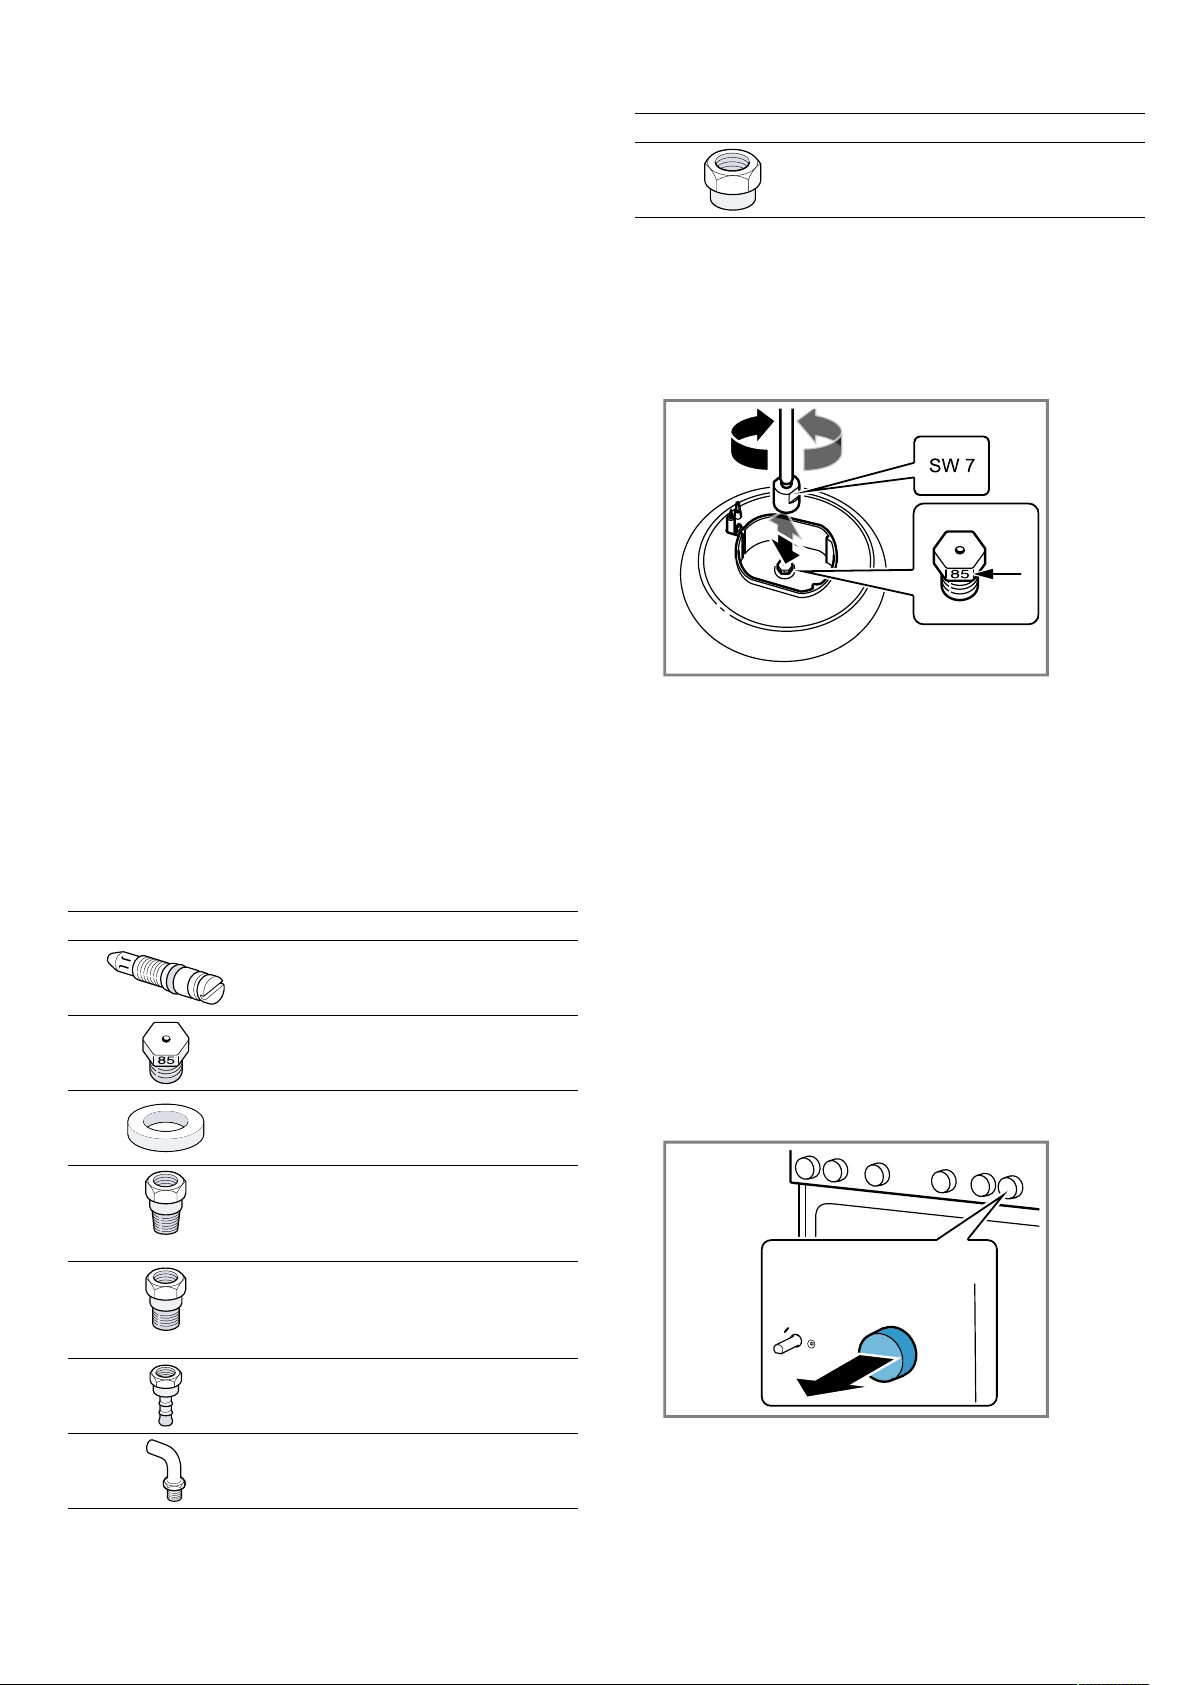
Explanation
Bypass nozzle
Burner nozzle
(*) Seal
(*) Connecting piece for nat-
ural gas (NG: G20, G25)
¡ TS 61-210 EN 10226 R½
¡ EN 10226 R½
(*) Connecting piece for nat-
ural gas (NG: G20, G25)
¡ TS EN ISO 228 G½
¡ EN ISO 228 G½
(*) Connecting piece for lique-
fied gas (LPG: G30, G31)
Connecting piece
Explanation
Blind plugs (closure part)
Replacing the cooker burner nozzles
1.
Switch off all of the knobs on the control panel.
2.
Close the gas connection shut-off.
3.
Remove the pan support grids or the pan support
racks and the burner parts.
4.
Use the socket wrench 7 to remove the cooker
burner nozzles.
5.
Look up the burner nozzles in the table. You can
find additional information about this in the section
entitled "Technical data – Gas" →Page37.
‒ Fit the new nozzles into the appropriate burners.
6.
After replacing the nozzles, check that there are no
leaks. You can find additional information about this
in the section entitled "Leak and function test"
→Page36.
Adjusting or replacing bypass nozzles (small
flame setting)
You can set the minimum flame height for the burners
via the bypass nozzles.
Requirements
¡ Close the gas isolating equipment.
¡ Disconnect the appliance from the power supply.
1.
Switch off all of the knobs on the control panel.
2.
Remove the knobs one by one by holding them
tightly against the control panel and pulling them to-
wards you slightly.
Converting the appliance from natural gas to
liquefied gas
If the appliance was set to natural gas at the time of
delivery (factory setting) (NG: G20, G25) and is now
being converted to liquefied gas for the first time (LPG:
G30, G31):
Loading ...
Loading ...
Loading ...