
Technical Support and E-Warranty Certificate
www.vevor.com/support
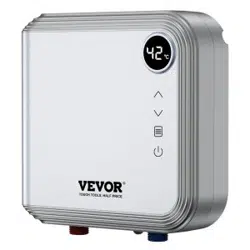
TANKLESS ELECTRIC WATER HEATER
MODEL:KFU70
We continue to be committed to provide you tools with competitive price.
"Save Half", "Half Price" or any other similar expressions used by us only represents an
estimate of savings you might benefit from buying certain tools with us compared to the major
top brands and doses not necessarily mean to cover all categories of tools offered by us. You
are kindly reminded to verify carefully when you are placing an order with us if you are
actually saving half in comparison with the top major brands.
MODEL:KFU70
Have product questions? Need technical support? Please feel free to
contact us:
Technical Support and E-Warranty Certificate
www.vevor.com/support
NEED HELP? CONTACT US!
This is the original instruction, please read all manual instructions
carefully before operating. VEVOR reserves a clear interpretation of our
user manual. The appearance of the product shall be subject to the
product you received. Please forgive us that we won't inform you again if
there are any technology or software updates on our product.
TANKLESS ELECTRIC
WATER HEATER

Warning-To reduce the risk of injury, users must read the instructions
manual carefully.
WARNINGS
This is not a do-it-yourself project. Failure to have this appliance
installed by a licensed plumber and electrician will void all
warranties.
Under no circumstances should you attempt to install, repair or
disassemble the tankless electric water heater without first shutting
off all power to the unit directly at the circuit breaker box.
Installation of this product is restricted to indoor locations only by
licensed plumbing or electrical contractors.
Power cable and circuit breaker requirement
Model
Main Circuit Breaker
Dedicated circuit breaker
Required wire
KFU70
≥30A
≥30A
10# AWG
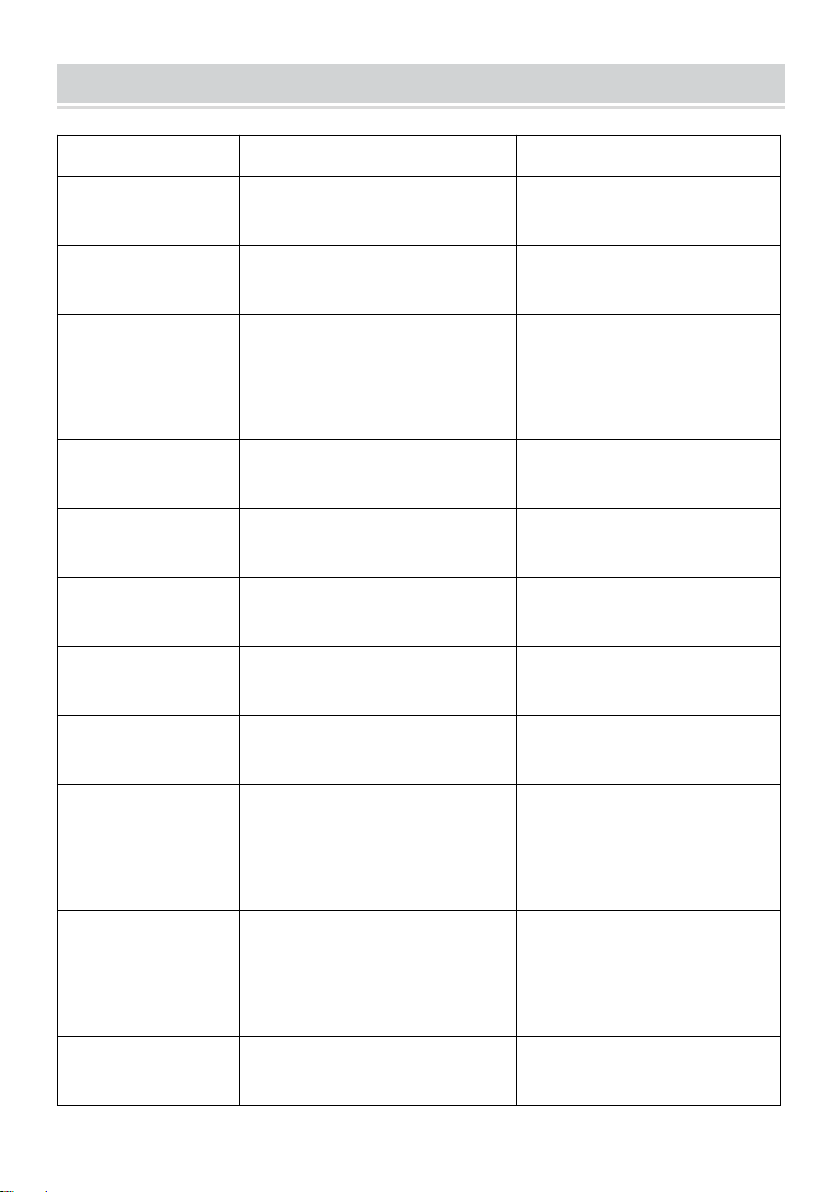
PRODUPRODUCT PARAMETERS
Model
KFU70
Voltage
AC240V
Wattage
7kW
Rated Current
29.2A
Min. Required Circuit Breaker
30A
Min. Wire Size AWG Copper
10#
Min. Water Flow to Activate Unit
0.4GPM
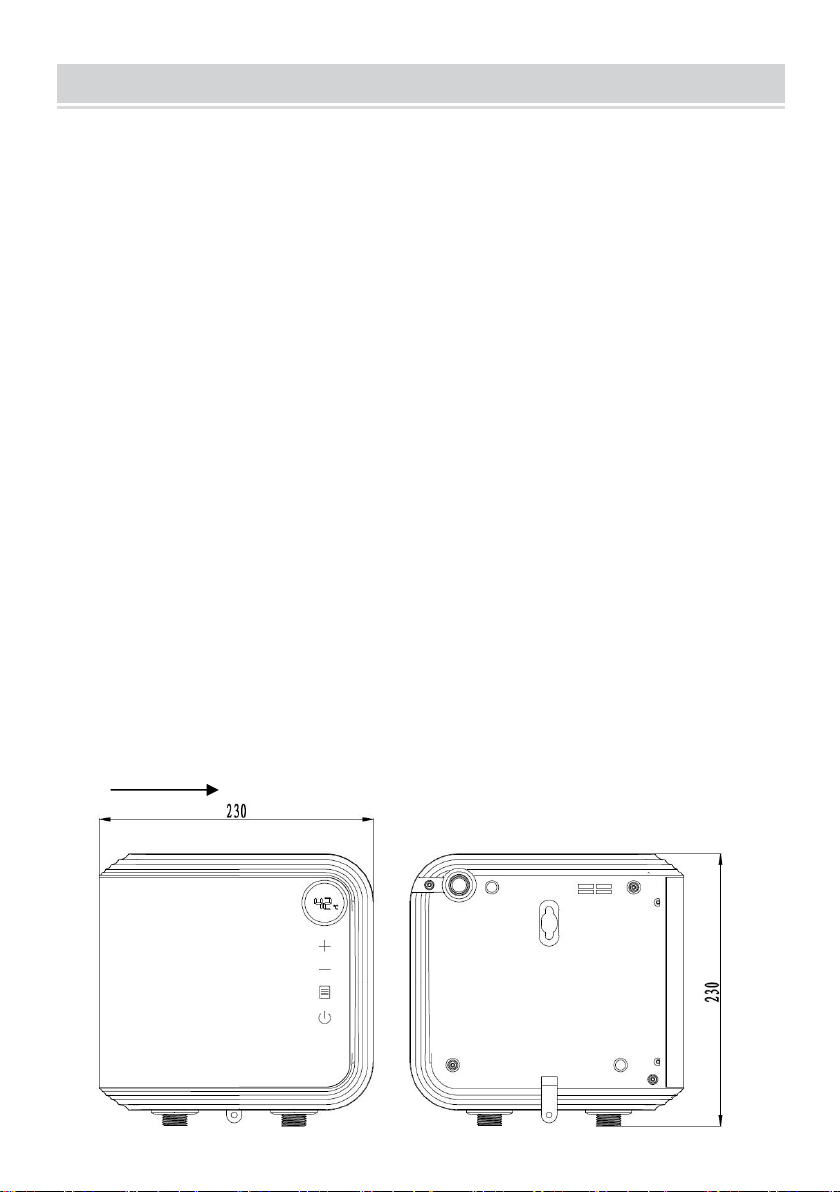
Product Dimensions
230x230x72mm
Water Connections
NPT1/2’’

SAFETY & WARNING
When using electrical appliances, base safety precautions should always be
followed including the following:
1.The unit is not suitable for bathing.
2.The installation must comply with the National Electrical Code, your local
electrical and plumbing codes.
3.This appliance must be EARTHED.
4.Install or locate this water heater only following the provided installation
instructions.
5.Use this water heater only for its intended use as described in this manual.
6.Contact a qualified electrician to have unit properly installed.
7.This appliance is not intended for use by persons (including children) with
reduced physical sensory or mental capabilities, or lack of experience and
knowledge, unless they have been given supervision or instruction concerning use
of the appliance by a person responsible for their safety. Children should be
supervised to ensure they do not play with the appliance.
8.This appliance must be permanently connected to the fixed circuit breaker and
it must be installed vertically .Do not install this appliance near to tinder or strong
magnetic field place.
9.This appliance is forbidden to be switch on if you think it may be frozen, as this
could result in serious damage to the unit. So wait until you are sure it has
completely thawed out before switching it on.
10.Please feel the outlet hot water temperature with hand to make sure it is
suitable for showering before taking a shower to avoid getting scalded.
11.Before connecting pipes to the water heater hoses, it is extremely important
to FLUSH the pipes to wash away all plumbing paste or residue in the pipes.
12.If there is damage to the wire, you must contact a qualified electrician to
replace it with a dedicated wire from our authorized dealers.
13.CONNECTED ONLY TO A CIRCUIT THAT IS PROTECTED BY A
RECOGNIZED GROUND-FAULT CIRCUIT INTERRUPTER(GFCI).
14.CAUTION: FOR HOUSEHOLD AND INDOOR USE ONLY.
SAVE THESE INSTRUCTIONS

PACKING LIST
Item
Unit
Quantity
Electric Water Heater
Unit
1
Rubber Plugs ,Screw ,strainer
Set
1
Operation and Installation Instructions
Copy
1
PRODUCT FEATURES
This Mini tankless electric water heater differs from conventional storage-type
mini water heaters. It doesn’t store hot water. Instead, water is heated
instantaneously as it flows through the unit. A flow switch activates the powerful
heating elements as water is drawn from a hot faucet connected to the appliance.
Due to the absence of standby loss, the mini heater has greater energy
efficiency than storage-type water heaters. In addition, the unit is incorporated
with multi-safety devices and will continuously supply hot water as long as the
faucet is open.
1. Besides, the unit has the following features.
2. Tankless, instantaneous heating for on demand hot water, No pre-heating. No
stand-by heating loss. Energy-saving.
3. High strength ABS splash proof casing, UL RECOGNIZED heating element.
4. Compact appearance and unlimited supply of hot water.
5. Easy installation, heater can be installed above or under sink. Easy operation,
the heater provides hot water at constant temperature.
6. Micro-computer control, adopting patent heating technology. Water is
completely separated from electricity by multi-layers of composite nano
insulation material.
7. Over temperature protection: when the outlet water temp. reaches or over 75°C,
the appliance will avoid getting scalded and will start to work automatically
while temp. drops to a certain temperature.
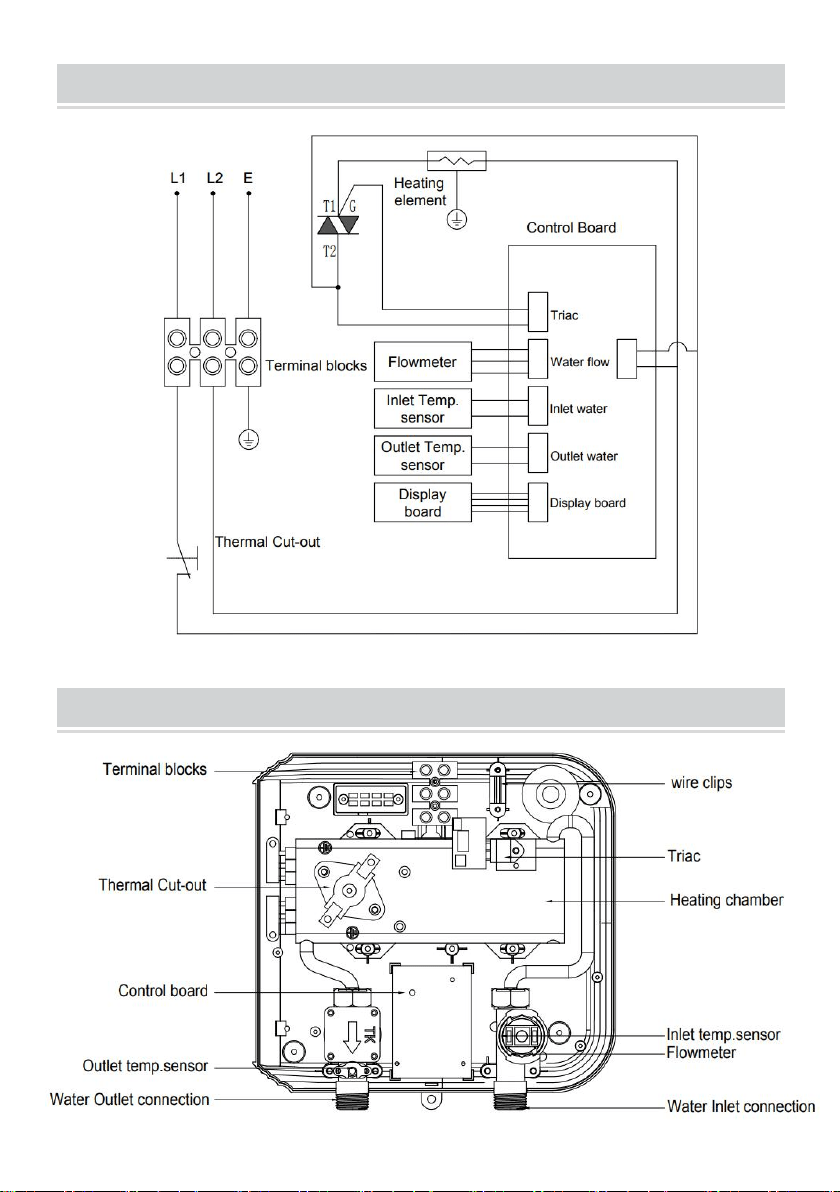
ELECTRICAL DIAGRAM
7KW
PRODUCT INNER STRUCTURE
INSTALLATION GUIDELINE
The installation must be in compliance with the National Electrical Code,
your local electrical and plumbing codes.
1. Make sure the appliance is intact, and the fittings are complete.
2. Please make sure the main power supply, water pressure, grounding condition,
ammeter and wire reach the standard of installation requirement.
3. The appliance must be connected to properly grounded dedicated branch
circuits of proper voltage rating. Ground must be brought to the “ground” at the
circuit breaker panel.
4. This appliance must be permanently connected to the fixed circuit breaker.
Please switch off the circuit breaker if you don’t use the heater.
5. Do not install this appliance near to tinder or strong magnetic field place. The
appliance can be installed above or under the sink, and unit must only be
mounted in a VERTICAL position nearby the water fittings. Please electrify
and try the machine after getting through waterway.
Installation Method
● General
The Mini tankless electric water heater can be used for hand washing the kitchen
and installed above or under the sink.
● Mounting the unit
Locate an appropriate place on a section of wall as above mentioned.
Fig 1 Front and back of the appliance
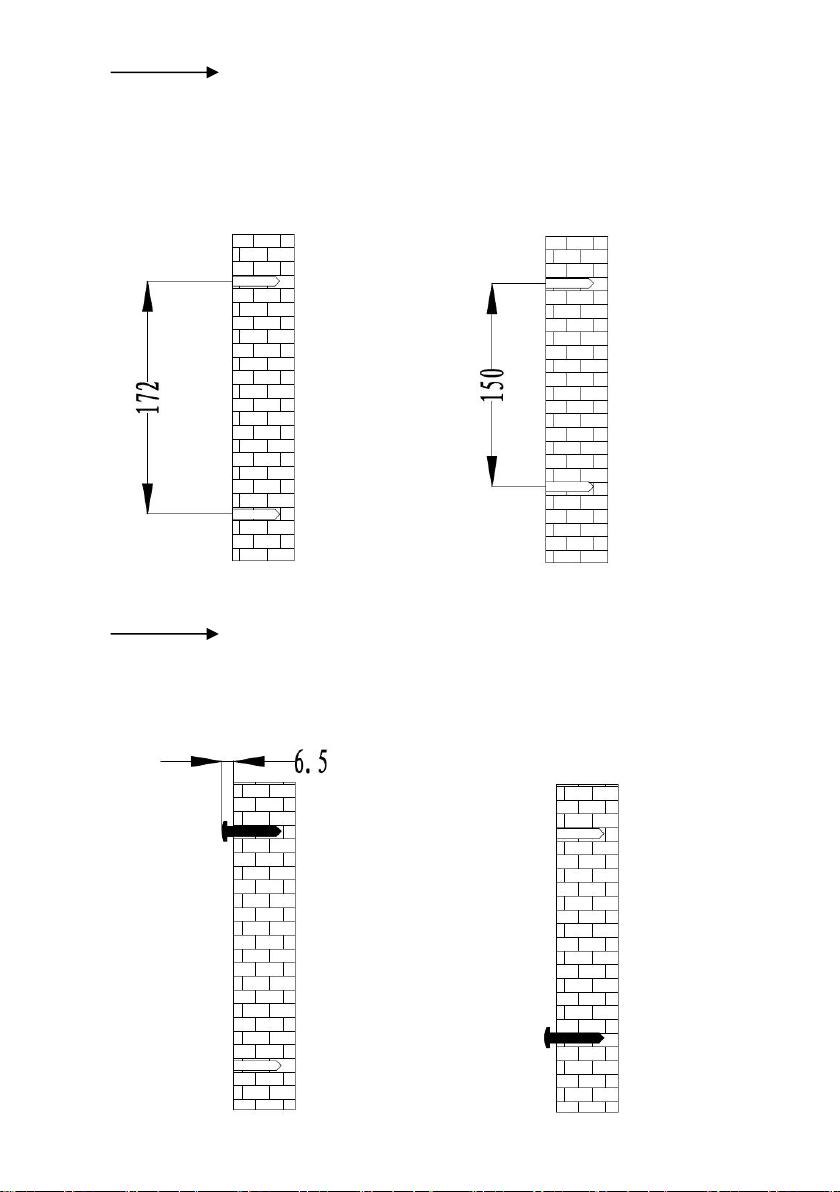
Fig 2 Drill two holes of 6.00mm diameter: if you install the heater
upright above the sink, the distance between every two holes is 172mm; if you
install the heater upside down under the sink, the distance between every two
holes is 150mm. Put plastic anchors in the holes.
Fig 2-A: Upward Installation Fig 2-B: Downward Installation
Fig 3 For Upright Installation, nail in the floor in upper hole (Fig2-A).
For Downward Installation, nail in the floor in under hole (Fig2-B), fix the appliance
on the wall with the below nail.
Fig 3-A: Upward Installation Fig 3-B: Downward Installation
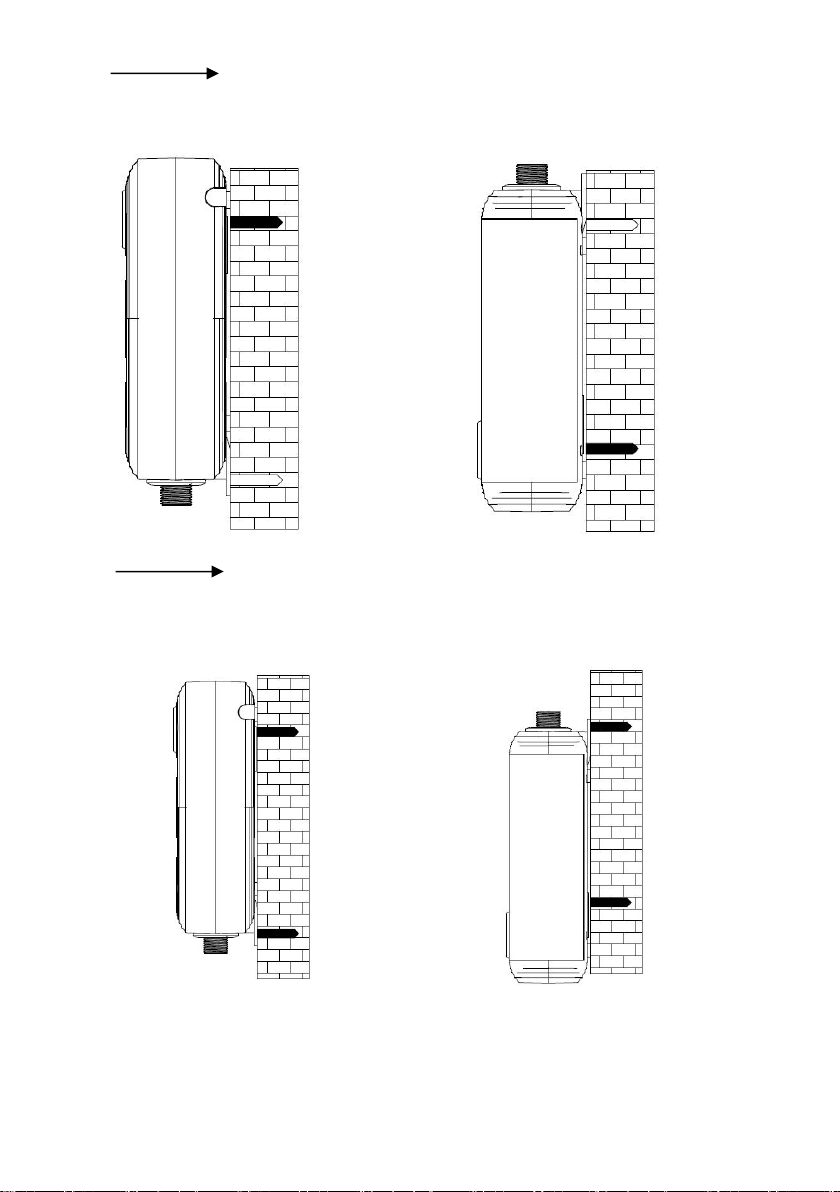
Fig 4 Fix the appliance on the wall with the fixed nail;
Fig 4-A: Upward Installation Fig 4-B: Upside down Installation
Fig 5 Then fix the appliance with nail in another hole, to make sure
the whole appliance is installed on firm.
Fig 5-A: Upward Installation Fig 5-B: Upside down Installation
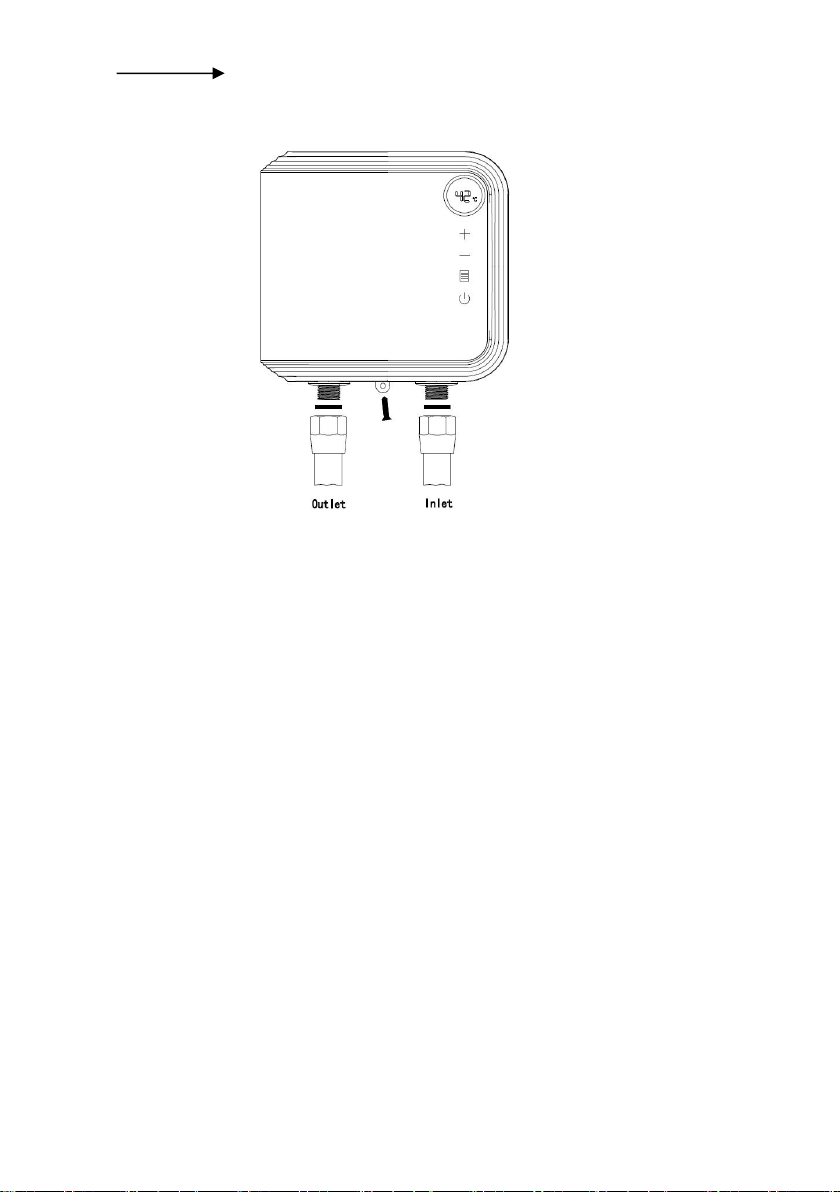
Fig 6 Connect the water pipe to the water inlet and water outlet
connections, please remember to install the rubber seal ring.
●Water Connections
1.All water pipes must comply with national and applicable state and local water
pipe codes.
2.No matter install the appliance is upright or handstand, please connect the inlet
connection (blue arrow points to) to the cold water inlet pipe; connect the outlet
connection (red arrow points to) to the hot water outlet pipe.
3.The unit should be connected directly to the main water supply. Flush pipe with
water to remove any debris or loose particles. Following pictures are for your
reference.
4.It is required that use 1/2”NPT water connections to fit the appliance. Please
connect the inlet and outlet pipe in perspective. Following pictures are for your
reference.
5.Please remember to install rubber seal rings at the connections. When all
water connections are completed, check for leaks and take corrective action
before proceeding.
●Electrical connection
1.All electrical work must comply with national and applicable state and local
electrical codes.
2.All unit must be connected to a properly grounded dedicated branch circuit of
proper voltage rating.
3.While fed the cable to terminal blocks/Circuit Breaker, please make sure the
metal wire ends and the terminal blocks touch completely. Then tighten the screws
up to make sure the full current can go through.
4.Before beginning any work on the electric installation, be sure that main
breaker panel switch is OFF to avoid any danger of electric shock, all mounting
and plumbing must be completed before proceeding with electrical hook-up.
OPERATION INSTRUCTIONS
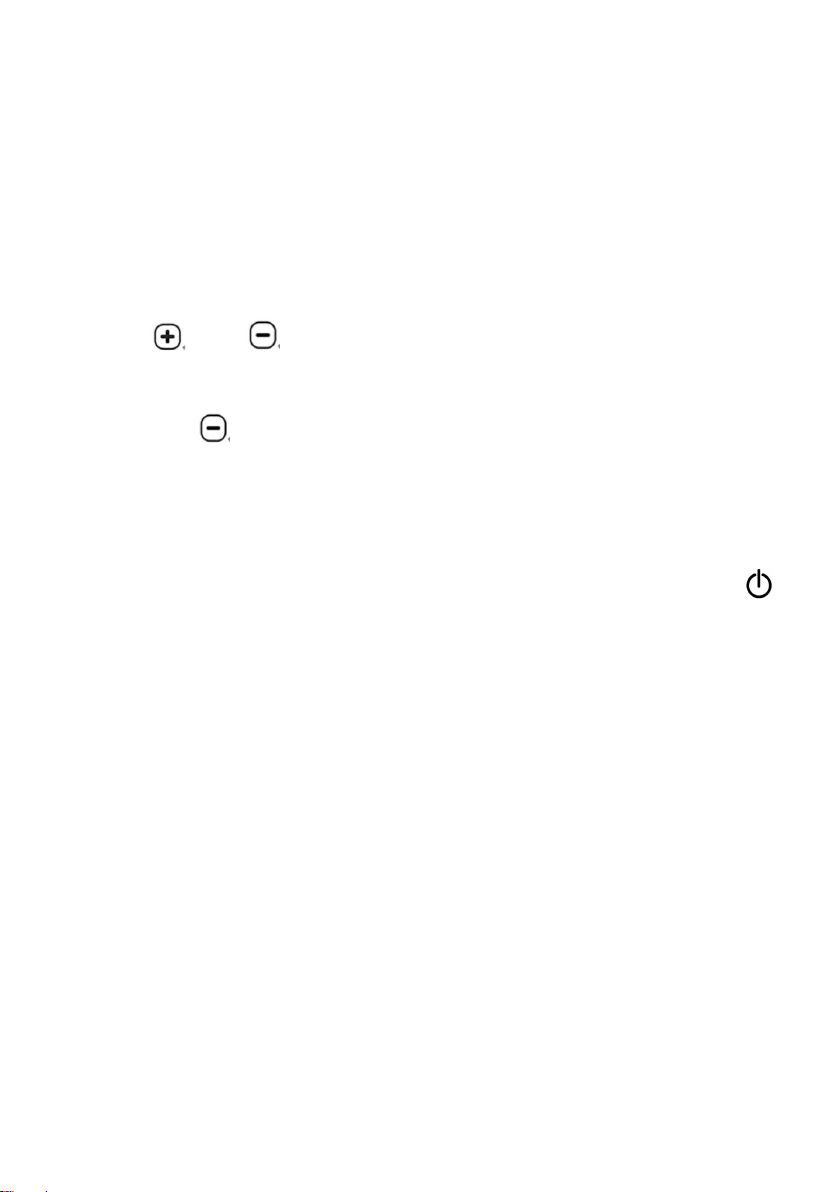
TIPS:The power of the unit shall be adjusted before ex-factory. If there are no
special circumstances, it is not recommended to press“ ” to adjust the power.
1.Turn on the circuit breaker to bring electrical power to the unit. The LED digital
display screen will light.
2.Turn on the water faucet for a few minutes until water flow is continuous and all
air is drained from water pipes. The unite must be operated after the breaker is
turned on.
3.After the unit is supplied with power, please turn on the water and then the
appliance will start work. The min water flow to activate the unit is 1.5L/min.
4.Turn off the water flow, the appliance will stop working. Turning off the heater
by pressing any key on the front panel is unnecessary.
5.Single touch “ ” to turn ON/OFF the appliance. When the unit is ON, LED
displays setting temperature for 2 seconds, then display the actual outlet water
temperature. stop operating for 15 seconds, the screen switch to the screen saver
mode. the display screen will be light off. If there is touch to the screen, the screen
will light again.
6.Single touch “ ”and or “ ” adjust the outlet temperature. Temperature
setting range is 30-55°C.
a.If the unit has been paused, you may initially get a short burst of very hot
water while you turn on again. Please run the water through for a few
seconds to let the temperature settle down. Please check hot water with hand
before using.
b.If the unit is not used in winter, drain out the water completely so the heater
will not be frozen.
c.Please periodically clean inlet strainer and the spray head to keep a free
water flow.
7.In off mode,
a) Touch “ ” and “ ” at the same time, the LED digital display will be upside
down.
b) Long press “ ” for 3 seconds, machine will change degree unit between
o
C
and
o
F.
8.There is an automatic memory function to avoid repetitive operation, while you
turn on the appliance, the default set temperature will be the same as last time set.
9.There is an adjustable power function, touch and hold on for 5 seconds “ ”
and then enter adjustable power setting menu, the default display maximum power
is the model of the power machine. Then set the power through the encoder and
display the "PXX", automatically save and exit after 3 seconds.
10.There is overheat protection function for the appliance, while the outlet
temperature reaches 65°C, the appliance will enter into pause mode, only after the
hot water temp drop to 50°C, it will start to work again automatically.
11.There is dry heating protection function for the appliance, while the hot water
temperature reaches 75°C, the power will be cut off, only after the faults remove.
12.There is real-time leakage detection function, while there is an electricity
leakage, the appliance will stop working automatically and E2 appear in LED
screen.
13.Please check hot water with hand before using.
If the unit is not be used in winter, drain out water completely so that the
heater will not be frozen.
Please periodically clean inlet filter and the spray head to keep a free water
flow.
TROUBLE-SHOOTING
Problems
Possible Causes
Corrective Actions
1. Inlet and outlet
fittings is leaking.
A. Fittings is not tight.
B. Rubber washer is worn-out
A. Tighten fittings.
B. Change rubber washer.
2. LED has no
signal.
A. Power is not connected.
B. LED is damaged.
A. Connect power to the unit.
B. Change LCD.
3. Functional keys
are not working.
A. No water out from shower.
B. Water pressure is too low.
C. Key or PCB is damaged.
A. Open valve to get water.
B. Open valve to get
pressure.
C. Change key or PCB.
4. Water too is hot.
A. Too high temperature set.
B. Water flow is too small.
A. Set a lower temperature.
B. Increase inlet water flow.
5. Water is too cold
A. Low temperature set.
B. Water flows too much.
A. Set a higher temperature.
B. Reduce water flow.
6. Outlet water gets
smaller and smaller.
Inlet strainer or shower clogged.
Clean strainer and shower.
7. LED displays E1
Outlet temp. is over 75℃.
A. Reduce the temperature
B. Turn up the water flow
8.LED displays E2
Electricity has leakage.
Please contact with the local
dealer
9. LED displays E3
A. The connecting wire loose.
B. Inlet Temperature sensor
failure
A. Plug in the connecting wire
tightly.
B. Replace the temperature
sensor
10. LED displays
E4
A. The connecting wire loose.
B. Outlet Temperature sensor
failure
A. Plug in the connecting wire
tightly.
B. Replace the temperature
sensor
11.LED displays E5
Heating body surface
temperature sensor has failure.
Replace the temperature
sensor

NORMAL MAINTENANCE
Note: Do not attempt to repair this water heater yourself, call a service
person for assistance. Before these operations, the power supply needs to
be shut off.
It is not required any regular maintenance. However, to ensure consistent
water flow, it is recommended to follow the maintenance.
1.Periodically remove scale and dirt that may build up at the aerator of the faucet
or in the shower head.
2.A built-in filter screen at the inlet connection should be cleaned occasionally.
Please turn off the water flow before doing this.