ADVANCED|AVANÇÉ|AVANZADA
ADVANCED|AVANÇÉ|AVANZADA
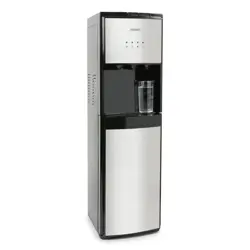
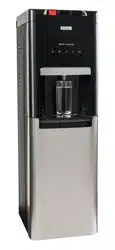
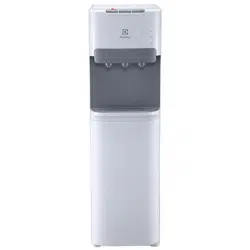
VWD1006BLP
VWD1006W
CAUTION: Before using water
dispenser, read this manual and
follow all safety rules and
operating instructions.
MISE EN GARDE: Avant
d’employer votre distributeur
d’eau, lisez ce manuel et suivez
toutes les règles de sécurité et
les consignes d’utilisation.
PRECAUCIÓN: Antes de usar
el dosificador de agua, lea este
manual y siga todas las reglas
de seguridad e instrucciones de
funcionamiento.
Use & Care Guide
Guide d’utilisation et d’entretien
Manual d uso y cuidado
High Efficiency Bottom Load
Water Dispenser
Distributeur d’eau
chargement du bas
à rendement élevé
Dosificador de agua
de Alta Eficiencia con Montaje
de Agua en la Sección Inferior
REV00
SAVE THESE INSTRUCTIONS
CONSERVER CES INSTRUCTIONS
GUARDE ESTAS INSTRUCCIONES

Thank you for purchasing a Vitapur (Bottom Mount) Water Dispenser. This unique design offers the benefits of :
• Nomorestrugglingandliftingofheavywaterbottles
• Nomoreaccidentalwaterspillageduringwaterbottleinstallation
• Nomorelookingatbruisedandbatteredrecycledwaterbottles
Please read the enclosed operating instructions carefully and retain this booklet for future reference. We have carefully
engineered your Vitapur Water Dispenser to give you years of enjoyment and trouble free operation.
IMPORTANT SAFEGUARDS
WARNING: This water dispenser is designed for indoor applications only. DO NOT use outdoors.
IMPORTANT NOTE: Your Vitapur® water dispenser is designed with a special "safety" feature (float switch
mechanism) that controls activation/operation of the Kettle Feature hot water tank heating system. If no water is
present and/or low water levels are detected inside the internal water reservoir, activation/operation of the
Kettle Feature hot water heating system is not possible. Likewise, if the hot water heating system is operational
and water is being drawn simultaneously causing internal water levels to drop below the established minimal
level set point, hot water tank operation is automatically suspended. To reactivate the hot water heating system,
you must replenish your water supply.
•Neverturnthedispenserupsidedownortiltmorethan45degrees.Iftheunithasbeenrestingonits’sideforalong
period of time, place the water dispenser in the upright position for approximately 12 hours before turning it on.
•Forusewith3or5gallon(12or19liter)waterbottles.
•Neverusethisdispenserwithwaterthatisunsafetodrinkorisfromanunknownsource.
•Neveruseanyotherliquidinthedispenserotherthanknownandmicrobiologicallysafebottledwater.
•Neverallowchildrentodispensehotwaterwithoutproperanddirectsupervision.
•Thiswaterdispenserisequippedwithagroundedpowercordplugforyoursafety.
•Keepyourwaterdispenserinadryplaceawayfromdirectsunlight.
•Neverputanythingammableclosetothedispenser.
•Leaveaminimumof2”(5cm)aroundthebackandsidesofthedispenserforproperventilation.
•Alwaysinstallyourwaterdispenseronaleveloor.Wait3minutesbeforerestartingmachineaftershuttingitdown.
•Alwaysunplugthewaterdispenserbeforeservicing.
• Regularcleaningofyourwaterdispenserisrequiredforyourwarranty.
Pleasefollowthecleaninginstructionsoutlinedinthismanualandcleanthedispenserevery4months.
GROUNDING INSTRUCTIONS
•Improperuseofthegroundingplugcanresultinariskofelectricshockcausingseriousinjury,evendeath.
•Thisappliancemustbegrounded.Intheeventofanelectricalshortcircuit,groundingreducestheriskofelectric
shock by providing an escape wire for the electric current.
•Thisapplianceisequippedwithapowercordhavingagroundingwirewithagroundingplugandmustbe
connected into a properly grounded polarized outlet. Consult a qualified electrician if the grounding instructions are
notcompletelyunderstood,orifdoubtexistsastowhethertheapplianceisproperlygrounded.Ifthewalloutletisa
standard 2 prong outlet, it is your personal responsibility and obligation to have it replaced with a properly grounded
3-prongwalloutlet.
• Donotunderanycircumstancescutorremovethethird(ground)prongfromthepowercordplug.
•Donotuseanadapterplugwiththisappliance.
• Donotuseanextensioncordwiththisappliance.Ifthepowercordistooshort,haveaqualiedelectricianinstall
an electrical outlet near the appliance.
1
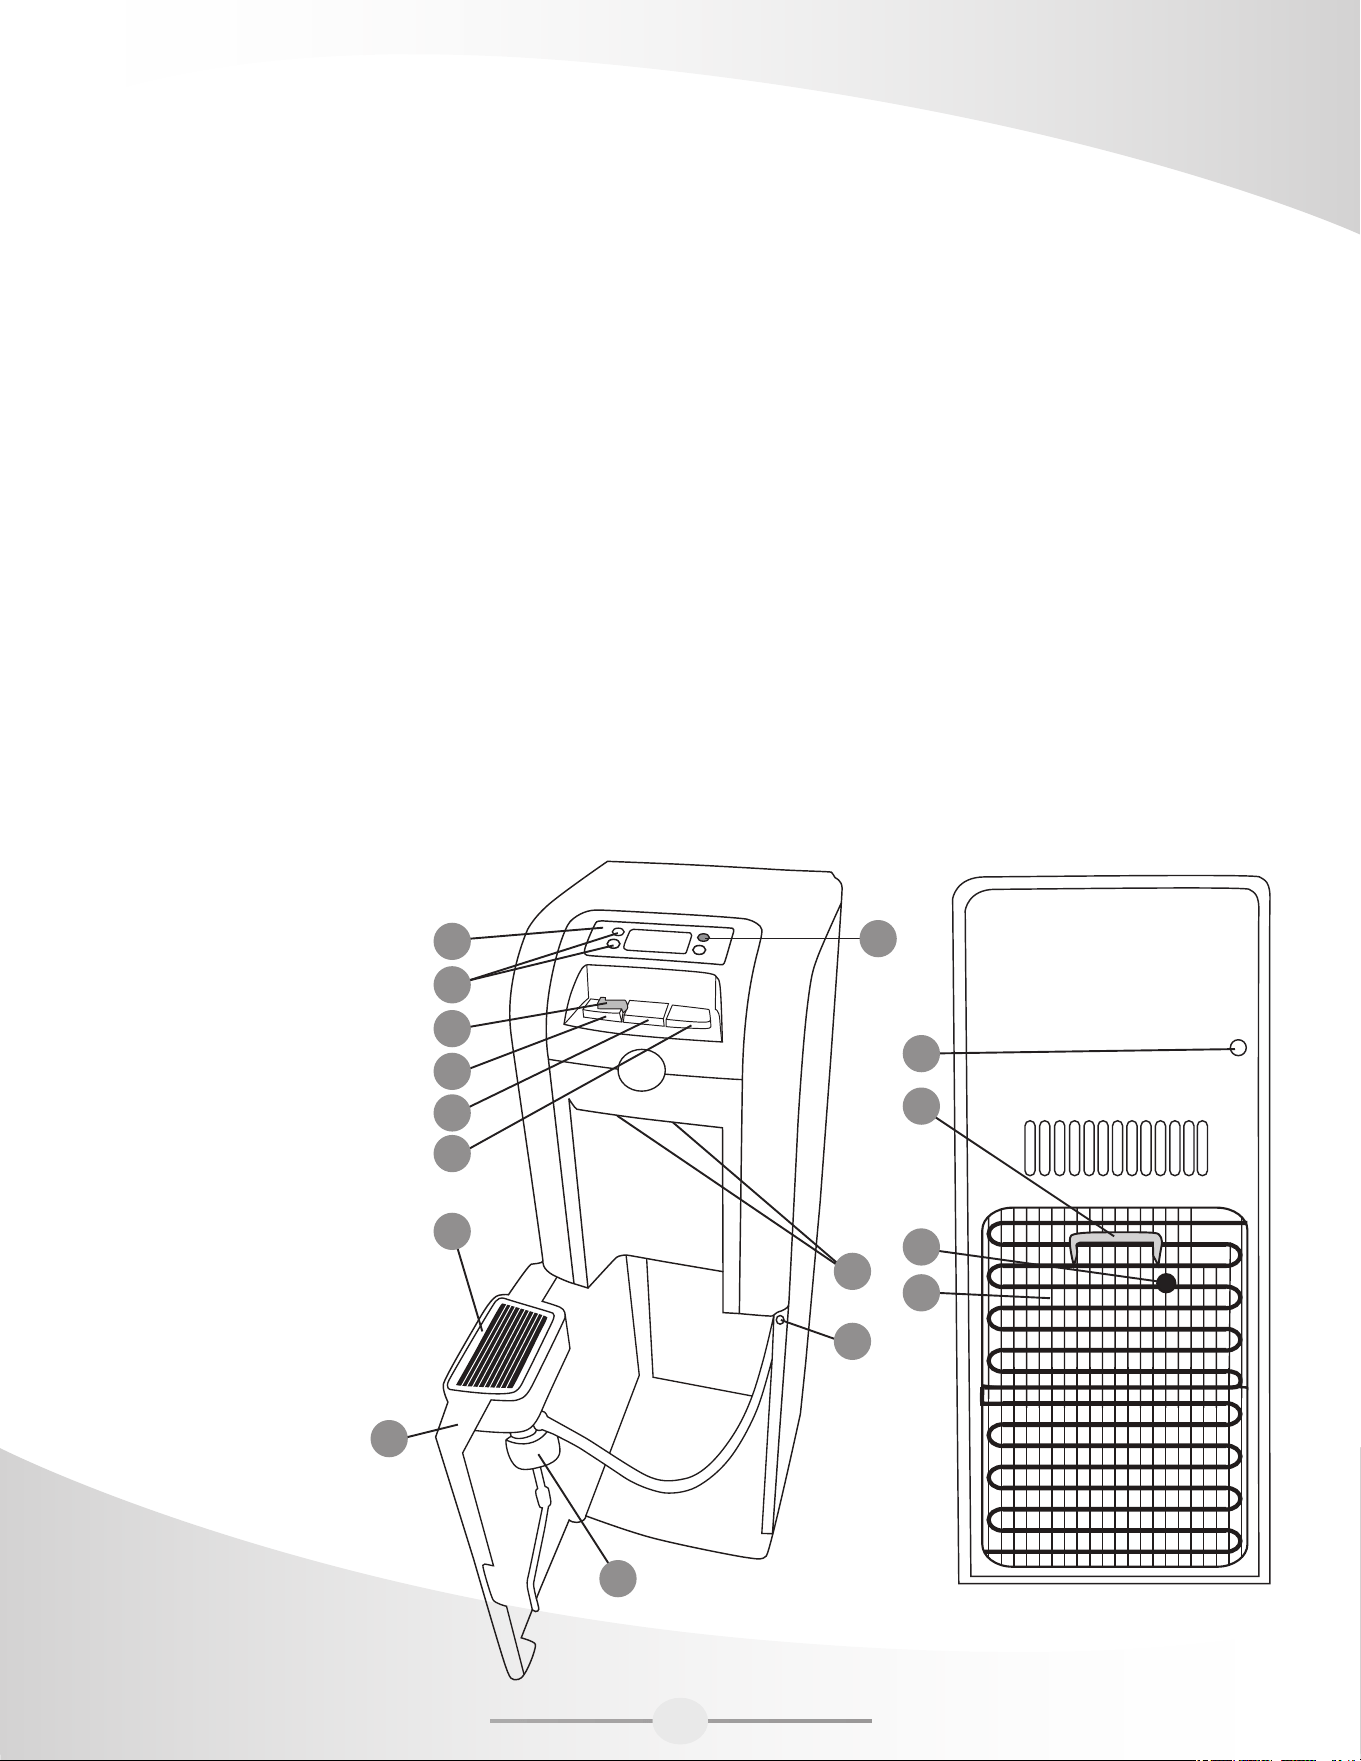
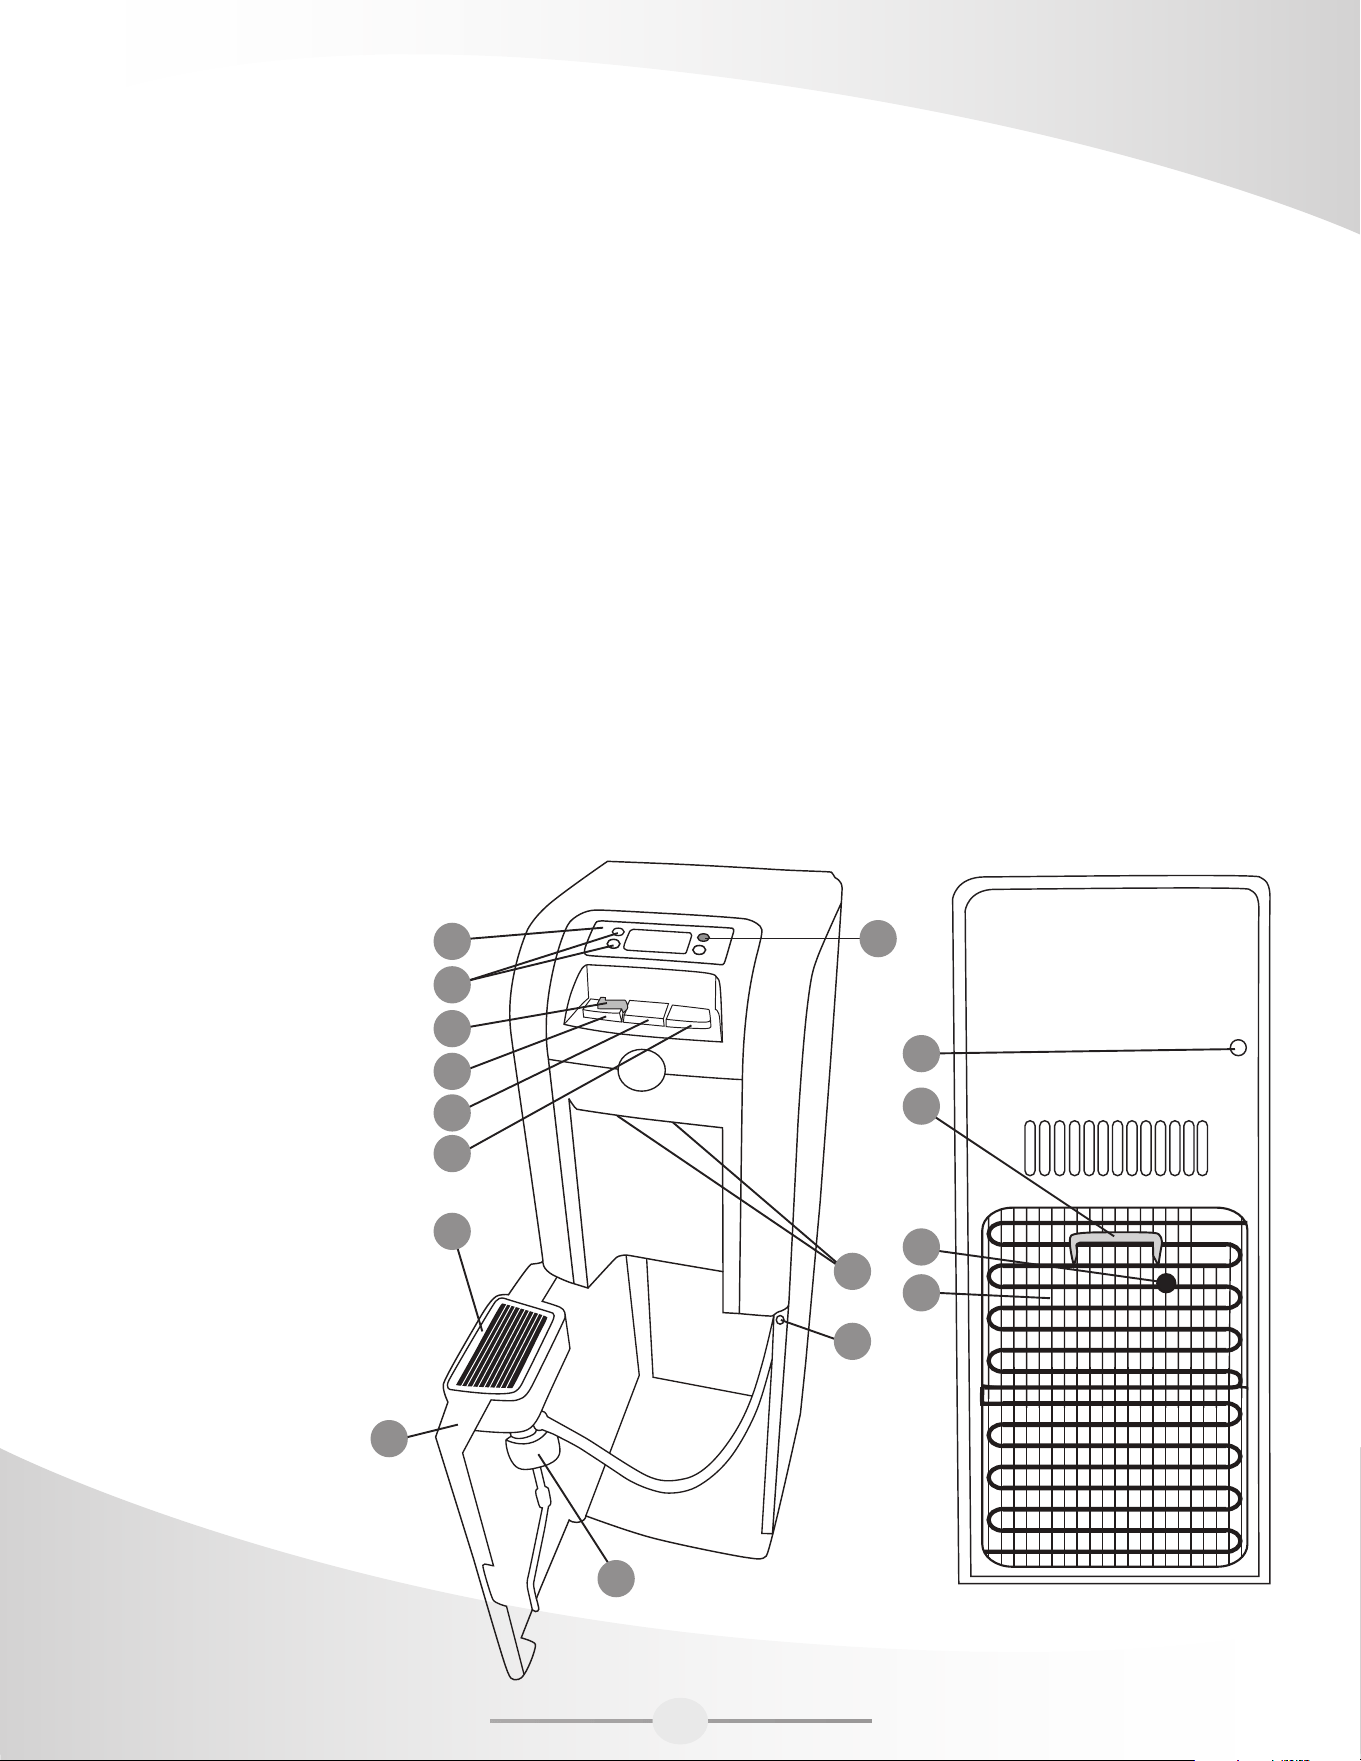
YOUR VITAPUR® WATER DISPENSER
1. Control panel
2. KettleFeature(on/off)activationbutton
3. Ready-to-dispenseindicatorlights
RedLight:“Flashing”= Heater(hotwatertank)isoperational
R e d L i g h t : “ S t e a d y O n ” = T h e h o t w a t e r h a s r e a c h e d o p t i m u m t e m p e r a t u r e a n d i s r e a d y f o r d i s p e n s i n g .
RedLight:“Off”= Hotwatertankheatingsystemisoff,howeverwaterwithinthetankmaystillbeveryhot,
alwaysexercisecautionwhendispensingand/ordrainingwaterfromthehotwatertank.
B l u e L i g h t : “ S t e a d y O n ” = T h e c o l d w a t e r h a s r e a c h e d o p t i m u m t e m p e r a t u r e a n d i s r e a d y f o r d i s p e n s i n g .
BlueLight:“Off”= Thecoolingcycleisinprogress,itispossibletodispensewaterduringthecooling
cycle, however, optimum cooling temperature may not yet be achieved.
YellowLight:“Flashing”= Lowwaterlevelinsideinternalreservoir,waterbottleempty.
YellowLight:“Off”= Thestatusofallwaterlevelsarenormal.
4. Child resistant safety switch
5. Hotwaterdispensingbutton
6. Room temperature water dispensing button
7. Cold water dispensing button
8. Removable drip tray
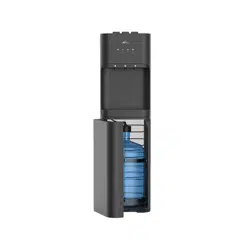
9. Lowerdoor(bottlestoragecompartment)
10. Water dispensing spigots
11. Stainlesssteelstraw(waterbottle)
12. DoorSwitch(Controlswaterpumpoperation)
13. Adjustable“cold”waterthermostat.
(Note:hotwatertemperatureisfactory
set and cannot be adjusted)
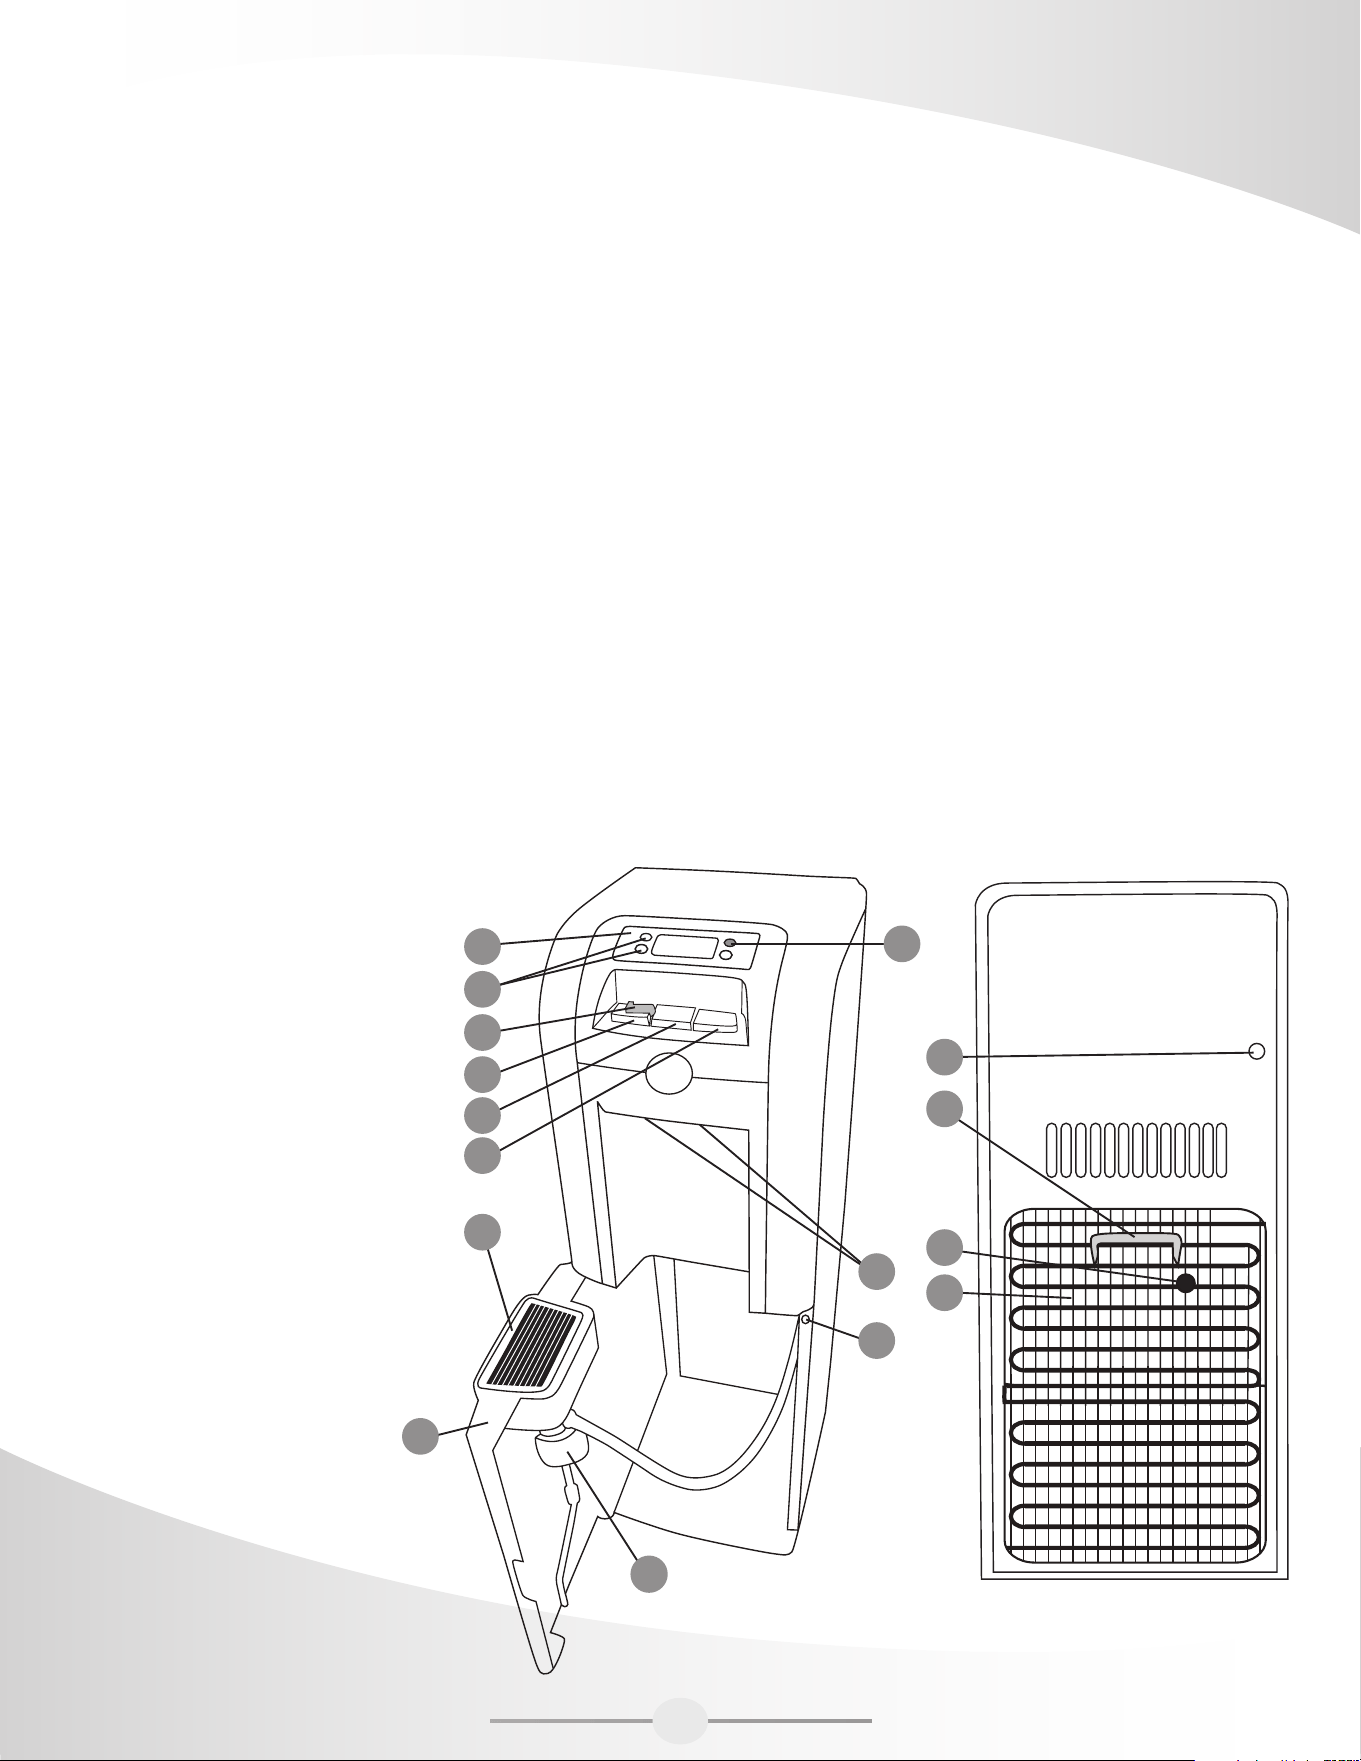
14. Carry handle
15. Drain valve
16. Condenser coil
2
1
4
5
6
7
8
9
3
2
10
13
14
15
16
12
11

OPERATING INSTRUCTIONS
Initial Product Cleaning Procedure
Likemostappliances,yourwaterdispenserrequiresperiodicmaintenanceformaximumefciencyandperformanceand
mustbecleanedonaregularbasis(i.e.every4months).Tomaintainahygienicenvironmentwithinyourwaterdispenser
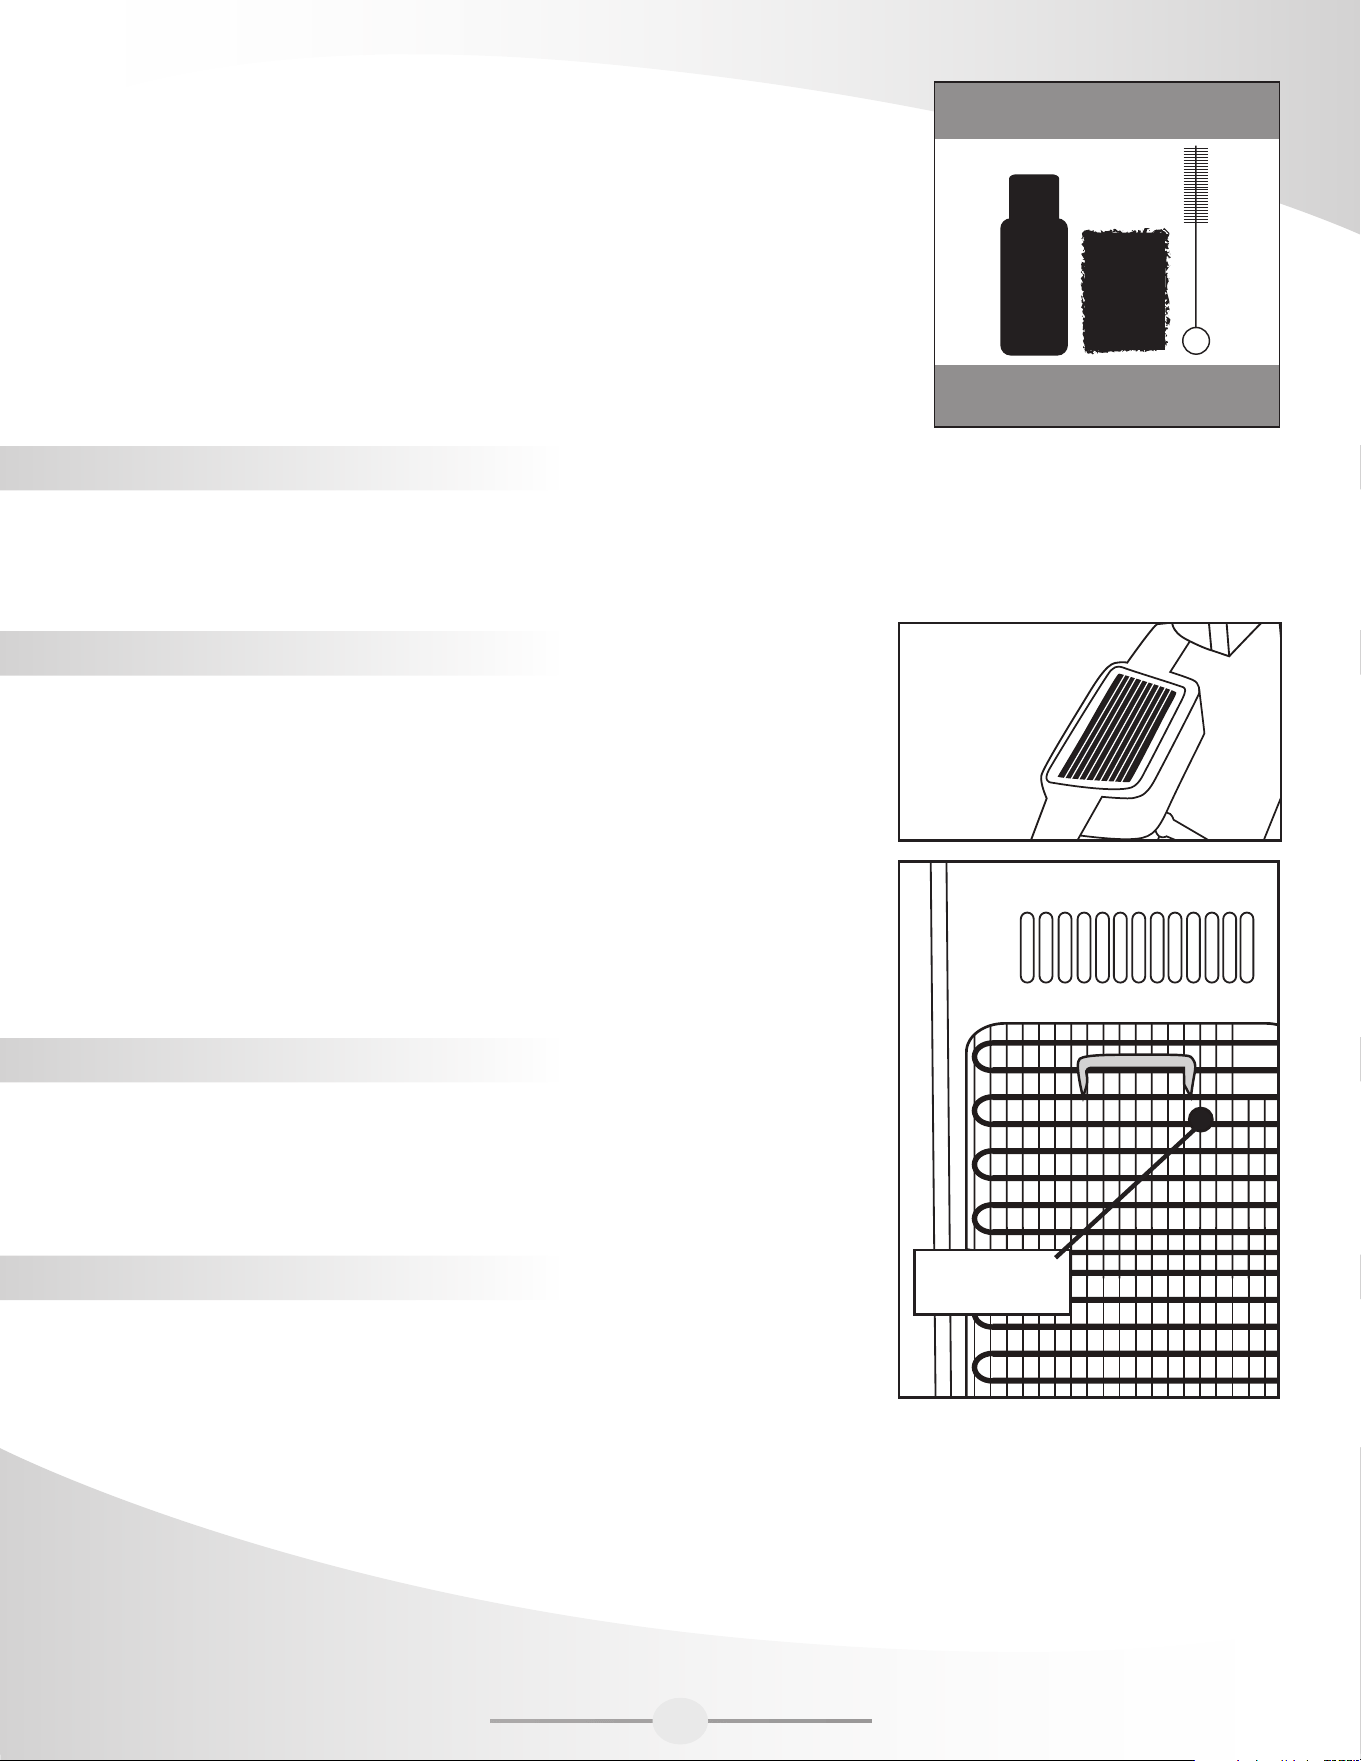
and prevent potential formation (growth) of bacteria, we strongly recommend regular cleaning. A cleaning kit is available
throughourCustomerServiceDepartmentat1-866-253-0447 or can be ordered on line
at www.greenwayhp.com.
1. Makesurethelowercompartmentstoragedooris“open”
(this will prevent activation of the water pump).
2. Make sure the power cord is plugged into electrical outlet.
3. Usingacleanjug/containerpre-mix(50ml/1.7ozs)waterdispenser
cleanerwith2L/0.5galofhotwater.Placethejug/containerontheoor
ofthebottlestoragecompartment.Insertthestainlessstrawintothe
cleaningsolution,(makesurethejug/containerdoesnottipover)andclose
the storage door. The water pump will start automatically and draw the
cleaning solution into the dispenser reservoirs. When all of the cleaning
solution has been drawn, the pump will continue to operate for
approximately20secondsandstopautomatically,followedbyaashing
yellowlight(addwater)condition(thisisnormal).Simplyopenthestorage
doortocanceltheashingyellowlight.Allowthecleaningsolutiontositinsidethedispenserfor20minutes.
4.Placeajug/containerunderthedispensingspigotsandpressboththehotandcolddispensingbuttonsuntilthe
cleaningsolutionstopsowing.Discardcleaningsolution.
5.Usingajug/container,draintheremainingcleaningsolutionfromtheinternalreservoirsbyunscrewingthedraincap
and removing the drain plug from the drain valve located at the back of the unit. Discard the cleaning solution.
6.Re-installthedrainpluganddraincapontheunitandushthesystemusing2Lcleanwateronly(nocleaning
solution)followingthesamebasicstepsoutlinedabove.(Seestep#3)Placejug/containerunderdrainvalveand
removedraincapanddrainplugallowingrinsewatertodrain.Whentherinsewaterstopsowing,re-installthe
drain plug and drain cap and tighten. The cleaning process is now complete.
Installing the Water Bottle
IMPORTANT: Always wash your hands first before handling water bottle! Clean the top of the water bottle with a
clean cloth. Water bottles can be purchased from your local retailer.
1. Make sure the lower door (bottle storage compartment) is open. The water pump cannot operate as long as the
door is in the open position.
2. Remove the protective label from the top of the bottle.
3. Most water bottles have a puncturable membrane in the top cap. To puncture the membrane, insert the straw into
thecapandpushdownwarduntilthemembraneopens.Insertthestrawallthewayintothebottleuntilthebottom
ofthestrawtouchesthebottomofthewaterbottle.NOTE:Thewaterbottledrinkingstrawfeaturesanexclusive
telescopicdesignforusewitheither18.9L(5gal)and11.4L(3gal)waterbottles.(SeeFig.1&Fig.2)Toadjustthe
lengthofthewaterbottledrinkingstraw,holdtheupperportionofthestrawandsimplypull/pushthelowerportion
of the straw to the desired length.
4. Toattachthewaterbottlestrawontotheneckofthewaterbottle,makesurethehandleispositioned“horizontally”
andpressrmlyontothetopofthebottleneck.(SeeFig.3)Whenthehandleisinthe“vertical”(locked)position,
(SeeFig.4)itispossibletolift/carrythewaterbottle.However,wheninstallingthe18.9L(5gal)waterbottleinside
thestoragecompartment,thehandlemustbeinthe“horizontal”position.(SeeFig.3)
Cleaning Kit
Available online at
www.greenwayhp.com
3

IMPORTANT: DO NOT BREAK OR REMOVE THE SEAL FROM AROUND THE NECK OF THE WATER BOTTLE,
(See Fig. 5) OTHERWISE YOU WILL NOT BE ABLE TO LIFT/CARRY THE WATER BOTTLE WITH THE CARRY
HANDLE. (See Fig. 6)
5. To install the water bottle inside the bottle storage compartment, simply position the bottle in front of storage
compartment ramp and (push) slide inside using the side of your leg until the bottle comes to a stop.
6. Close the lower compartment door and the water pump will start delivering water into the dispenser automatically.
When the internal reservoirs are full, the water pump will stop automatically.
IMPORTANT NOTE: Your Vitapur® water dispenser is designed with a special "safety" feature (float switch
mechanism) that controls activation/operation of the Kettle Feature hot water tank heating system. If no water is
present and/or low water levels are detected inside the internal water reservoir, activation/operation of the
Kettle Feature hot water heating system is not possible. Likewise, if the hot water heating system is operational
and water is being drawn simultaneously causing internal water levels to drop below the established minimal
level set point, hot water tank operation is automatically suspended. To reactivate the hot water heating system,
you must replenish your water supply.
NOTE:Thewaterpumpsystemalsoincorporatesaspecialsafetyfeaturethatprevents/stopsoperationintheabsence
of water. (i.e. empty water bottle conditions) Water pump operation is also linked to a door switch system mounted inside
the lower storage compartment.
i.e.Dooropen=pumpoperationsuspended.
Doorclosed=normalpumpoperation.
Dispensing Room and Cold Water
Placeaglassunderthedispensingspigotontherightsideofthewateroutletpanel.Forcoldwater,press/hold
dispensingbutton(#7)untilthedesiredamountofwaterisdispensedandrelease.Forroomtemperaturewater,
press/holddispensingbutton(#6)untilthedesiredamountofwaterisdispensedandrelease.
4
FIG. 1. 11.4L (3gal) bottle
FIG. 5. Water bottle seal in tact
CORRECT INCORRECT
FIG. 6. Water bottle seal removed
FIG. 2. 18.9L (5gal) bottle FIG. 3. Handle Open FIG. 4. Handle Closed
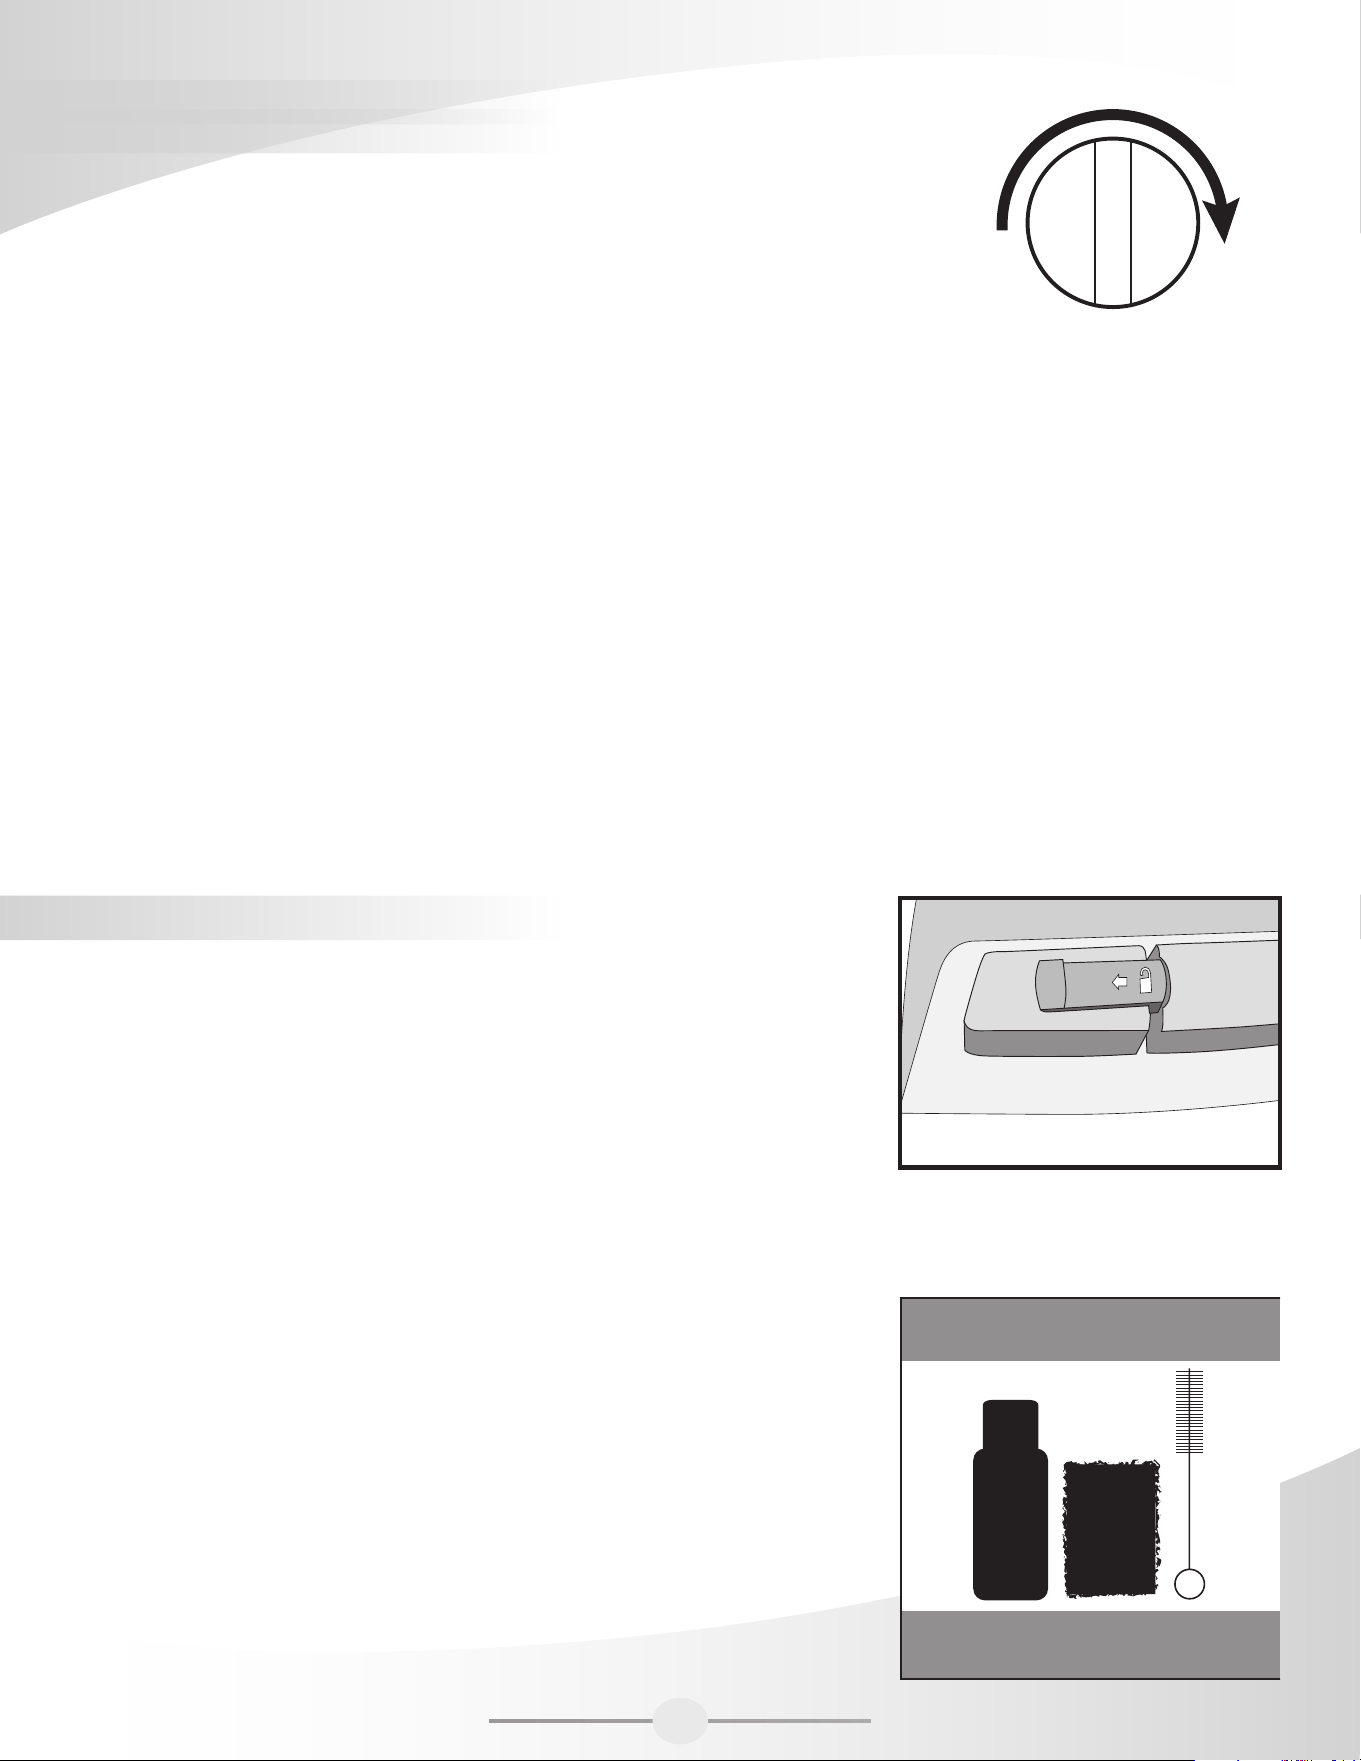
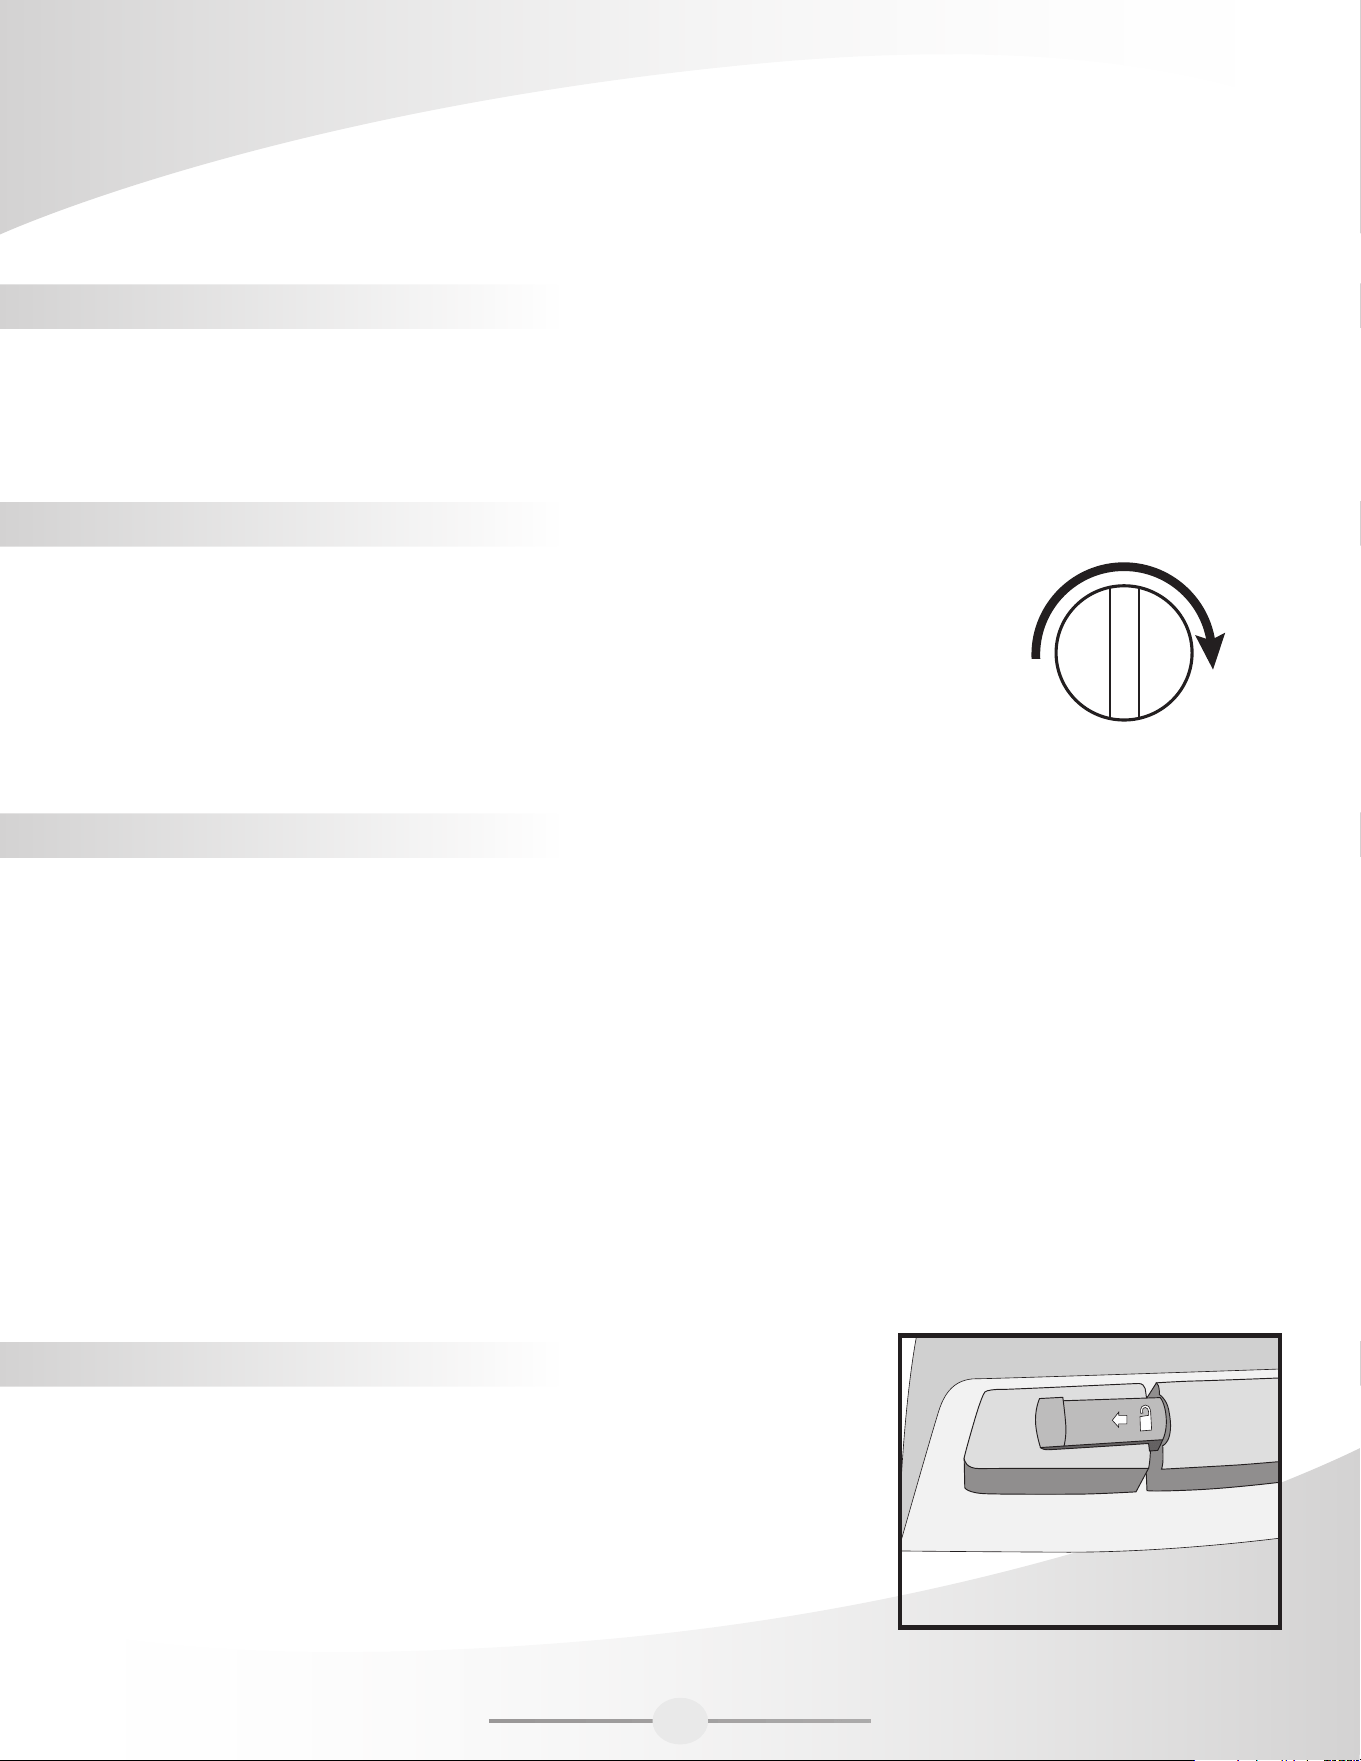
Adjusting the Temperature (Cold water only)
By turning the thermostat at the back of the unit, the temperature can be adjusted.
Turn the dial clockwise between the high (cool) and low (colder) levels until the
desiredtemperatureisreached.Ifthewaterdispenserisnotdispensingwater,there
couldbeapossibleicebuildupduetothethermostatbeingsettoocold.Ifthis
happens,unplugthedispenserovernightandthenreset.Setthermostattohigh,
slowly increasing based on your use and need for cold water.
Dispensing Hot Water
TheKettleFeaturedispensingsystemonthisunitisdesignedtosaveenergyandmoney.
Conventionalhotwaterdispensingsystemsoperate24/7regardlessofwaterusage.The
(ondemand)KettleFeatureactivatesthehotwatersystem"only"whentheKettleFeature(red)buttonisactivated
deliveringsteaminghotwaterinlessthan3minutes.
Tostop/canceltheKettleFeatureduringacycle,simplypresstheKettleFeaturebuttonasecondtimeandtheredLED
lightwillstopashing.
IMPORTANT NOTE: Your Vitapur® water dispenser is designed with a special "safety" feature (float switch
mechanism) that controls activation/operation of the Kettle Feature hot water tank heating system. If no water is
present and/or low water levels are detected inside the internal water reservoir, activation/operation of the Kettle
Feature hot water heating system is not possible. Likewise, if the hot water heating system is operational and
water is being drawn simultaneously causing internal water levels to drop below the established minimal level set
point, hot water tank operation is automatically suspended. To reactivate the hot water heating system, you must
replenish your water supply.
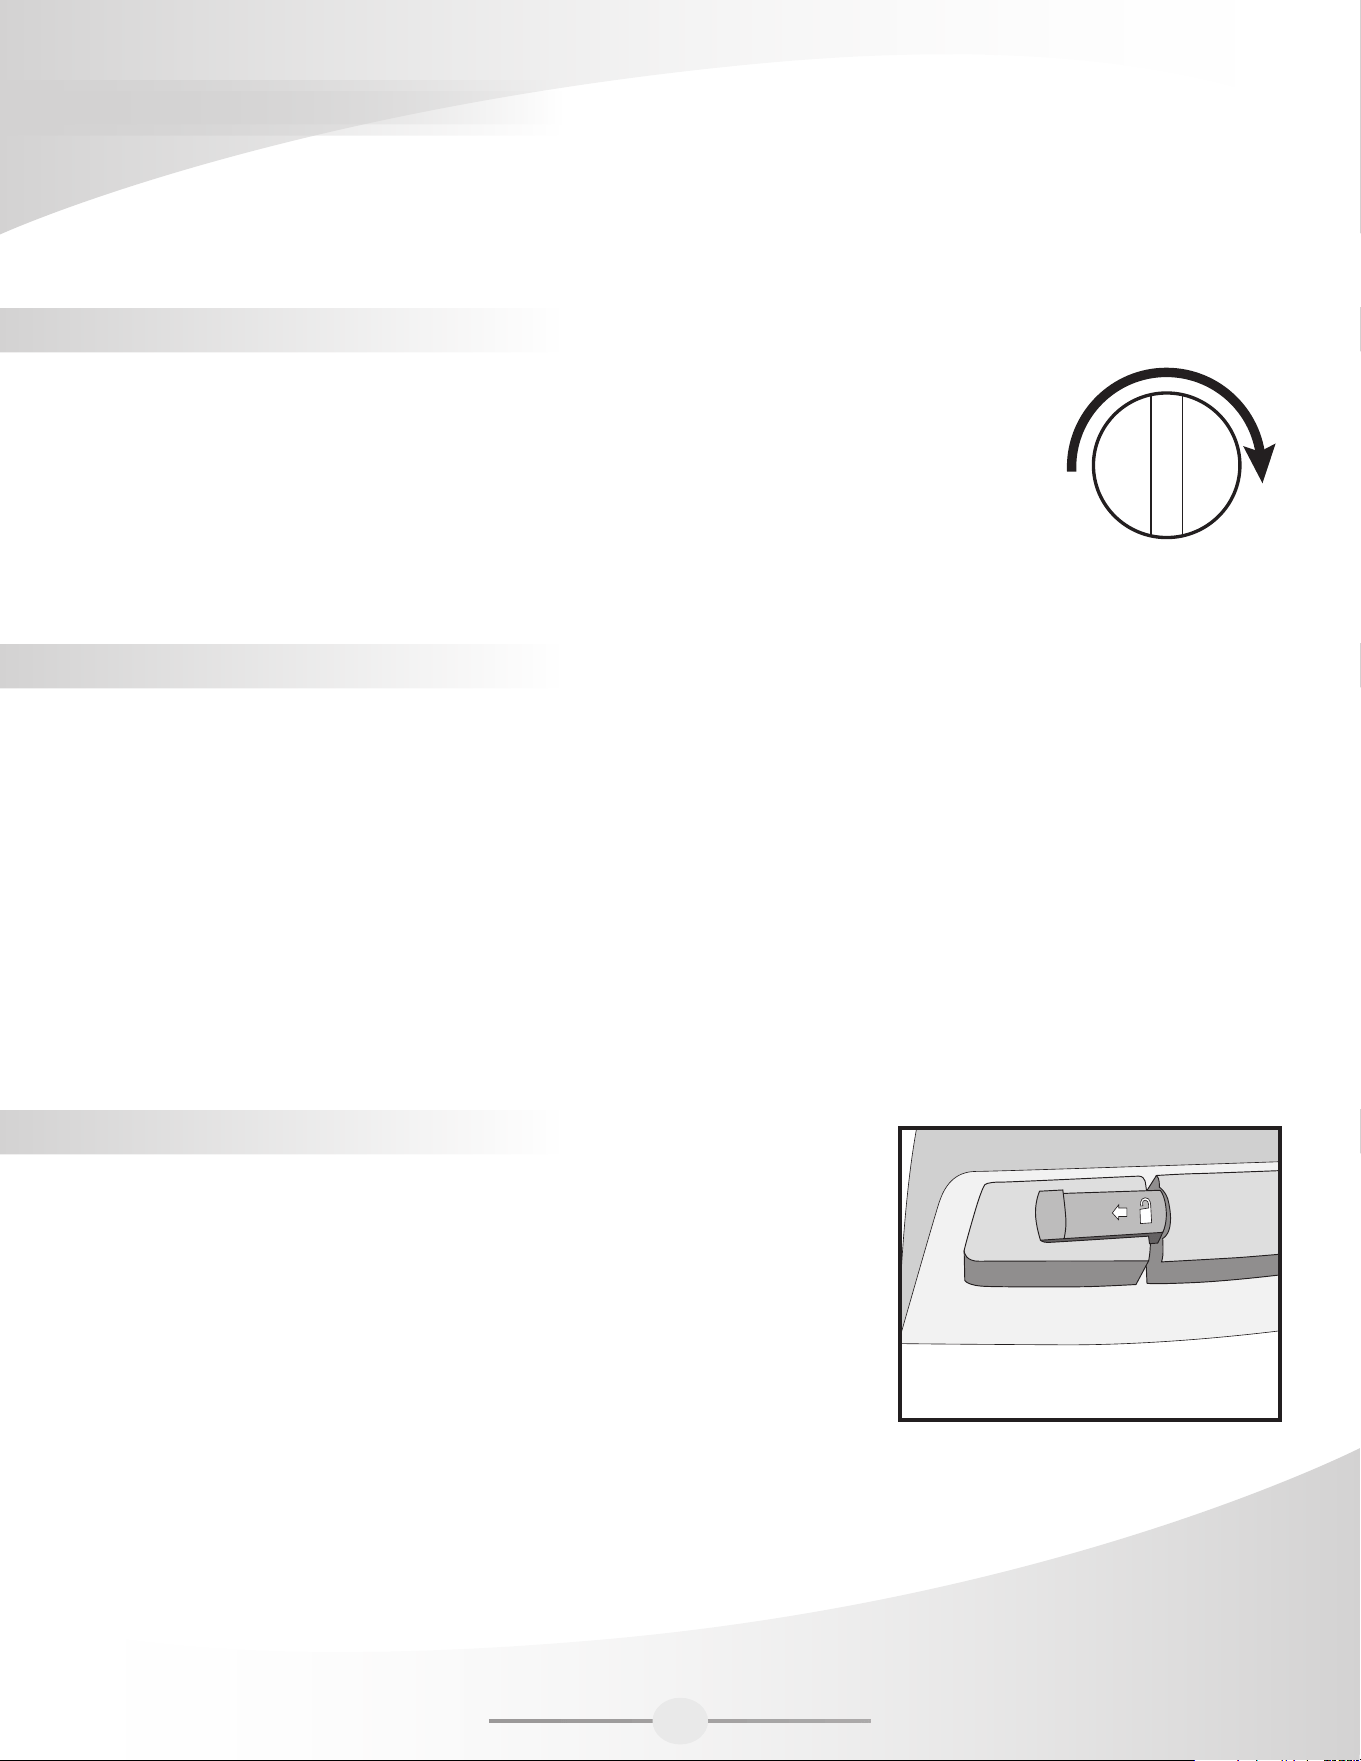
Child Resistant Safety Switch
To prevent hot water from being dispensed accidentally and possible harming
a child, the hot water dispensing button can only be operated when the child
resistant safety switch is activated. To dispense hot water, push the child safety
switch sideways, (in the direction of the arrow located on the switch) from
right to left, then depress the hot water button until the desired amount of hot
water is dispensed. Upon releasing the hot water button, the child safety lock
automaticallyreturnstothelockedposition.(gure7)
DANGER: The hot water is heated to approximately 194˚ F / 90˚C. Temperatures above 125˚ F / 52˚ C can cause
severe burns from scalding. DO NOT ALLOW CHILDREN TO USE THE HOT WATER DISPENSING
BUTTON WITHOUT PROPER AND DIRECT SUPERVISION.
CLEANING AND MAINTENANCE
Likemostappliances,yourwaterdispenserrequiresperiodicmaintenancefor
maximum efficiency and performance and must be cleaned on a regular basis
(i.e.every4months).Tomaintainahygienicenvironmentwithinyourwater
dispenser and prevent potential formation (growth) of bacteria, we strongly
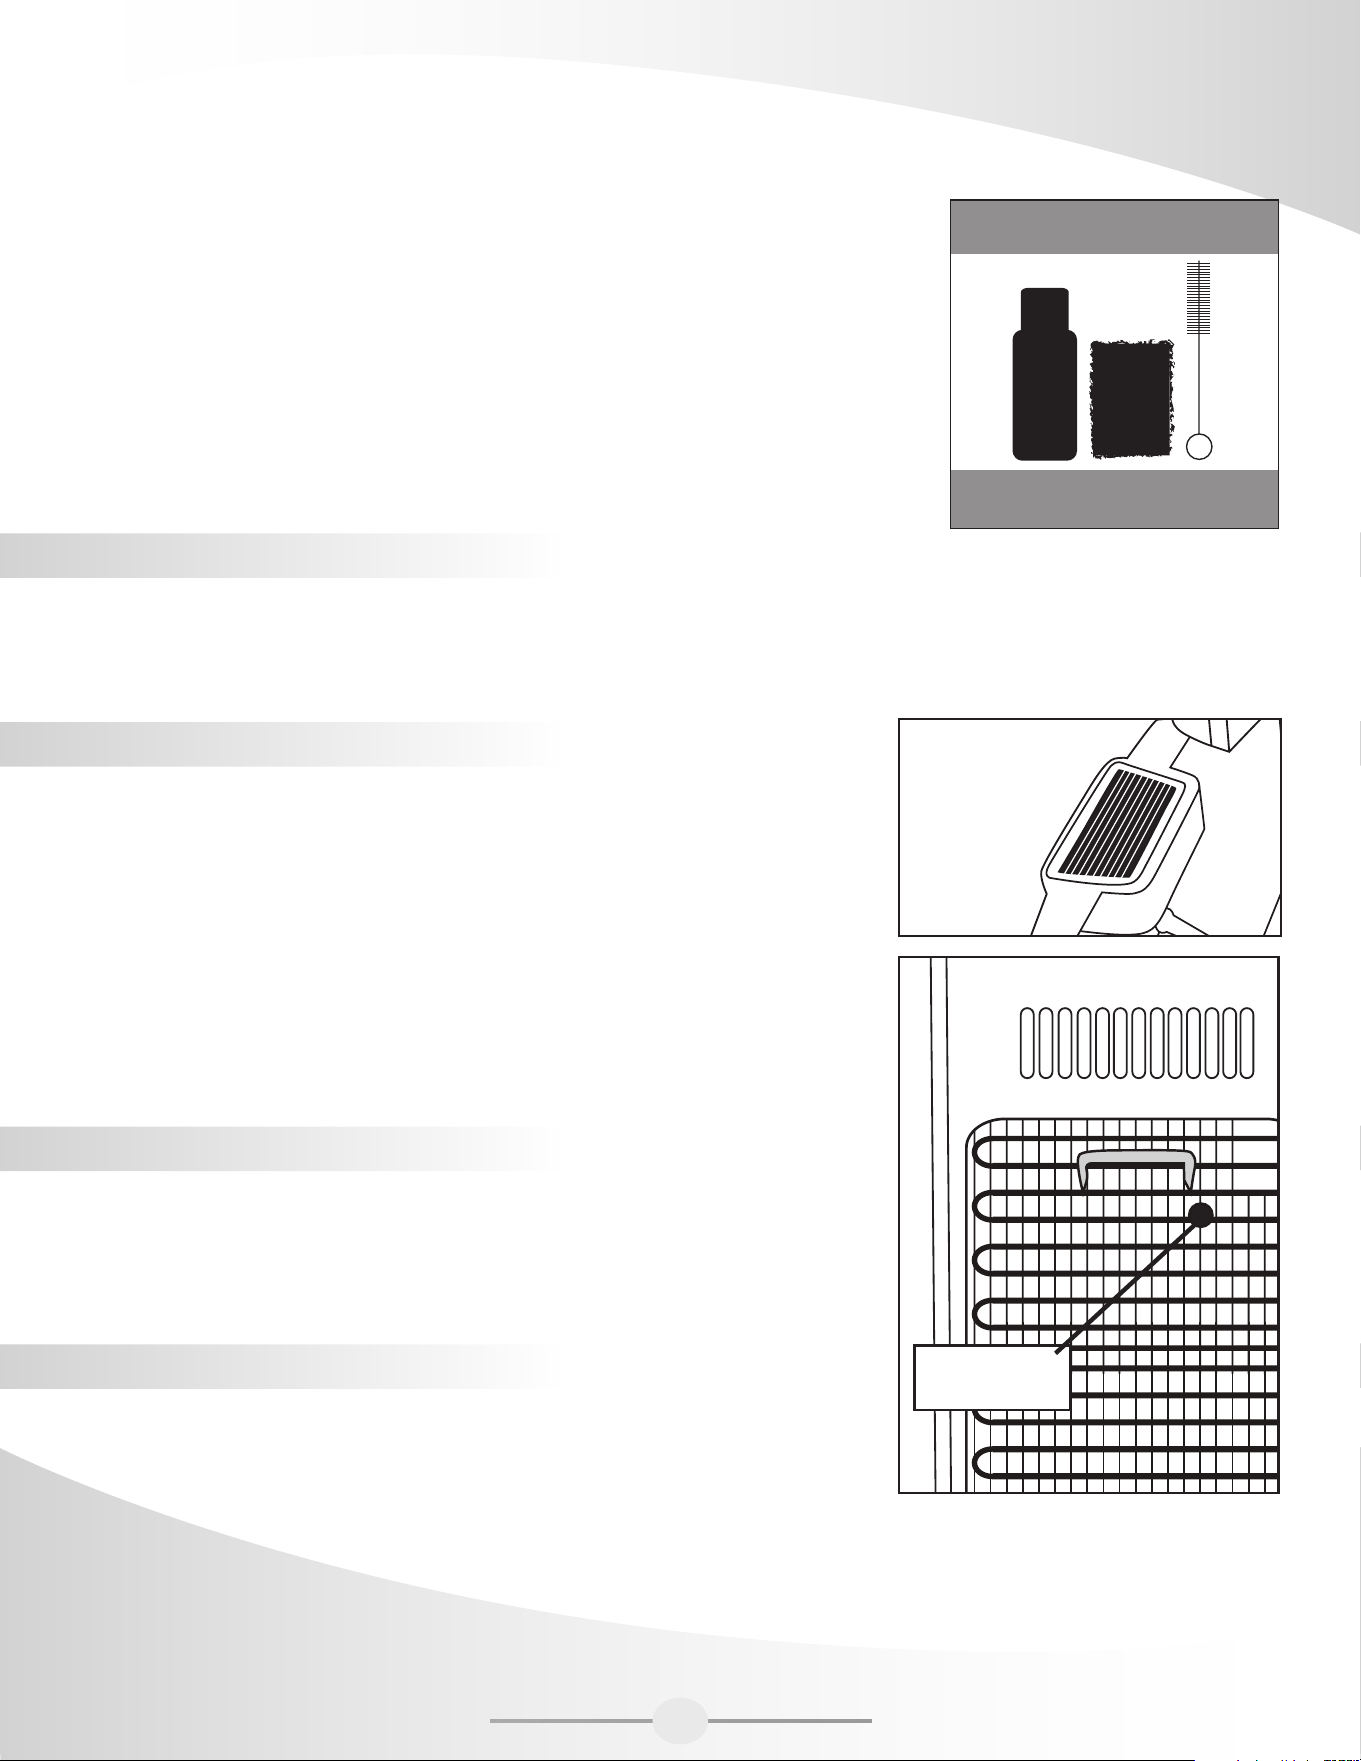
recommend regular cleaning. A cleaning kit is available through our Customer
ServiceDepartmentat1-866-253-0447 or can be ordered on line at
www.greenwayhp.com.Pleasesee“InitialProductCleaningProcedure”and
follow instructions.
4
Cleaning Kit
Available online at
www.greenwayhp.com
5
Low
High
TEMP
COLD WATER
FIG. 7. Child Resistant Safety Switch
Cleaning the Outside of the Water Dispenser
The outside of the dispenser can be wiped clean with a vitapur® water dispenser cleaning solution or a mild soap and
watermixture.Neveruseharshchemicalsorabrasivecleaners.Rinsethoroughlywithcleanwaterandthendrysurfaces.
Cleaning the Drip Tray
Toremovethedriptray,(Fig.8)pullthetrayforwarddislodgingitfromtheguides.
Drain and clean.
The drip tray should be emptied and cleaned regularly to remove spotting and any
mineral deposits. Clean with vitapur® water dispenser cleaning solution or a mild
soapandwatermixture.Fortoughdeposits,addvinegarandletitsoakuntilthe
deposits come loose. Then wash, rinse and dry thoroughly. To replace, put the grill
back on the tray and slide the tray onto the guides (not dishwasher safe).
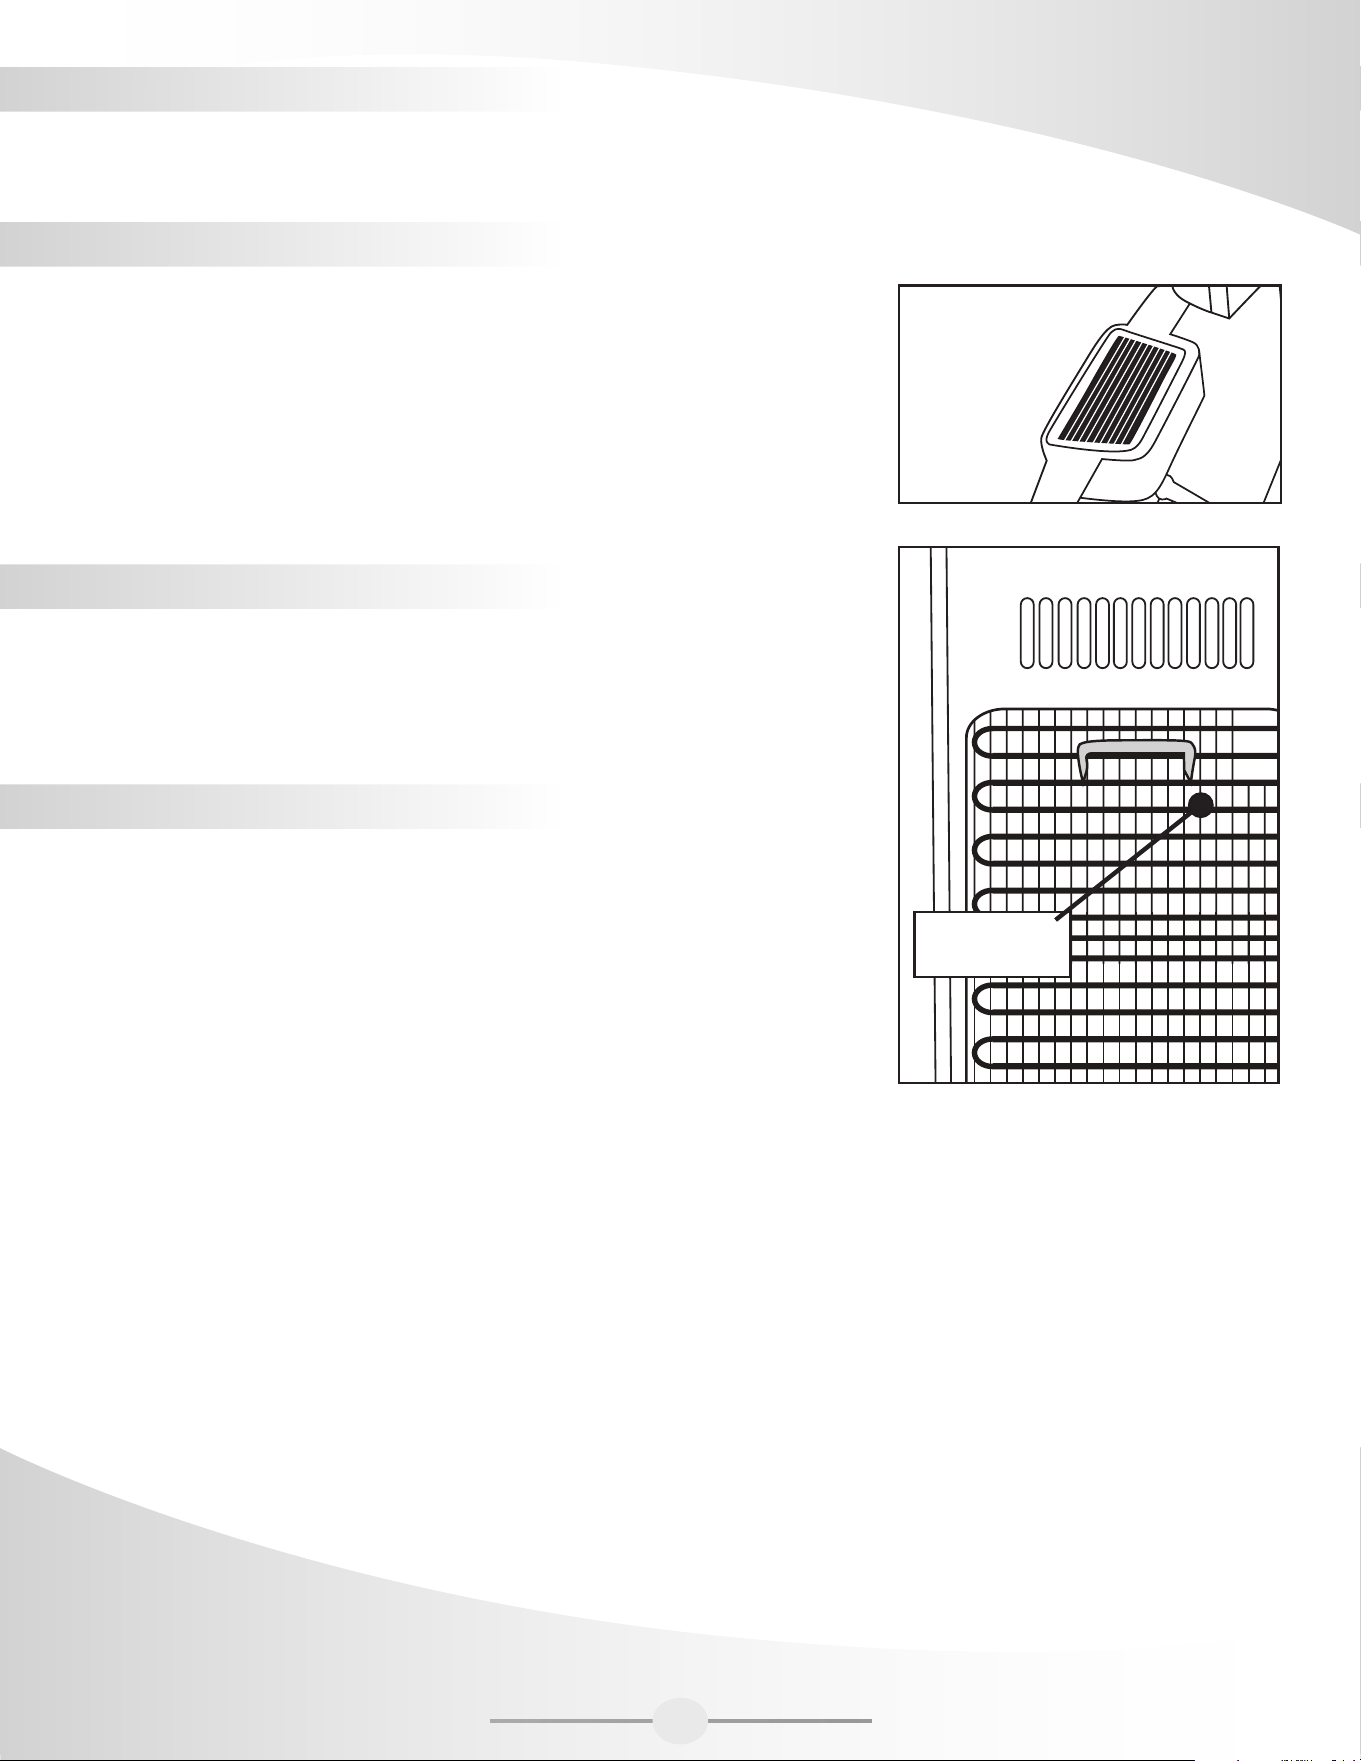
Cleaning the Condenser
Vacuum or sweep away the dust from the condenser coils at the back of the
dispenser.Forbestresults,youcanpurchaseabrushdesignedspecicallyfor
this purpose from your local appliance store. This will improve cooling
and efficiency.
Draining the Reservoirs
Drain the reservoirs before and after cleaning, when going on long vacations or
if not using the dispenser for long periods of time.
IMPORTANT! Unplug the dispenser before performing this procedure.
Dispense hot water until temperature drops to a safe level to avoid the risk
of scalding.
1. Remove the water bottle.
2. Press both dispensing taps until water no longer comes out.
3. Place a bucket beneath the drain valve on the back of the dispenser.
4. Removethecapandplugfromthedrainvalveandletthewaterowintothebucket.Replacethecapandplug.
IMPORTANT: Collect the water in a container, not the drip tray.
5. Replace the water bottle (see Installing the Water Bottle).
Going Away on Vacation
When not using the dispenser for long periods of time or when going on vacation, conserve energy, unplug the dispenser
and drain the reservoirs (see Draining the Reservoirs).FollowInitialProductCleaningProceduresuponreturnand
startup of the dispenser.
56
FIG. 8. Drip tray
and Grill
Drain Valve

TROUBLESHOOTING TIPS
Problem Possible Cause Suggested Solution
Water dispenser
is leaking
Drain cap and silicone seal are not secure. Ensure seal is secure in drain plug and
tighten drain cap.
Water is not hot or cold
enough
All the water in the tank has been used.
Replacewithfullbottleandwait;60minutesfor
watertocool,3minutesforwatertoheat(after
activating"Kettle"featurebutton).
The unit is unplugged. Plug it into the outlet.
"Kettle"Featurewasnotactivated. Activate"Kettle"Featurebypressingthebutton.
The circuit breaker in your home is
tripped or the fuse has blown.
Reset the breaker or replace the fuse.
Temperature limit tripped. Allow the temperature of the hot water tank to cool
forapproximately15-30minutes.Thetemperature
limitthermostatwillre-setautomaticallyonce
sufficiently cooled, and the cooling system will
reactivate automatically. To operate the hot water
system,presstheInsta-Hotbutton.
Thermostat needs to be adjusted colder. Adjust thermostat between high (cool) and low
(colder) levels to achieve desired temperature.
Water dispenser is not
dispensing water
Empty water bottle. Replace with full bottle.
Mineral deposits clogging tanks.
SeeCleaningtheReservoirs.
Possible air pocket. Push down on the dispenser buttons to prime
the unit.
Possible ice build up due to thermostat set too
cold.
Unplugovernight,thenreset.Setthermostatto
high, slowly increasing based on your use and
need for cold water.
Water dispenser is noisy
Bottle making a gurgling noise as it fills the tank. This is normal.
Water dispenser is uneven. Make sure the dispenser is on an even
surface that can support its full weight.
6 7

Retailer: ModelNumber:
SerialNumber: DateCode:
Purchase Date:
Warranty
DO NOT RETURN THIS PRODUCT TO THE STORE:
PleasecontactCustomerServiceat:1-866-253-0447 or [email protected]
GreenwayHomeProductswarrantsyourwaterdispensertobefreefrommanufacturer’sdefectsinworkmanshipormaterialundernormal
operating conditions for one (1) year from the original date of purchase. This warranty applies only in the country in which it is sold, and is
availabletotheoriginalpurchaseronly.Thiswarrantyisnon-transferable.
ThiswarrantyandtheCSAInternationallistingforthiswaterdispenserarevoidifthewaterdispenserisaltered,modified,orcombined
withanyothermachineordevice.Alterationofthiswaterdispensermaycauseseriousfloodingand/orhazardouselectricalshockorfire.
The provisions of this warranty shall not apply to the following:
• Waterbottles.
• Servicetripstoyourhometoteachyouhowtousetheproduct.
• Improperinstallation,delivery,ormaintenance(failuretomaintaintheproductaccordingtotheinstructionsoutlinedintheproduct
manual will automatically void the warranty).
• Failureoftheproductifitisabused,misused,altered,usedcommercially,orusedforotherthantheintendedpurpose.
• Productsthatareusedoutsidearesidentialorofficeenvironment.
• Replacementofhousefusesorresettingofcircuitbreakers.
• Useofthisproductwherewaterismicrobiologicallyunsafeorofunknownquality.
• Damagetotheproductifusedtodispenseanythingotherthanwater.
• Damagetotheproductcausedbyaccident,fire,floods,oractsofGod.
• Anyservicetotheproductbyunauthorizedpersonnel.
• Incidentalorconsequentialdamagecausedbypossibledefectswiththisappliance,itsinstallationorrepair.
ThiswarrantyshallbefulfilledatanauthorizedGreenwayRepairFacility.Allwarrantyrepairsmustbepre-authorizedbyGreenwayHome
Products. Greenway will, at its option, repair or replace free of charge any defective part, where the Purchaser has notified their Retailer or
GreenwayHomeProductswithinthewarrantyperiod.TheobligationofGreenwayHomeProductsunderthiswarrantyisexpresslylimited
to such repairs or replacement. This warranty does not cover the freight costs to and from the authorized repair facility.
Except as set forth herein or required by law, the Manufacturer makes no other warranty, guarantee, or agreement, express, implied,
or statutory including any implied warranty of merchantability or fitness for a particular purpose. The manufacturer does not assume or
authorizeanypersontoassumeanyobligationsofliabilityinconnectionwiththiswaterdispenser.Innoeventwillthemanufacturerbe
liable for indirect, special, or consequential damages (including, without limitation, economic loss) or for any delay in the performance of
this agreement due to causes beyond its control.
Somestatesorprovincesdonotallowlimitationsonhowlonganimpliedwarrantylasts,sotheabovelimitationmaynotapplytoyou.
Somestatesorprovincesdonotallowtheexclusionorlimitationofincidentalorconsequentialdamages,sotheabovelimitationor
exclusion may not apply to you. This warranty gives you specific legal rights, and you may also have other rights which vary from state to
state or from province to province.
Ifyourequireservice,pleasefirstseethe“Troubleshooting”sectionofthismanual.Additionalassistancecanbefoundbycheckingour
websiteatwww.greenwayhp.com,orbycallingourcustomerservicelineat1-866-253-0447,MondaytoThursdayfrom8:30AMto5:00
PM(EST),Fridayfrom8:30AMto4:00PM(EST),orwrite:GreenwayHomeProducts,CustomerServiceCenter,400SouthgateDrive,
Guelph,ON,CanadaN1G4P5orGreenwayHomeProducts,1270FlagshipDrive,Perrysburg,OH,USA43551.
Keepthismanualandyoursalessliptogetherforfuturereference.Youmustprovideproofofpurchaseforin-warrantyservice.
Write down the following information about your water cooler to better help you obtain assistance or service if your ever need it. You will
need to know your complete model number and serial number. You can find this information on the back of the water dispenser.

Mercipourl’achatd’unDistributeurd’EauVitapur(MonterauFond).Cetteconceptionuniqueoffrelesavantagessuivant:
-Plusàsouleverdesbouteillesd’eaulourde
-Aucundéversementaccidenteld’eaulorsdel’installationd’unebouteilled’eau
-Plusàregarderdesbouteillesd’eaurecyclées
S'ilvousplaîtlirelesinstructionsci-jointd'exploitationetconservezsoigneusementcemanuelpourfutureréférence.Nousavons
conçuavecsoinvotredistributeurd'eauVitapurpourvousdonnerdesannéesdeplaisiretunfonctionnementsanspanne.
PRÉCAUTIONS IMPORTANTES
AVERTISSEMENT: Ce distributeur d'eau est conçu pour des applications d'intérieur seulement.
Ne pas employer dehors.
NOTE IMPORTANTE : Votre distributeur d'eau Vitapur® est équipé d'une caractéristique de sécurité spéciale
(contacteur à flotteur) qui contrôle l'activation et le fonctionnement du chauffe-eau du réservoir Bouilloire. S'il n'y
a pas d'eau ou si le niveau d'eau est bas dans le réservoir interne, l'activation et le fonctionnement du système
Bouilloire sont désactivés. De même, si le chauffe-eau fonctionne et que le niveau de l'eau tombe simultanément
sous le niveau minimal prescrit, le fonctionnement du système est automatiquement interrompu. Pour réactiver le
chauffe-eau, vous devez ajouter de l'eau au réservoir.
• Neretournezjamaisledistributeurd’eauetnel’inclinezpasàplusde45degrés.Sil’appareilestrestésurlecôtépendant
unlongmoment,placezledistributeurd’eauàlaverticalependant12heuresenvironavantdelebrancher.
• Doitêtreutiliséavecdesbouteillesd’eaude3oude5gallons(12ou19litres).
• N'employezjamaiscedistributeuravecuneeauquin’estpeut-êtrepaspotableouquiprovientd'unesourceinconnue.
• N'employezjamaisdansledistributeurd’autresliquidesquedel’eauenbouteilleconnueetmicrobiologiquementsûre.
• Nepermettezjamaisauxenfantsdedistribuerdel'eauchaudesanssurveillanceappropriéeetdirecte.
• Cedistributeurd'eauauneprised’alimentationélectriqueavecmiseàlaterrepourassurervotresécurité.
• N'employezpasderallongeélectriqueavecvotredistributeurd’eau.
• Conservezvotredistributeurd’eauàunendroitsecetnonexposéauxrayonssolairesdirects.
• Neplacezjamaisdematièreinammableàproximitédudistributeur.
• Laissezaumoins2po(5centimètres)derrièreledistributeuretsurlescôtéspouravoiruneventilationappropriée.
• Installeztoujoursledistributeurd’eausurunesurfaceauniveauquipeutsoutenirtoutsonpoids.
• Débrancheztoujoursledistributeurd’eauavantd’enfairel'entretien.
• Unnettoyagerégulierdevotredistributeurd’eauestnécessairepourquelagarantiesoitapplicable.Veuillezsuivreles
instructionsdenettoyagedecemanueletnettoyerledistributeurtousles4mois.
INSTRUCTIONS DE MISE À LA TERRE
• Uneutilisationinadéquatedelachedemiseàlaterrepeutentraînerdes
chocs électriques, pouvant ainsi causer des blessures graves, voire la mort.
• Cetappareildoitêtremisàlaterre.Encasdecourt-circuit,lamiseàlaterreréduitlesrisquesdechocsélectriquesen
procurantunchemind'évacuationducourant.
• Cetappareilestdotéd'uncordond'alimentationmunid'unconducteurdemiseàlaterreetd'unechemiseàlaterre,et
doitêtreraccordéàuneprisepolariséecorrectementmiseàlaterre.Faitesappelàunélectricienqualiésivousne
comprenezpasparfaitementlesinstructionsdemiseàlaterreousivousavezdesdoutessurlamiseàlaterre
adéquatedevotreappareil.Silaprisedecourantmuraleestuneprisestandardàdeuxbroches,ilvousincombedela
remplacerparunepriseàtroisbrochesmiseàlaterredefaçonadéquate.
• Necoupezetneretirezjamaislabrochedemiseàlaterreducordond'alimentation.
• N'utilisezpasunadaptateurdebranchementaveccetappareil.
• N'utilisezaucunerallongeaveccetappareil.Silecordond'alimentationesttropcourt,demandezàunélectricienqualié
d'installeruneprisedecourantàproximitédel'appareil.
1
VOTRE DISTRIBUTEUR D’EAU VITAPUR®
1. Panneaudecontrôle
2. Bouttond’activation(EnMarche/Arrêt)Bouilloire
3. LumièresindicateurPrêtàDistribuer
LumièreRouge:“Clignote”=Chauffeur(réservoird’eauchaude)estenfonction
L u m i è r e R o u g e : “ A l l u m é ” = L ’ e a u c h a u d e a a t t e i n t l a t e m p é r a t u r e o p t i m u m e t e s t p r ê t à d i s t r i b u e r
LumièreRouge:“Éteint” =Leréservoird’eauchaudeestfermé,l’eauàl’intérieurduréservoirpeutêtreencore
chaude, toujours utiliser avec prudence lorsque vous prenez de l’eau du réservoir
d’eau chaude.
L u m i è r e B l e u : “ A l l u m é ” = L ’ e a u f r o i d a a t t e i n t l a t e m p é r a t u r e o p t i m u m e t e s t m a i n t e n a n t p r ê t à d i s t r i b u e r .
LumièreBleu:“Éteint” =Lecyclederefroidissementestenfonction,ilestpossiblededistribuerdel’eaudurant
cecyclemaislatempératuredel’eaufroideneseraitpasatteintàcetemp.
LumièreJaune:“Clignote”=Leniveaud’eaudansleréservoirestbas,labouteilleestvide
LumièreJaune”Éteint” =Leniveaud’eaudansleréservoirestnormale
4. Interrupteurdesécuritédesenfants
5. Boutton de Distribution pour eau chaude
6. Boutton de Distribution pour eau tempérée
7. Boutton de Distribution pour eau froide
8. Bac
9. Porte (Compartiment de rangement pour bouteille)
10. Faussetsdedistributiond’eau
11. Paille en acier inoxydable (Bouteille d’eau)
12. Interrupteurdeporte(Contrôlel’opérationdepompeàeau)
13. Thermostat adjustable pour l’eau froide
(Note:lethermostatd’eauchaude
est non adjustable.)
14. Poignée de transport
15. Vidange
16. Condenseur
2
1
4
5
6
7
8
9
3
2
10
13
14
15
16
12
11

CONSIGNES D'UTILISATION
Nettoyage initial de produit
Àl'instardelaplupartdesappareils,votredistributeurd'eauexigeunentretien
périodiquepourassurersonefcacitéetsonrendement,etdoitêtrenettoyé
àintervallerégulier(c'est-à-direàtousles4mois).Andeproterd'un
distributeurd'eausécuritaireetd'empêcherlaproliférationdesbactéries,nous
vous recommandons fortement de le nettoyer régulièrement. Vous pouvez
obtenirunnécessairedenettoyageencommuniquantavecleserviceàla
clientèle au 1-866-253-0447;vouspouvezégalementlecommanderenligneà
l'adressewww.greenwayhp.com.
1. Assurez-vousquelaporteducompartimentinférieurderangementest
"ouvert"(celaempêchel'activationdelapompeàeau).
2. Assurez-vousquelecordond'alimentationestbranchédansunepriseélectrique
3. Utilisantunecarafe/récipientpropremélanger(50ml/1.7ozs)unsolutionpourdistributeurd'eauavec2L/0,5gal
d'eauchaude.Placerlecarafe/récipientsurleplancherducompartimentderangementpourlesbouteilles.Insérez
lapailleinoxydabledanslasolutiondenettoyage,(s'assurerquelerécipientoulecontenantnebasculepas)et
fermerlaporte.Lapompeàeaudémarreautomatiquementetétablitlasolutiondenettoyagedanslesréservoirs
dedistribution.Lorsquetoutelasolutiondenettoyageaétéétablie,lapompecontinueradefonctionnerpendant
environ20secondesets'arrêteautomatiquement,suivid'unelumièrejauneclignotant(ajoutezdel'eau)condition
(cequiestnormal).Ilsuftd'ouvrirlaported'annulerlalumièrejauneclignotant.Laisserlasolutiondenettoyagede
s'asseoiràl'intérieurdudistributeurpour20minutes.
4. Placezuncarafe/récipientsouslesrobinetsdedistributionetappuyezsimultanémentsurlestoucheschaudeset
froidesdedistributionjusqu'àcequelasolutiondenettoyages'arrêtedecouler.Jeterlasolutiondenettoyage.
5. Utilisezunecarafe/récipient,viderlasolutiondenettoyagerestantdanslesréservoirsinternesendévissantle
bouchondevidangesituéeàl'arrièredel'appareil.Jeterlasolutiondenettoyage.
6. Re-installerlebouchondevidangedel'appareiletrincezlesystèmeenutilisant2Ld'eaupropre(pasdesolution
denettoyage)suivantlesmêmesétapesdebasedécritesci-dessus.(Voirl'étapen°3)Placerlecarafe/récipient
souslerobinetdevidangeetretirezlebouchondevidangepermettantàl'eaudes'écouler.Lorsquel'eaus'arrête
decouler,ré-installerlebouchondevidangeetserrer.Leprocessusdenettoyageestmaintenantterminé.
Mise en place de la bouteille d’eau
IMPORTANT: Toujours se laver les mains avant de manipuler les bouteilles d'eau! Nettoyez le dessus de la
bouteille d'eau avec un chiffon propre. Les bouteilles d'eau peut être achetée chez votre détaillant local.
1. Assurez-vousquelaporte(compartimentderangementdebouteille)estouverte.Lapompeàeaunepeutpas
fonctionner tant que la porte est en position ouverte
2. Retirezl'étiquettedeprotectionaudessusdelabouteille
3. Laplupartdesbouteillesd'eauontunemembraneperforantdanslecapuchon.Pourpercerlamembrane,insérer
lapailledanslebouchon,etpousserverslebasjusqu'àlamembranes'ouvre.Insérezlapailleàfonddans
labouteillejusqu'àcequelebasdelatouchedelapailleaufonddelabouteilled'eau.NOTE:Lapaillebouteille
d'eaudisposed'undesignexclusiftélescopiquepouruneutilisationavecdesbouteillesde18,9L(5gal)et11,4
litresd'eau(3gal)(voirgure1etgure2..)Pourajusterlalongueurdelapailleàboirel'eauenbouteille.,detenirla
partiesupérieuredelapailleetilsuftdetirer/pousserlapartieinférieuredelapailleàlalongueurdésirée.
4. Pourxerlapaillebouteilled'eausurlecoldelabouteilled'eau,assurez-vousquelapoignéeestpositionnée
"horizontalement"etappuyezfermementsurledessusdugoulotdelabouteille.(VoirFig.3)Lorsquelapoignée
estdansle"vertical"(positionverrouillée),(voirg.4)ilestpossibledesoulever/porterlabouteilled'eau.Toutefois,
lorsdel'installationdelabouteilled'eau18,9(5gal)àl'intérieurducompartimentderangement,lapoignéedoitêtre
dansle«horizontale»position.(Voirgure3).
Cleaning Kit
Available online at
www.greenwayhp.com
Trousse de nettoyage
Accessible en ligne à
www.greenwayhp.com
Juego de limpieza
Disponible en línea en
www.greenwayhp.com
3

IMPORTANT: (voir Fig. 5) NE PAS briser ou enlever le sceau de autour du cou de la bouteille d'eau, SINON VOUS
NE POURREZ PAS LE LEVER / TRANSPORTER LA BOUTILLE D’EAU AVEC LA POIGNÉE DE TRANSPORT.
(Voir Fig. 6)
5. Pourinstallerlabouteilled'eauàl'intérieurducompartimentderangementdebouteille,ilsuftdepositionnerla
bouteilleenfaceducompartimentderangement(pousser)glisseràl'intérieurenutilisantlecôtédelajambe
jusqu'àcequelabouteilles’arrêt
6. Fermezlaporteducompartimentetlapompeàeauvacommencerleslivraisonsd'eaudansledistributeur
automatiquement.Lorsquelesréservoirsinternessontpleins,lapompeàeaus'arrêteautomatiquement.
NOTE IMPORTANTE : Votre distributeur d'eau Vitapur® est équipé d'une caractéristique de sécurité spéciale
(contacteur à flotteur) qui contrôle l'activation et le fonctionnement du chauffe-eau du réservoir Bouilloire.
S'il n'y a pas d'eau ou si le niveau d'eau est bas dans le réservoir interne, l'activation et le fonctionnement
du système Bouilloire sont désactivés. De même, si le chauffe-eau fonctionne et que le niveau de l'eau
tombe simultanément sous le niveau minimal prescrit, le fonctionnement du système est automatiquement
interrompu. Pour réactiver le chauffe-eau, vous devez ajouter de l'eau au réservoir.
NOTE:Lesystèmedepompeàeaucomporteégalementundispositifdesécuritéspécialquiempêche/arrêt
l'opérationenl'absenced'eau.(Ex:bouteilled'eauvide)
Fonctionnementdelapomped'eauestégalementliéeàunsystèmedecommutateurmontésurlaporteàl'intérieurdu
compartiment de rangement inférieur. Ex :
Porteouvert=pompearrêt
Portefermé=pompefonctionne
FIG. 1. 11.4L (3gal)
Bouteille D’Eau
FIG. 5. Membrane de bouchon Installé
CORRECT INCORRECT
FIG. 6. Membrane de bouchon Retiré
FIG. 2. 18.9L (5gal)
Bouteille D’Eau
FIG. 3. Position Poignée
Ouvert
FIG. 4. Position Poignée
Fermé
4
Distribution de l’eau froide/eau à la température ambiante
Placezunverresouslerobinetdedistributionsurlecôtédroitdupanneaudesortied'eau.Pourl'eau
froide,appuyezetmaintenezenfoncéleboutondedistribution(#7)jusqu'àcequelaquantitédésirée
del'eauestdistribuéeetlâcherlebouton.Poureauàtempératureambiante,appuyezetmaintenez
e n f o n c é l e b o u t o n d e d i s t r i b u t i o n ( # 6 ) j u s q u ' à c e q u e l a q u a n t i t é d é s i r é e d e l ' e a u e s t d i s t r i b u é e e t l â c h e r .
Réglage de la température (Eau froide seulement)
Entournantlethermostatsituéàl’arrièredel’appareil,latempératurepeutêtreréglée.Tournez
lecadranensenshoraireentrelehaut(frais)jusqu’aubas(froid),soitjusqu’àcequevous
parveniezàlatempératuredésirée.
Sil'eaunecoulepas,ilestpossiblequel'oricesoitbouchépardelaglacequis'estformée
parcequelethermostatestréglétrophaut.Sic'estlecas,débranchezledistributeurpendant
lanuitetrebranchez-lelematin.Réglezlethermostatàhaut,etaugmentezprogressivementce
réglage,enfonctiondevosbesoinsenmatièred'eaufroide.
Distribution d’eau chaude
Lafonctiondedistributiond'eauchaude(fonction"Kettle")del'unitéestdestinéeàvousfaireéconomisertempset
argent.Lessystèmesconventionnelsdedistributiond'eauchaudefonctionnent24heuresparjour,7joursparsemaine,
sanségardàlaconsommation.Lafonction"Kettle"(eausurdemande)activelesystèmed'eauchaudeseulement
lorsqueleboutondelafonction"Kettle"estactivé,permettantainsid'avoirdel'eauchaudeen3minutes.Pourarrêter/
décommanderledispositif"Kettle"pendantuncycle,simplementappuiezsurlebouton"Kettle"unedeuxièmefoisetla
lumièrerougedeLEDcesseraautomatiquementleclignotant.
NOTE IMPORTANTE : Votre distributeur d'eau Vitapur® est équipé d'une caractéristique de sécurité spéciale
(contacteur à flotteur) qui contrôle l'activation et le fonctionnement du chauffe-eau du réservoir Bouilloire.
S'il n'y a pas d'eau ou si le niveau d'eau est bas dans le réservoir interne, l'activation et le fonctionnement
du système Bouilloire sont désactivés. De même, si le chauffe-eau fonctionne et que le niveau de l'eau
tombe simultanément sous le niveau minimal prescrit, le fonctionnement du système est automatiquement
interrompu. Pour réactiver le chauffe-eau, vous devez ajouter de l'eau au réservoir.
Bouton de sécurité résistante d'enfant
Pourempêcherl'eauchauded'êtredistribuéeaccidentellementetpossible
nuisantàunenfant,leboutondedistributiond'eauchaudepeutseulementêtre
actionnéquandlacommanderésistantedesécuritéd'enfantestactionnée.
Pourdistribuerl'eauchaude,pousserlacommandedesécuritéd'enfanten
longueur,(dansladirectiondelaèchesituéesurlecommutateur)dedroite
àgauche,puisenfoncerleboutond'eauchaudejusqu'àcequelaquantité
désiréed'eauchaudesoitdistribuée.Lorsdelibérerleboutond'eauchaude,la
sécuritéd'enfantrevientautomatiquementàlapositionverrouillée.(FIG.7)
DANGER: La température de l'eau chaude est d’environ 194˚F / 90 ˚C. Les températures supérieures à 125 ˚
F/52 ˚C peuvent causer des brûlures graves. NE PERMETTEZ PAS AUX ENFANTS D'UTILISER LE BOUTON DE
DISTRIBUTION D'EAU CHAUDE SANS SURVEILLANCE APPROPRIÉE ET DIRECTE.
Low
High
TEMP
COLD WATER
FIG. 7. Interrupteur de sécurité
des enfants
5
NETTOYAGE ET ENTRETIEN
Àl'instardelaplupartdesappareils,votredistributeurd'eauexigeunentretien
périodiquepourassurersonefcacitéetsonrendement,etdoitêtrenettoyéà
intervallerégulier(c'est-à-direàtousles4mois).Andeproterd'undistributeur
d'eausécuritaireetd'empêcherlaproliférationdesbactéries,nousvous
recommandons fortement de le nettoyer régulièrement. Vous pouvez obtenir un
nécessairedenettoyageencommuniquantavecleserviceàlaclientèleau1-866-
253-0447;vouspouvezégalementlecommanderenligneàl'adresse
www.greenwayhp.com.S'ilvousplaîtvoirlasection«Procéduredenettoyagedu
produitinitial"etsuivezlesinstructions.
Nettoyage de l'extérieur du distributeur d’eau
L'extérieurdudistributeurpeutêtreessuyéaveclasolutiondenettoyagevitapur®dudistributeurd’eauouunmélange
desavondouxetdel’eau.N'employezjamaisdeproduitchimiquepuissantoudeproduitdenettoyageabrasif.Rincez
complètementavecdel'eaupropreetasséchezlessurfaces.
Nettoyage du bac
Pourenleverlebac,(Fig.8)retirerlebacparl’avantpourledélogerdeses
guides. Vider et nettoyer.
Lebacdevraitêtrevidéetnettoyérégulièrementpourenleverlestachesetles
dépôtsdeminéraux.Nettoyezlebacaveclasolutiondenettoyagevitapur®
du distributeur d’eau ou un mélange de savon doux et de l’eau. Pour les
dépôtsbienincrustés,ajoutezduvinaigreetlaissez-lereposerjusqu'àceque
lesdépôtssedétachent.Lavez,rincezetséchezcomplètementlebac.Pour
remettre le bac en place, remettez la grille sur le bac et insérez ce dernier sur
lesguides(nevapasaulave-vaisselle).
Nettoyage du condensateur
Passez l’aspirateur ou le balai pour enlever la poussière du serpentin du
condensateursituéàl’arrièredudistributeur.Pouravoirlesmeilleursrésultats
possibles,achetezunpinceauconçuspéciquementàcettenàvotremagasin
locald'électroménagers.Celaamélioreralerefroidissementetl'efcacité.
Vidange des réservoirs
Vidangez les réservoirs avant et après le nettoyage, lorsque vous partez en
vacances pendant longtemps ou lorsque vous n’utilisez pas le distributeur
pendant une longue période.
IMPORTANT! Débranchez le distributeur avant d'entamer cette procédure.
Distribuez l'eau chaude jusqu'à ce que la température baisse à un niveau sûr pour éviter les risques de brûlure
par l’eau chaude.
1. Enlevez la bouteille d’eau.
2. Appuyezsurtouslesboutonsdudistributeurjusqu'àcequ’aucuneeaunes’écoule.
3. Placezunseausouslavannedevidangesituéeàl’arrièredudistributeur.
Cleaning Kit
Available online at
www.greenwayhp.com
Trousse de nettoyage
Accessible en ligne à
www.greenwayhp.com
Juego de limpieza
Disponible en línea en
www.greenwayhp.com
FIG. 8. Bac et
Grillage
Vanne de
vidange
6

4. Enlevezlecapuchonetlaprisedessortiesdedrainageetlaissezl'eaus’écoulerdansleseau.Remettezle
capuchon et la prise.
IMPORTANT: Recueillez l'eau dans un récipient et non dans le trop-plein.
5. Remplacez la bouteille d’eau (voir les instructions sur la Mise en place de la bouteille d’eau).
Vacances
Sivousn'utilisezpasledistributeurd'eaupendantdelonguespériodes,ousivouspartezenvacances,vouspouvez
économiserdel'électricité,débranchezledistributeuretvidezlesréservoirs. (Voir Vidange des réservoirs). À votre
retour, suivez les étapes du nettoyage initial et remettez votre distributeur en marche.
CONSEILS DE DÉPANNAGE
Problème Cause possible Solution Suggérée
Le distributeur d'eau
coule
Lecapuchondevidangeetlejointétancheàla
siliconenesontpassûrs.
Assurez-vousquelejointétanchedubouchonde
vidange est bien en place et serrez le capuchon de
vidange.
L'eau n'est pas assez
chaude ou assez froide
Vous avez utilisé toute l’eau du réservoir.
Installezunebouteillepleine;attendez60minutes
pourlaisserl'eauserefroidiret3minutespour
laisserl'eauseréchauffer(aprèsavoiractivéla
fonction"Kettle").
L’appareilestdébranché. Branchez-le.
Lafonction"Kettle"n'apasétéactivée. Activerlafonction"Kettle"enappuyantsurle
bouton.
Ledisjoncteurdevotremaisonestdéclenchéou
le fusible a grillé.
Réarmez le disjoncteur ou remplacez le fusible.
Lalimitethermiqueestdéclenché. Laissezleréservoird'eauchauderefroidirde
15à30minutes.Lethermostatseréinitialise
automatiquement lorsque le réservoir
est suffisamment refroidi; le système de
refroidissement se réactive automatiquement.
Pouractiverlechauffe-eauduréservoir,appuyez
sur le bouton "Kettle".
Lethermostatdoitêtrerégléàunetempérature
plus froide.
Réglez le thermostat entre «high» (frais) et
«low»(froid)jusqu’àcequevousparveniezàla
température désirée.
Le distributeur d’eau ne
distribue pas d'eau
Labouteilled’eauestvide. Remplacez la bouteille d’eau.
Dépôtsdeminérauxobstruantlesréservoirs. VoyezlesinstructionssurleNettoyagedes
réservoirs.
Poched'airpossible. Appuyez sur les robinets pour amorcer l’appareil.
Accumulationpossibledeglacedueàunréglage
trop élevé du thermostat.
Débranchez le distributeur pendant la nuit et
rebranchez-lelematin.Réglezlethermostatà
haut, et augmentez progressivement ce réglage,
enfonctiondevosbesoinsenmatièred'eau
froide.
Le distributeur d’eau est
bruyant.
Labouteillefaitunbruitdeglouglouquandje
remplis le réservoir.
C'estnormal.
Ladistributiond’eauestinégale. Assurez-vousqueledistributeurestplacésurune
surface au niveau qui peut soutenir tout son poids.
7

Revendeur: Numérodemodèle:
Numérodesérie: Codedatedefabrication:
Date d’achat :
Garantie
NEPASRETOURNERCESYSTÈMEAUMAGASIN:
VeuillezjoindreleServiceàlaclientèleau1-866-253-0447ouenvoyeruncourrielà[email protected]
GreenwayHomeProductsgarantitvotredistributeurd’eaupourlesvicesdefabricationlorsqueleproduitfonctionnedansdesconditions
normalespendantun(1)anàcompterdeladated’achatoriginale.Cettegaranties’appliqueseulementdanslepaysdanslequelle
produit est vendu et est valable pour l’acheteur d’origine seulement. Cette garantie est non négociable.
CettegarantieetleréférencementCSAInternationalconcernantcedistributeurd’eaudeviendrontnulssiledistributeurd’eauestaltéré,
modifiéoucombinéavectouteautremachineouappareil.Unealtérationdecedistributeurd’eaupeutcauserdesinondationsgraveset/
ou un grave danger de choc électrique ou d’incendie.
Les dispositions de cette garantie ne s’appliqueront pas à :
• Bouteillesd’eau.
• Trajetsdesinterventionsàvotredomicilepourvousapprendreàutiliserleproduit.
• Mauvaiseinstallation,livraison,ouentretien(lenon-respectdel’entretienduproduitconformémentauxinstructionsdumanueldu
produit annulera automatiquement la garantie).
• Défaillanceduproduitencasdemauvaisusage,modification,usagecommercialouusageàdesfinsautresquel’utilisationprévue.
• Produitsutilisésàl’extérieurdel’environnementrésidentieloudubureau.
• Remplacementdesfusiblesdudomicileouréamorçagedesdisjoncteurs.
• Utilisationdeceproduitavecdel’eaumicrobiologiquementdangereuseoudequalitéinconnue.
• Dommagescausésauproduitencasd’utilisationpourladistributionautrequecelledel’eau.
• Dommagescausésauproduitparaccident,incendie,inondationsouactesdeDieu.
• Toutserviceauproduitparunpersonnelnonautorisé.
• Dommagesindirectsoufortuitsdécoulantdepossiblesvicesdecetappareil,desoninstallationoudesaréparation.
CettegarantiedevraêtreexécutéedansunétablissementderéparationautoriséparGreenway.Touteslesréparationssousgarantie
doiventêtreautoriséesaupréalableparGreenwayHomeProducts.Greenwaychoisiraàsadiscrétionderéparerouremplacer
gratuitementtoutepiècedéfectueuselorsquel’AcheteuraurainformésonrevendeurouGreenwayHomeProductsdurantlapériode
garantie.L’obligationdeGreenwayHomeProductssouscettegarantieselimiteexpressémentàcesréparationsouremplacements.
Cette garantie ne couvre pas les frais de transport vers l’établissement de réparation autorisé, ni pour le retour.
Àl’exceptiondesconditionsdéfiniesci-aprèsouexigéesparlaloi,leFabricantn’engageaucuneautregarantie,ouacceptationexpresse,
impliciteougarantieparlaloiincluanttoutegarantieimplicitedequalitémarchandeoudeconditiond’usageparticulier.LeFabricant
n’assumepasetn’autorisepersonneàassumerdesobligationsderesponsabilitéenrapportaveccedistributeurd’eau.Enaucuncas
lefabricantnepourraêtretenuresponsabledesdommagesindirects,particuliersoufortuits(ycompris,sanslimitations,pourdes
préjudicesfinanciers)oudesdélaisdusàdescausesindépendantesdesavolontélorsdel’exécutiondecetaccord.
CertainsÉtatsouprovincesn’appliquentpasdelimitationsconcernantladuréedelagarantieimplicite,desortequelalimitationénoncée
ci-dessuspeutnepass’appliquerdansvotrecas.CertainsÉtatsouprovincesn’autorisentpasl’exclusionoulalimitationdedommages
fortuitsouindirects,desortequeleslimitationsetexclusionsénoncéesci-dessuspeuventnepass’appliquerdansvotrecas.Cette
garantievousconfèredesdroitsjuridiquesspécifiques;vouspouvezégalementbénéficierd’autresdroitsquipeuventvarierd’unÉtatà
l’autreoud’uneprovinceàl’autre.
Sivousavezbesoindeservice,voird’abordlasection“Dépannage”decemanuel.Del’aidesupplémentairepeutêtretrouvéeen
consultantnotresiteWebàwww.greenwayhp.com,ouenappelantnotreserviceàlaclientèleau1-866-253-0447,Dulundiaujeudi,de8
h30à17h(HNE),levendredi,de8h30à16h(HNE),ouécrivezà:GreenwayHomeProducts,CustomerServiceCenter,400Southgate
Drive,Guelph,ON,CanadaN1G4P5.
Conservez ce manuel et votre reçu de vente pour référence ultérieure. Vous devez présenter une preuve d’achat pour le service sous
garantie.
Inscrivezlesrenseignementssuivantsausujetdevotrerafraîchisseurd’eaupourmieuxvousaideràobtenirassistanceouserviceencas
debesoin.Vousdevrezconnaîtrelenumérodemodèleetlenumérodesérieaucomplet.Voustrouverezcetteinformationàl'arrièredu
distributeurd'eau.

Gracias por comprar un dispensador de agua Vitapur (con montaje de agua por la sección inferior) dispensador de agua.
Este diseño único le brinda los beneficios de;
Nomáslevantamientodebotellaspesadas
Nomásderramedeaguaaccidentalmentedurantelainstalacióndelabotella
Nomásbotellasdeaguarecicladasmagulladasomaltratadas
Porfavor,leaelmanualdeinstruccionesincluidoconcuidadoyguardeestefolletoparaconsultarloenelfuturo.Hemos
diseñado cuidadosamente su dispensador de agua Vitapur para darle años de disfrute y un funcionamiento sin problemas.
SALVAGUARDIAS IMPORTANTES
ADVERTENCIA: Este dispensador de agua esta diseñado para uso en interiores solamente. No use al aire libre.
NOTA IMPORTANTE: Su expendedor de agua Vitapur® está diseñado con una función especial de seguridad
(mecanismo de interruptor de flotación) que controla la activación y/o el funcionamiento del sistema calentador
del tanque de agua caliente "Kettle". Si no se detecta presencia de agua y/o su nivel está bajo dentro del
depósito interno de agua, no será posible la activación ni el funcionamiento del sistema calentador de
agua "Kettle". Del mismo modo, si el sistema calentador de agua está en funcionamiento y se retira agua
simultáneamente haciendo que el nivel de agua se encuentre por debajo del punto establecido como nivel mínimo,
se suspende automáticamente el funcionamiento del tanque de agua caliente. Para reactivar el sistema calentador
de agua, deberá recargar su suministro de agua.
• Noponganuncaeldosicadorbocaabajoniloinclinemásde45grados.Silaunidadhaestadoapoyadasobre
un costado durante un periodo prolongado de tiempo, coloque el dosificador de agua en la posición vertical durante
aproximadamente 12 horas antes de encenderlo.
• Paraelusoconbotellonesdeaguade3ó5galones(12ó19litros).
• Nuncauseestedosicadorconaguaqueesinseguraparabeberoqueprovienedeunafuentedesconocida.
• Nuncauseningúnotrolíquidoeneldosicador,salvoelaguaembotelladaconocidaymicrobiológicamentesegura.
• Nuncapermitaquelosniñossesurtandeaguacalientesinunasupervisiónapropiadaydirecta.
• Parasuseguridad,estedosicadordeaguaestáequipadoconuncabledealimentaciónconectadoatierra.
• Conservesudosicadordeaguaenunlugarsecoyalejadodelaluzdelsoldirecta.
• Nuncaponganadainamablecercadeldosicador.
• Dejeunmínimode2”(5cm)alrededordelapartetraseraylosladosdeldosicadorparaunaventilaciónapropiada.
• Siempreinstaleeldosicadordeaguasobreunasupercieplanayquepuedasoportartodosupeso.
• Siempredesenchufeeldosicadordeaguaantesdedarleservicio.
• Senecesitaunalimpiezaperiódicadeldosicadordeaguaparalagarantía.
Sigalasinstruccionesdelimpiezaseñaladasenestemanual,ylimpieel
dosicadorcada4meses.
INSTRUCCIONES DE PUESTA A TIERRA
• Elusoinadecuadodelaconexióndepuestaatierrapuedetraeraparejadasdescargaseléctricas,causarlesionese
incluso la muerte.
• Elpresenteelectrodomésticodebeestarconectadoatierra.Encasodecortocircuito,laconexióndepuestaatierra
disminuye el riesgo de descargas eléctricas ya que tiene un cable de escape para la corriente eléctrica.
• Elpresenteelectrodomésticotieneuncabledealimentaciónquecuentaconunenchufedepuestaatierraydebeestar
conectado a un tomacorriente polarizado con la puesta a tierra correspondiente. Consulte a un electricista calificado
si no comprende, en su totalidad, las instrucciones de conexión de puesta a tierra, o si tiene dudas acerca de la conexión
atierradelelectrodoméstico.Sieltomacorrienteesde2patas,essuresponsabilidadyobligacióncambiarloporunode3
patas debidamente puesto a tierra.
• Bajoningunacircunstanciacorteoretirelatercerapata(deconexiónatierra)delcabledealimentación.
• Noutiliceunadaptadorconelpresenteelectrodoméstico.
• Noutiliceuncabledealargueconelpresenteelectrodoméstico.Sielcabledealimentaciónesdemasiadocorto,pídalea
un electricista calificado que instale un tomacorriente cerca del electrodoméstico.
11
SU DOSIFICADOR DE AGUA VITAPUR®
1. Panel de control
2. BotóndeactivacióndelafuncióndeTetera(encendido/apagado)
3. LucesindicadorasListo-para-dispensar
LuzRoja:"Intermitente"=Calentador(tanquedeaguacaliente)estáenfuncionamiento
LuzRoja:"Encendidapermanente"=Elaguacalientehaalcanzadolatemperaturaóptima
yestálistaparadispensar
LuzRoja:"Apagada"=Elsistemadeaguacalienteestáapagado,sinembargoelaguadentrodeltanque
todavíapuedeestarmuycaliente,siempretengacuidadocuandodispenseodreneel
agua del depósito de agua caliente
LuzAzulclaro:"Encendidapermanente"=Elaguafríahaalcanzadolatemperaturaóptimayestálista
para dispensar.
LuzAzulclaro:"Apagada"Elcicloderefrigeraciónestáenmarcha,esposibledispensaraguaduranteelciclode
enfriamiento, sin embargo, puede que la temperatura de refrigeración óptima aún no se haya alcanzado.
LuzAmarilla:“Intermitente”=Elniveldeaguaeneldepósitointernoesbajo,labotellaestavacía.
LuzAmarilla:“Apagada”=Elniveldeaguaentodoslosdepósitosesnormal.
4. Dispositivo de seguridad resistente a los niños
5. Botón distribuidor de agua caliente
6. Botón distribuidor de agua a temperatura ambiente
7. Botóndistribuidordeaguafría
8. Bandeja removible para goteo de agua
9. Puerta inferior ( Compartimiento para colocar la botella)
10. Grifos dispensadores de agua
11. Varilla de acero inoxidable
12. Interruptordelapuerta
(Controla el funcionamiento
de la bomba de agua)
13. Termostato ajustable para el
agua“fría”.(Nota:la
temperatura del agua
calienteestáreguladade
fábricaynosepuedeajustar)
14. Asa de transporte
15. Válvuladedrenaje
16. Condensador
2
1
4
5
6
7
8
9
3
2
10
13
14
15
16
12
11

INSTRUCCIONES DE FUNCIONAMIENTO
Procedimiento inicial de limpieza del producto
Comolamayoríadelosaparatos,sudispensadordeaguarequiereun
mantenimiento periódico para que funcione con eficiencia y rendimiento
máximos,ysedebelimpiardemaneraregular(cadacuatromeses).Para
mantener un entorno higiénico dentro de su dispensador de agua y evitar
la posible formación (desarrollo) de bacterias, recomendamos efectuar una
limpieza regular. A través de nuestro Departamento de Atención al Cliente
recibiráunequipodelimpieza,llamandoal1-866-253-0447 o puede solicitarlo
enlínea,visitandowww.greenwayhp.com.
1. Asegúresedequelapuertadelcompartimientoinferioresté“abierta”
(estoevitarálaactivacióndelabombadeagua).
2. Asegúrese de que el cable eléctrico de alimentación esté conectado a la toma corriente.
3. Utiliceunajarralimpiaounrecipienteconunapre-mezcla(50ml/1.7ozs)delimpiadordedispensadorde
aguacon2litros/0.5galonesdeaguacaliente.Coloquelajarraoelrecipienteenelpisodelcompartimientode
almacenamientodelabotella.Insertelavarilladeaceroinoxidableenlasolucióndelimpieza,(asegúrese
dequelajarraoelrecipientenosevuelque)ycierrelapuertadelcompartimiento.Labombadeaguaseactivará
automáticamenteybombearálasolucióndelimpiezaalosdepósitosdeaguadeldispensador.Cuandotoda
lasolucióndelimpiezasehaextraído,labombaseguiráfuncionandoduranteaproximadamente20segundosy
sedetendráautomáticamente,seguidodeunaluzamarillaintermitenteparaagregaragua(estoesnormal).Basta
con abrir la puerta del compartimiento para cancelar la luz amarilla intermitente. Deje la solución de limpieza
reposar en los depósitos internos durante 20 minutos.
4.Coloqueunajarraounrecipientedebajodelosgrifosdeaguaypulselosbotonesdeaguacalienteyfríohastaque
lasolucióndelimpiezadejedeuir.Desechelasolucióndelimpieza.
5.Utiliceunajarraounrecipienteyvacíelasolucióndelimpiezarestanteenlosdepósitosinternos,desenroscando
lacoberturadeldesagüeyeltapóndelaválvuladedrenajeubicadaenlaparteposteriordelaunidad.Desechela
solución de limpieza.
6. Vuelva a colocar el tapón de drenaje y la cobertura en la unidad y enjuague el sistema con 2 litros de agua limpia
(nosolucióndelimpieza),siguiendolosmismospasosbásicosdescritosanteriormente.(Veaelpaso#3)Coloque
lajarraoelrecipientedebajodelaválvuladedrenajeyquitelacoberturayeltapóndedrenajepermitiendoqueel
aguadeenjuaguedrene.Cuandoelaguadeenjuaguedejedeuir,vuelvaainstalarlacoberturayeltapónde
drenaje y ajuste. El proceso de limpieza se ha completado.
Cómo instalar el botellón de agua
IMPORTANTE: ¡Siempre lave sus manos antes de manipular una botella de agua! Limpie la parte superior de la
botella con un paño limpio. Las botellas de agua pueden ser compradas en su tienda local.
1. Asegúrese de que la puerta inferior (compartimiento de almacenamiento de la botella) esté abierta. Mientras que la
puertasemantengaabiertalabombadeaguanoseactivará.
2. Retire la etiqueta protectora de la parte superior de la botella.
3. Lamayoríadelasbotellasdeaguatienenunamembranaparaperforarenlatapasuperior.Paraperforaresta
membrana,insertelavarillaenlatapayempujehaciaabajohastaquelamembranaseabra.Insertelavarilla
completahastaquelapartededebajodelavarillatoqueelfondodelabotella.Nota:Lavarilladelabotellade
aguacuentaconundiseñotelescópicoexclusivoparaelusoconbotellasdeaguade18.9L(5gal)y11.4L(3gal)
(verFig.1yFig.2.)Paraajustarlalongituddelavarilladelabotelladeaguapotable,sostengalapartesuperiorde
avarillaysimplementetire/empujelaparteinferiordelavarillaalalongituddeseada.
Cleaning Kit
Available online at
www.greenwayhp.com
Trousse de nettoyage
Accessible en ligne à
www.greenwayhp.com
Juego de limpieza
Disponible en línea en
www.greenwayhp.com
3

4. Para colocar la varilla de la botella de agua en el cuello de la botella, asegúrese de que el asa esté colocada
"horizontalmente"ypresionermementesobrelapartesuperiordelcuellodelabotella.(Verg.3)Cuandoelasa
estáenlaposición"vertical"(bloqueado),(verg.4)esposiblelevantar/transportarlabotelladeagua.Sin
embargo,cuandolabotelladeaguade18.9L(5gal)secolocadentrodelcompartimientodelalmacenamiento,el
asadebeestarenposición“horizontal”.(Véaselagura3).
IMPORTANTE: NO ROMPA O RETIRE EL SELLO DE ALREDEDOR DEL CUELLO DE LA BOTELLA DE AGUA
(Ver Fig. 5), DE LO CONTRARIO NO SERÁ POSIBLE LEVANTAR / TRANSPORTAR LA BOTELLA DE AGUA POR
EL ASA DE TRANSPORTE. (Ver Fig. 6)
5. Para instalar la botella de agua dentro del compartimiento de almacenamiento, basta con colocar la botella en la
parte delantera de la rampa del compartimiento y (empuje) deslice hacia adentro usando el costado de su pierna
hasta que la botella se detenga
6. Cierrelapuertadelcompartimientoinferiorylabombadeaguainiciaráelsuministrodeaguaeneldispensadorde
formaautomática.Cuandolosdepósitosinternosesténllenos,labombadeaguasedetendráautomáticamente.
NOTA IMPORTANTE: Su expendedor de agua Vitapur® está diseñado con una función especial de seguridad
(mecanismo de interruptor de flotación) que controla la activación y/o el funcionamiento del sistema
calentador del tanque de agua caliente "Kettle". Si no se detecta presencia de agua y/o su nivel está bajo
dentro del depósito interno de agua, no será posible la activación ni el funcionamiento del sistema
calentador de agua "Kettle". Del mismo modo, si el sistema calentador de agua está en funcionamiento y se
retira agua simultáneamente haciendo que el nivel de agua se encuentre por debajo del punto establecido
como nivel mínimo, se suspende automáticamente el funcionamiento del tanque de agua caliente. Para
reactivar el sistema calentador de agua, deberá recargar su suministro de agua.
FIG. 1. 11.4L (3gal)
Botella de agua
FIG. 5. Sello intacto en la botella
CORRECTO INCORRECTO
FIG. 6. sello ha sido retirado de la botella
FIG. 2. 18.9L (5gal)
Botella de agua
FIG. 3. Posición abierta
del asa
FIG. 4. Posición cerrada
del asa
4
NOTA:Elsistemadebombadeaguatambiénincorporaundispositivodeseguridadespecialqueevita/detienela
operaciónenlaausenciadeagua.(Esdecir,cuandolabotelladeaguaestávacía)Laoperacióndelabombadeagua
estátambiénvinculadaaunsistemadeinterruptormontadoenlapuertaenelinteriordelcompartimientoinferior.
Es decir;
Puertaabierta=laoperacióndelabombadeaguaestádetenida
Puertacerrada=labombadeaguaestáoperando
Surte agua a temperatura ambiente y fría
Coloqueunvasodebajodelgrifodispensadordeaguaenlapartederechadelpaneldesalidadelagua.Paraaguafría,
mantengapulsado/presioneelbotóndistribuidor(#7)hastaquelacantidaddeseadadeaguaesdispensada.Paraagua
atemperaturaambiente,mantengapulsado/presioneelbotóndistribuidor(#6)hastaquelacantidaddeseadadeagua
es dispensada.
Cómo regular la temperatura (Sólo para agua fría)
Latemperaturapuederegularsegirandoeltermostatoqueestáenlapartetraserade
la unidad. Gire el cuadrante en el sentido de las manecillas del reloj, entre los niveles
alto(fresca)ybajo(másfría)hastaalcanzarlatemperaturadeseada.Sieldosicadorde
agua no despacha agua, es posible que haya una acumulación de hielo debido a que
eltermostatoestájadoenunaposicióndemasiadofría.Siestosucede,desenchufe
durante la noche, luego reposicione. Coloque el termostato en alto, y aumente lentamente
segúnelusoylanecesidaddeteneraguafría.
Cómo surtir agua caliente
Elsistemadedespachode"Caldera"(aguacaliente)deestaunidadestádiseñadaparaahorrarenergíaydinero.Los
sistemasconvencionalesdedispensacióndeaguacalienteoperan24/7sinimportarelusodelagua.Lacaracterística
"Caldera"(segúndemanda)activaelsistemadeaguacaliente"sólo"cuandoelbotónde“Caldera"(rojo)seactiva
entregandovapordeaguacalienteenmenosde3minutos.Paradetenerocancelarla"caldera"duranteunciclo,
simplementepulseelbotón"Caldera"(rojo)unasegundavezyelLEDrojoseapagará.
NOTA IMPORTANTE: Su expendedor de agua ® está diseñado con una función especial de seguridad
(mecanismo de interruptor de flotación) que controla la activación y/o el funcionamiento del sistema calentador
del tanque de agua caliente "Kettle". Si no se detecta presencia de agua y/o su nivel está bajo dentro del
depósito interno de agua, no será posible la activación ni el funcionamiento del sistema calentador de
agua "Kettle". Del mismo modo, si el sistema calentador de agua está en funcionamiento y se retira agua
simultáneamente haciendo que el nivel de agua se encuentre por debajo del punto establecido como nivel
mínimo, se suspende automáticamente el funcionamiento del tanque de agua caliente. Para reactivar el sistema
calentador de agua, deberá recargar su suministro de agua.
Dispositivo de seguridad resistente a los niños
Para evitar que el agua caliente sea dispensada accidentalmente y pueda
dañar a un niño, el botón dispensador de agua caliente sólo puede funcionar
cuando el interruptor de seguridad es activado. Para dispensar el agua
caliente, presione el interruptor de seguridad hacia un lado, (en la dirección
delaechasituadaenelinterruptor)dederechaaizquierda,yluegopresione
el botón dispensador hacia abajo, hasta que la cantidad deseada de agua
caliente sea dispensada. Al liberar el botón dispensador de agua caliente, el
interruptordeseguridadregresaautomáticamentealaposicióndebloqueo.
(FIG.7)
Low
High
TEMP
COLD WATER
FIG. 7. Dispositivo de seguridad
resistente a los niños
5
PELIGRO: El agua caliente es calentada aproximadamente a 194 ˚F / 90 ˚C. Las temperaturas por arriba de 125˚ F
/ 52˚ pueden causar quemaduras severas por escaldadura. NO PERMITA QUE NIÑOS USEN EL BOTÓN DE AGUA
CALIENTE SIN UNA SUPERVISIÓN APROPIADA Y DIRECTA.
LIMPIEZA Y MANTENIMIENTO
Comolamayoríadelosaparatos,sudispensadordeaguarequiereunmantenimiento
periódicoparaquefuncioneconecienciayrendimientomáximos,ysedebelimpiar
de manera regular (cada cuatro meses). Para mantener un entorno higiénico dentro
de su dispensador de agua y evitar la posible formación (desarrollo) de bacterias,
recomendamos efectuar una limpieza regular. A través de nuestro departamento
deAtenciónalClienterecibiráunequipodelimpieza,llamandoal1-866-253-
0447opuedesolicitarloenlínea,visitandowww.greenwayhp.com.Porfavorvea
“Procedimientoinicialdelimpiezadelproducto”ysigalasinstrucciones.
La limpieza del exterior del dosificador de agua
Elexteriordeldosicadorpuedeserlimpiadoconlíquidolimpiadordedosicadorvitapur®deaguaounjabónsuave
yaguamezcla.Nuncauseproductosquímicosfuertesolimpiadoresabrasivos.Enjuaguemeticulosamenteconagua
limpia y luego seque las superficies.
Cómo limpiar la bandeja de goteo
Pararetirarlabandejadegoteo,(Fig.8)tiredelabandejahaciaadelantehasta
quesesalgadelasguías.Vacíeylimpie.
Labandejadegoteodeberíavaciarseylimpiarseconregularidadparaeliminar
manchasycualquieracumulacióndeminerales.Limpieconlíquidolimpiador
para dosificador de agua o un jabón suave y agua mezcla. Para acumulaciones
resistentes, añada vinagre y déjelo remojar hasta que los depósitos se suelten.
Entonces lave, enjuague y seque meticulosamente. Para poner en su sitio,
coloquederegresolarejillaenlabandejaydeslicelabandejaenlasguías(no
para lavar en la fregadora eléctrica).
Limpieza del condensador
Aspire o cepille el polvo de las bobinas del condensador en la parte trasera del
dosificador. Para obtener los mejores resultados, usted puede comprar en su
tienda de aparatos local un cepillo diseñado expresamente para este fin.
Esomejoraráelenfriamientoyeciencia.
Desagüe de los depósitos
Drene los depósitos antes y después de la limpieza, cuando va a salir de
vacacionesprolongadasonovaausareldosicadorduranteperíodoslargos
del tiempo.
IMPORTANTE! Desenchufe el dosificador antes de realizar este procedimiento. Surta agua caliente hasta que la
temperatura llegue a un nivel seguro para evitar el riesgo de escaldaduras.
1. Retire el botellón de agua.
Cleaning Kit
Available online at
www.greenwayhp.com
Trousse de nettoyage
Accessible en ligne à
www.greenwayhp.com
Juego de limpieza
Disponible en línea en
www.greenwayhp.com
FIG. 8. Bandeja
de goteo y
rejilla
Desagüe de
los depósitos
6

2. Presionetodoslosbotonesdeldosicadorhastaqueyanosalgamásagua.
3. Coloqueuncubodebajodelasalidadedesagüe,queestáenlapartetraseradeldosicador.
4. Retirelatapayeltapóndelassalidasdedesagüeydejequeelaguauyaalcubo.Reemplacelatapayeltapón.
IMPORTANTE: Recolecte toda el agua en un recipiente, no en la bandeja de goteo.
5. Cómo reemplazar el botellón de agua (véase cómo instalar el botellón de agua).
Si sale de vacaciones
Cuandonouseeldosicadorporperíodosdetiempoprolongadosocuandoestédevacaciones,conservela
energía,desenchufeeldosicadoryvacíelosdepósitos(vea Desagüe de los depósitos). Cuando regrese, siga los
procedimientos de limpieza y puesta en marcha inicial del dosificador.
7

Problema Causa Posible Solución Sugerida
El dosificador de agua
está goteando
Latapadeldesagüeyelsellodesiliconano
estánbienasegurados.
Asegúrese de que el sello de la tapa del desagüe
estábienaseguradoyaprietelatapadeldesagüe.
El agua no está
suficientemente caliente
o fría
Seusótodaelaguaeneltanque. Reemplaceconunbotellónlleno;espere60minutos
paraqueelaguaseenfríe,3minutosparaqueel
agua se caliente (después de activar el botón de la
función"Kettle").
Launidadestádesenchufada. Enchúfela en el tomacorriente.
Noseactivólacaracterística"Kettle". Activelacaracterística"Kettle"presionandoel
botón.
Sedisparóundisyuntorosevolóunfusibleen
su casa.
Restaure el disyuntor o reemplace el fusible.
Sedisparóellimitadordetemperaturas. Deje que la temperatura del tanque de agua caliente
bajeduranteaproximadamente15a30minutos.El
termostatolimitadordetemperaturasereactivará
automáticamenteunavezquesehayaenfriadolo
suficienteyelsistemaderefrigeraciónsereactivará
automáticamente.Paraoperarelsistemadeagua
caliente,presioneelbotónInsta-Hot.
Debe regularse el termostato para que quede
másfrío.
Regule el termostato entre los niveles alto
(fresco)ybajo(másfrío)paraalcanzarla
temperatura deseada.
El dosificador de agua
no surte aguar
Elbotellóndeaguaestávacío. Reemplazar con un botellón lleno.
Hayacumulacióndemineralesqueestá
obstruyendo los tanques.
Véase Cómo limpiar los depósitos.
Posible burbuja de aire. Presione los grifos del dosificador para cebar la
unidad.
Posible acumulación de hielo debido a que el en
una posición reposicione.
Desenchufedurantelanoche,luegotermostatoestá
fijadoColoqueeltermostatoenalto,demasiadofría.
y aumente lentamente según el uso y la necesidad
deteneraguafría.
El dosificador de
agua hace ruidos
El botellón hace un ruido como de gorjeo cuando
seestállenandoeltanque.
Esto es normal.
Eldosificadordeaguaestádesnivelado. Cercióresedequeeldosificadorestásobre
una superficie plana y que pueda soportar
todo su peso
CONSEJOS DE LOCALIZACIÓN Y REPARACIÓN DE AVERÍAS
8

Vendedor: Númerodemodelo:
Númerodeserie: Códigodefecha:
Fechadecompra:
Garantia
NO REGRESE ESTE PRODUCTO A LA TIENDA:
Por favor contacte al servicio de atención al cliente en el: 1-866-253-0447 o en [email protected]
GreenwayHomeProductslegarantizaqueeldosificadordeaguaestálibrededefectosdefabricación,yaseademanodeobracomode
materiales,bajocondicionesnormalesdefuncionamiento,porun(1)añodesdelafechadecompraoriginal.Estagarantíaseaplicasólo
enelpaísendondesevendió,yestádisponiblesolamenteparaelcompradororiginal.Estagarantíaesintransferible.
EstagarantíaylaaprobacióndeCSAInternational(Asociacióncanadienseinternacionaldenormalización)paraestedosificadorde
aguaseránanuladassielmismoesalterado,modificadoocombinadoconcualquierotramáquinaodispositivo.Laalteracióndeeste
dosificadordeaguapuedeocasionarseriasinundacionesy/oriesgodeincendioochoqueeléctrico.
Las disposiciones de esta garantía no se aplican en lo siguiente:
• Botellasdeagua.
• Visitasdeservicioasuhogarparaenseñarlecómousarelproducto.
• Instalación,entregaomantenimientoincorrectos(elnomantenerelproductosegúnlasinstruccionesindicadasenelmismoanulará
automáticamentelagarantía).
• Fallasdelproductosihasidoobjetodeabuso,usoindebido,alteración,usocomercialousodiferenteparaelcualhasidodiseñado.
• Productosqueseusenfueradeunambienteresidencialodeoficina.
• Reemplazodelosfusiblesdelacasaoreposicióndeloscortacircuitos.
• Elusodeesteproductoendondeelaguaseamicrobiológicamenteinseguraodecalidaddesconocida.
• Dañosdelproducto,siesusadoparadespacharotracosaquenoseaagua.
• Dañosdelproductocausadosporaccidente,incendio,inundacionesoactosfortuitos.
• Cualquierservicioalproductoporunpersonalnoautorizado.
• Dañosincidentalesoconsecuentescausadosporposiblesdefectosconesteaparato,suinstalaciónoreparación.
EstagarantíadeberácumplirseenunestablecimientodereparacionesautorizadoporGreenway.Todaslasreparacionesdeberánser
previamenteautorizadasporGreenwayHomeProducts.Greenwayrepararáoreemplazará,asuopción,cualquierpiezadefectuosa
sincosto,sobrelacualelCompradorhayanotificadoalvendedoroaGreenwayHomeProducts,dentrodelperíododelagarantía.La
obligacióndeGreenwayHomeProductsbajoestagarantíaestálimitadaexpresamentealasreparacionesoelreemplazo.Estagarantía
no cubre los costos de flete desde y hacia el establecimiento autorizado para la reparación.
Exceptosegúnloindicadoenlapresenteolorequeridoporley,elFabricantenoproveeráningunaotragarantíaocontrato,expreso,
implícitooporley,incluidatodagarantíadecomerciabilidadoidoneidadparaunpropósitoenparticular.Elfabricantenoasumeninguna
obligación, ni autoriza a ninguna persona a asumir ninguna obligación de responsabilidad en relación con este dosificador de agua. En
ningúnmomentoelfabricanteseráresponsablepordañosindirectos,especialesoconsecuentes(incluyendo,sinlimitación,pérdida
económica) ni por ninguna otra demora en el cumplimiento de este contrato, debido a causas que estén ajenas a su control.
Algunosestadosoprovinciasnopermitenlaslimitacionesacercadecuántodebedurarunagarantíaimplícita,demodoquelalimitación
arriba indicada puede no aplicarse en su caso. Algunos estados o provincias no permiten la exclusión o limitación acerca de daños
incidentalesoconsecuentes,demodoquelalimitaciónoexclusiónarribaindicadapuedenoaplicarseensucaso.Estagarantíale
otorgaderechoslegalesespecíficos,yustedpuedetenerotrosderechosquevaríandeunestadoaotro,odeunaprovinciaalaotra.
Siustednecesitaservicio,veaprimerolasección“Solucióndeproblemas”deestemanual.Puedeobtenerasistenciaadicionalen
nuestrositiodeinternet,www.greenwayhp.com,ollamandoanuestralíneadeservicioalcliente,al1-866-253-0447,Lunesajueves
de8:30AMa5:00PM(horadelEste),viernesde8:30AMa4:00PM(horadelEste),oescribaa:GreenwayHomeProducts,Customer
ServiceCenter,400SouthgateDrive,Guelph,ON,CanadaN1G4P5.
Guardeestemanualysurecibodecomprajuntosparareferenciafutura.Deberáproveerunapruebadecompraparaobtenerelservicio
delagarantía.
Escriba la siguiente información acerca de su dosificador de agua para ayudarlo mejor a obtener asistencia o servicio, si alguna vez lo
necesita.Deberásaberelnúmerocompletodemodeloydeserie.Puedeencontrarestainformaciónenlapartetraseradeldosificadorde
agua.