
Loading ...
Loading ...
Loading ...
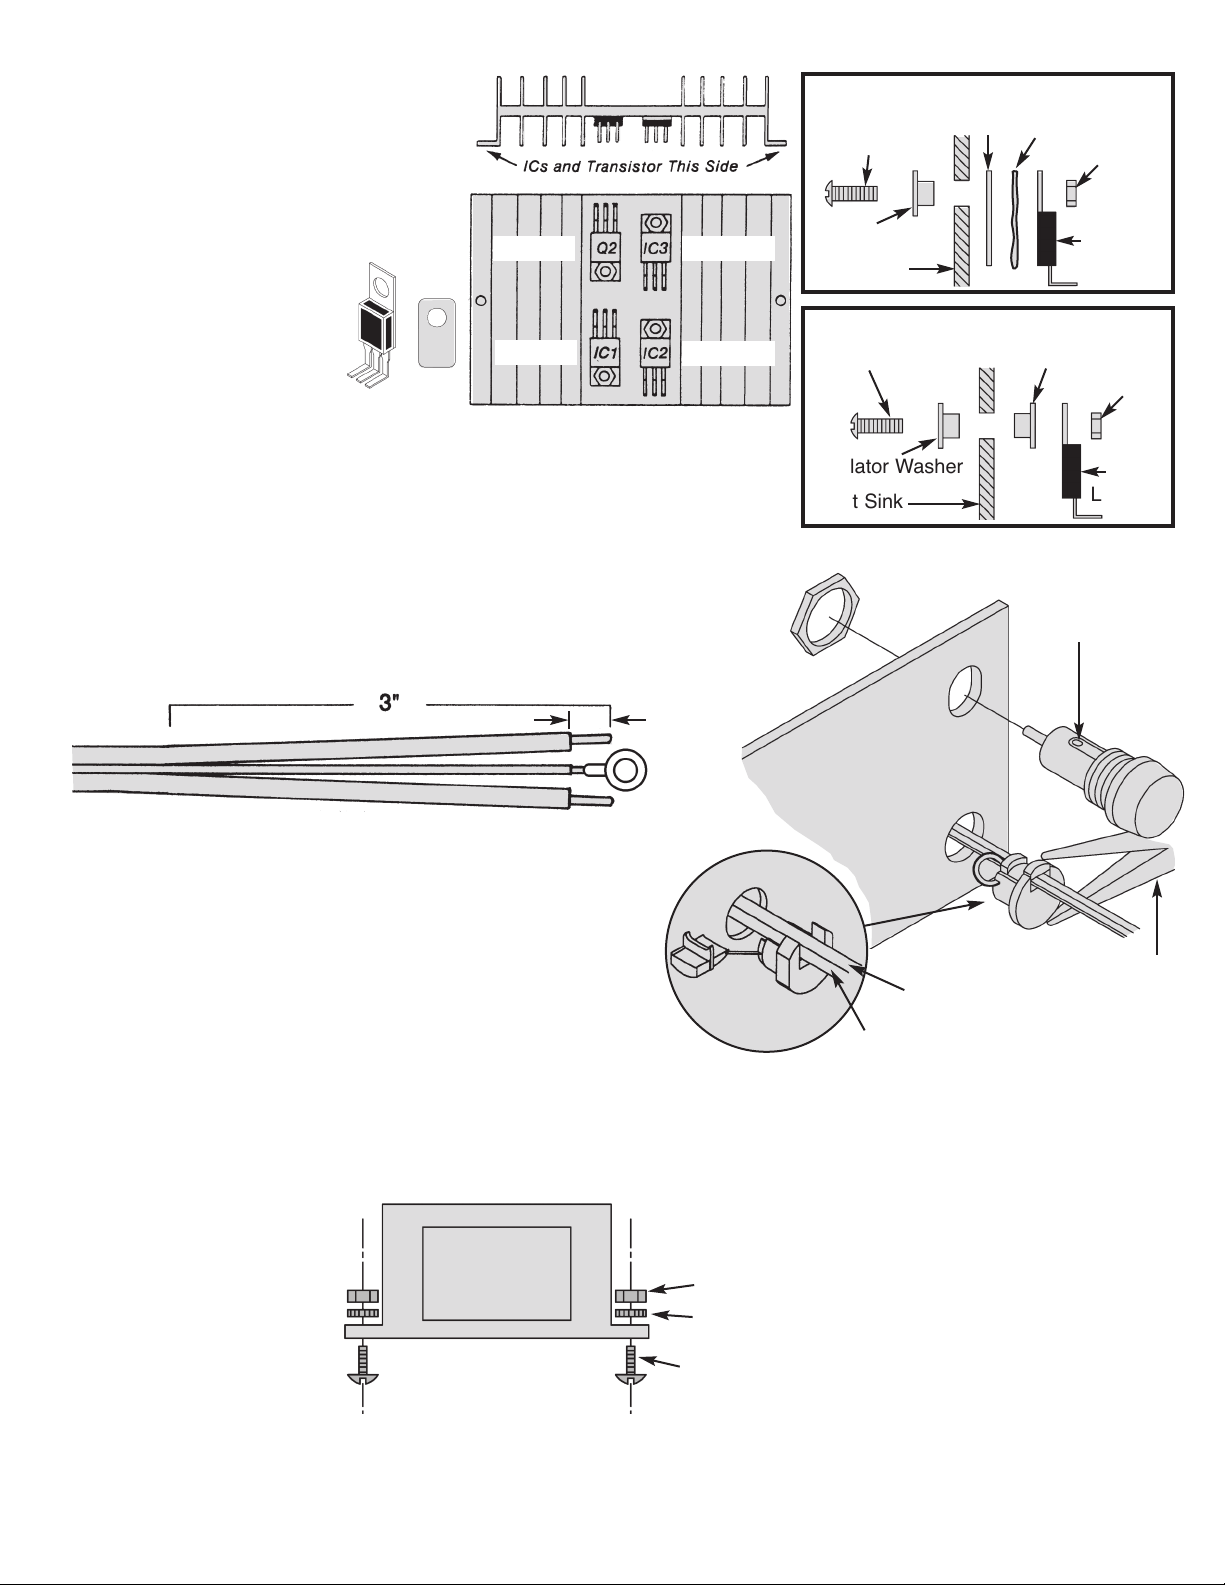
Carefully bend the leads of IC1, IC2,
IC3 and Q2 on the heat sink at right
a
ngles with pliers.
Install IC1, IC2 and Q2 in the positions
shown in Figure E. Fasten in place
using the parts shown in Figure F.
Spread the silicon grease on the back
of the transistor and ICs.
r IC1 - LM-317 IC
r IC2 - LM-337 IC
r Q2 - 2N6124 Transistor
Install IC3 as shown in Figure Fa.
r IC3 - LM-7805 IC
r Mount the fuse holder to the top
hole in the back of the chassis, with the side lug up, as shown in
Figure G. Fasten in place with the 3/8” nut. After the holder is
secure, unscrew the top and insert the fuse.
r
Separate the wires of the line cord 3” from the end. Strip the
insulation off the end of all two end wires to expose 1/4” of bare wire.
r
Insert 6” of the line cord into the bottom hole on the back of
the chassis, as shown in Figure G. Place the line cord into
the slot of the strain relief and squeeze the two sections
together with pliers. Then, insert the strain relief into the
hole.
r Install the transformer with the black wires side as shown
in Figure I. Use an 8-32 x 3/8” screw, #8 lockwasher and
an 8-32 nut on each side to fasten in place, as shown in
Figure H.
-8-
Figure E
Figure H
8-32 Nut
#8 Lockwasher
8-32 x 3/8” Screw
Figure F
S
mall 6-32 Nut
IC1, IC2,
Q2
Heat Sink
Insulator Washer
6-32 x 3/8”
Screw
LM7805
LM-337
LM-317
2N6124
Silicon GreaseMica
Figure Fa
Figure G
Side Lug
Pliers
Mica
Small 6-32 Nut
IC3
LM7805
Heat Sink
Insulator Washer
6-32 x 3/8” Screw
Insulator Washer
Ribbed
Smooth
1/4”
H
eatsink
XP-720K_REV-H_111114.qxp_XP-720K REV-H 111114 7/31/15 1:08 PM Page 9
Loading ...
Loading ...
Loading ...