Loading ...
Loading ...
Loading ...
32
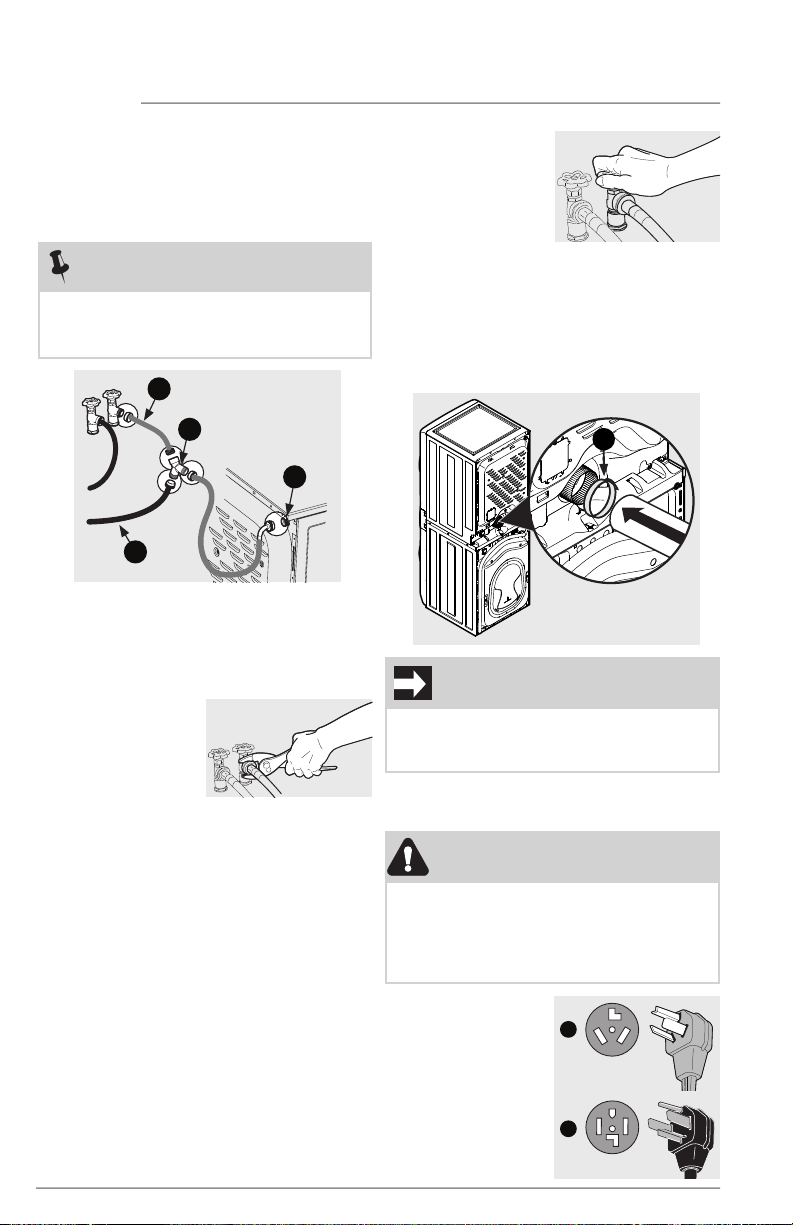
4. If your installation has room for the COLD
water supply to accept the “Y” connector
directly, thread the “Y” connector to the
COLD water supply and snug it by hand;
then tighten it another 2/3 turn with pliers.
5. If there is not
room to install
the “Y” connector
directly, thread
the short
extension hose
on to the COLD water supply and snug it
by hand; then tighten it another 2/3 turn
with pliers.
6. Thread the “Y” connector to the short
extension hose and snug it by hand; then
tighten it another 2/3 turn with pliers.
7. Connect the COLD inlet hose for the
washer to the “Y” connector and snug it
by hand; then tighten it another 2/3 turn
with pliers.
8. Connect the straight end of the long hose
from the kit to the other outlet on the “Y”
connector and snug it by hand. Connect
the hose’s 90° coupling to the brass
water inlet on the back of the laundry
center and snug it by hand. Tighten
each connection of the dryer inlet hose
another 2/3 turn with pliers.
1
2
3
4
NOTE
If you were able to install the “Y”
connector directly to the COLD water
supply, please skip to step 8.
1. Short hose
2. “Y” connector
3. Water Inlet on dryer
4. Cold water supply hose to washer
Completing the Installation
1
1. Connect the exhaust duct to the
outside exhaust system. Use of
a 4” (102 mm) clamp (item A) is
recommended to connect the dryer to
the exhaust vent system. Use metal foil
tape to seal all other joints.
2. Plug the power cord into a grounded
outlet.
IMPORTANT
Be sure the power is off at a circuit
breaker/fuse box before plugging the
power cord into an outlet.
WARNING
Improper grounding of the laundry center
may cause serious injury or death. Check
with a licensed electrician if you are in doubt
as to whether the appliance is properly
grounded.
1
2
1. 3-Wire Grounded
Plug
2. 4-Wire Grounded
Plug
9. Turn on the
water and check
for leaks at all
connections.
INSTALLATION
Loading ...
Loading ...
Loading ...