Loading ...
Loading ...
Loading ...
19
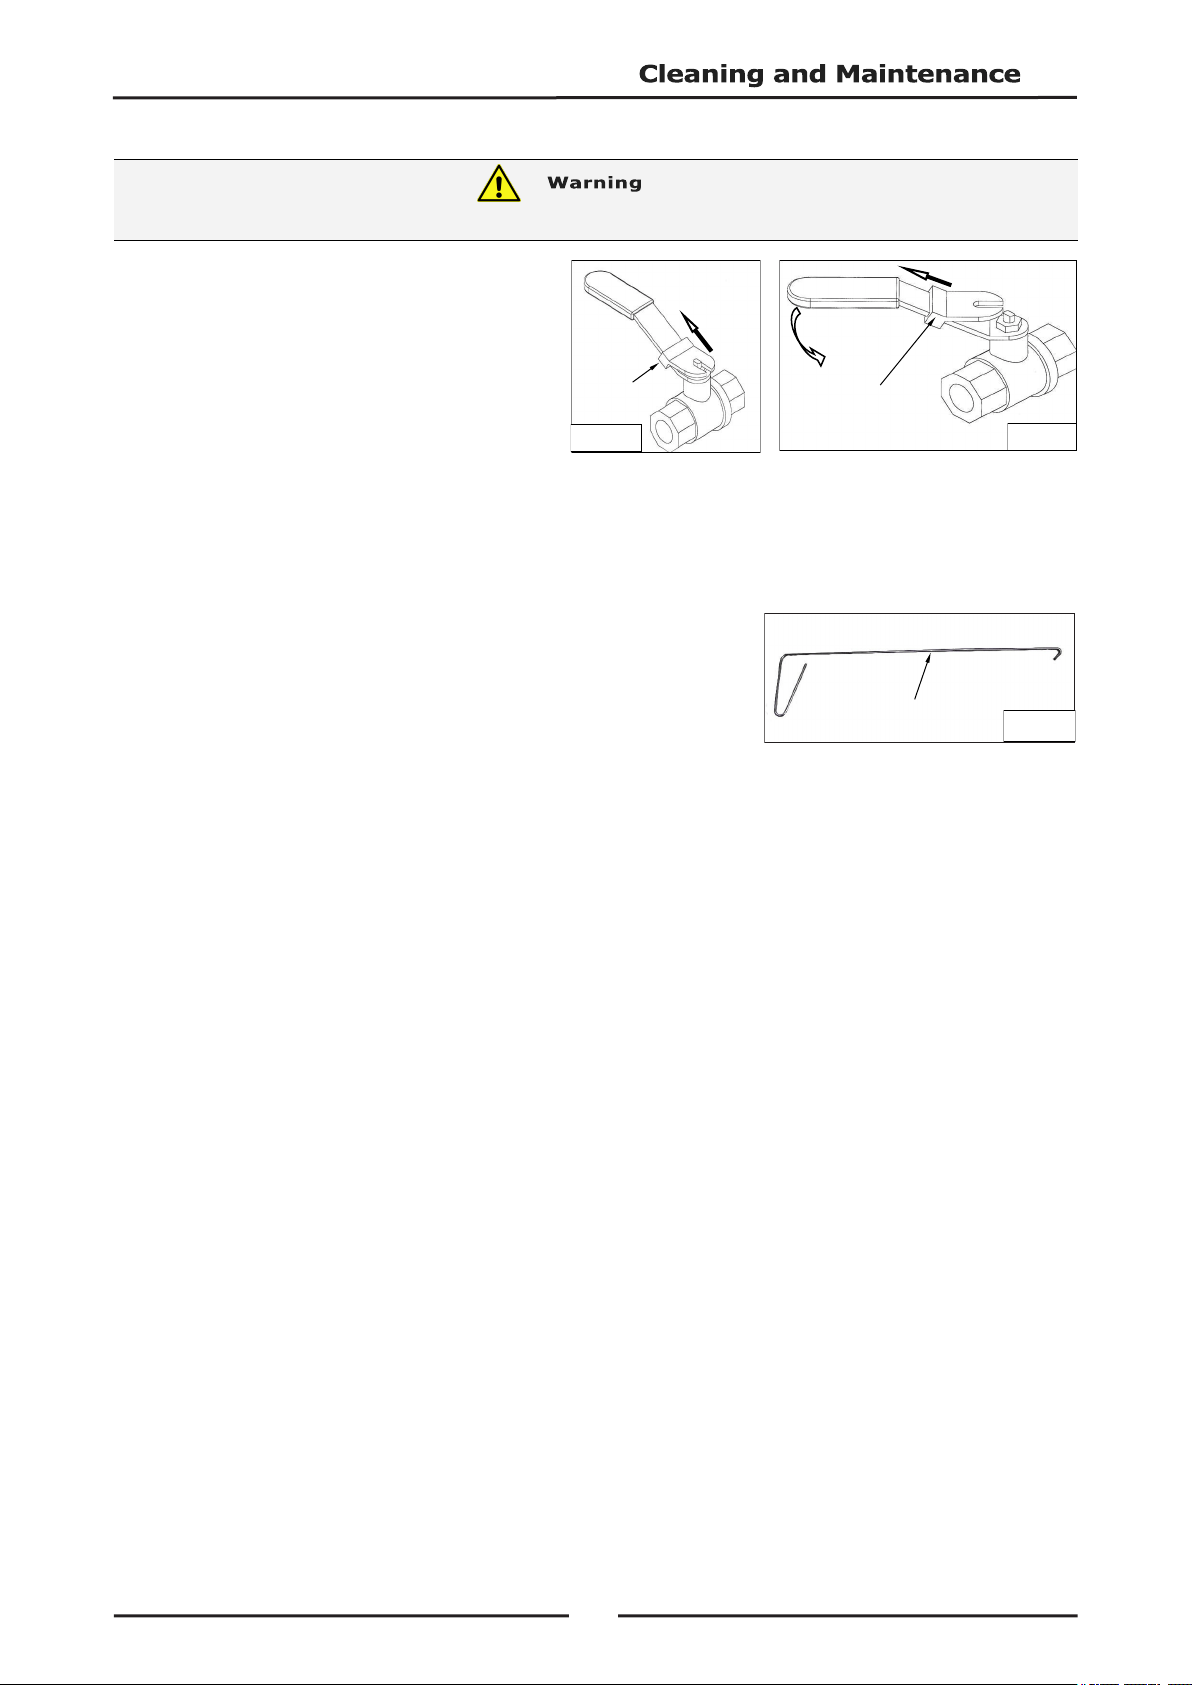
Opening the Drain Valve
a. Lift the locking slide on valve handle
(Fig 10) to release valve.
b. While holding locking slide in the
withdrawn position, rotate handle
anticlockwise (Fig 11) to open valve.
c. When valve is closed, locking slide will
drop down over locking valve to
prevent accidental opening of valve as
shown in Fig.10.
4. Do not empty total fryer contents into one large container, as this will be dangerous and may be
difficult, when lifted up to pour hot oil back into tank.
5. Slip a muslin or other suitable filter bag over the end of the drain valve. Crumbs will be caught in
bag but frying medium will strain freely through into receptacle.
6. Open drain valve slowly to minimise splashing, and take care not to overfill the container.
7. If necessary, use the drain stick (see Fig 12) to dislodge any
blockages in the drain.
8. When tank has been drained, use a ladle or small pan with a
handle and dip into hot frying medium from container and pour
around sides and bottom of tank to wash out crumbs and
particles adhering to tank.
9. Continue to dip and pour until all crumbs are washed down and
into the filter bag.
10. Open drain valve fully and check for any particles or crumb residue lodged in valve. Clean out valve
with a stiff nylon brush. Do not use a wire brush as this may damage the valve seating and will
eventually lead to leakage. If obstruction cannot be removed with a brush, use a wooden probe to
dislodge obstruction.
11. Wipe all exterior panels with a cloth dampened with detergent and rinse off any residue with clean
warm water.
12. Clean Control Panel with a damp cloth lightly moistened with a solution of water and a commercial
quality foodservice approved detergent.
13. Once the daily cleaning operation is completed, close the drain valve and pour frying medium back
into the tank.
HOT OIL WILL BURN - DO NOT RUSH THIS JOB.
Fig 11
Fig 10
Locking Slide
Locking
Slide
Fig 12
Drain Stick
Loading ...
Loading ...
Loading ...