Loading ...
Loading ...
Loading ...
14
OIL - Carefully fill fryer tank with oil until the 'FILL-LEVEL' mark is reached.
The GT45E fryer will hold 20 litres of oil.
The GT46E fryer will hold 13 litres of oil per tank.
The GT60E fryer will hold 31 litres of oil.
SHORTENING - Shortening should be cut in pieces and packed down into tank.
The GT45E fryer will hold 37lbs shortening.
The GT46E fryer will hold 24lbs shortening per tank.
The GT60E fryer will hold 46.5lbs shortening.
Turn ‘On’ the fryer. Melt cycle should be set to CY S on the control
panel display. Refer to ‘Controller Advanced Programming Mode’
section to change. Heating will automatically cycle at a lower
temperature to gently melt the shortening.
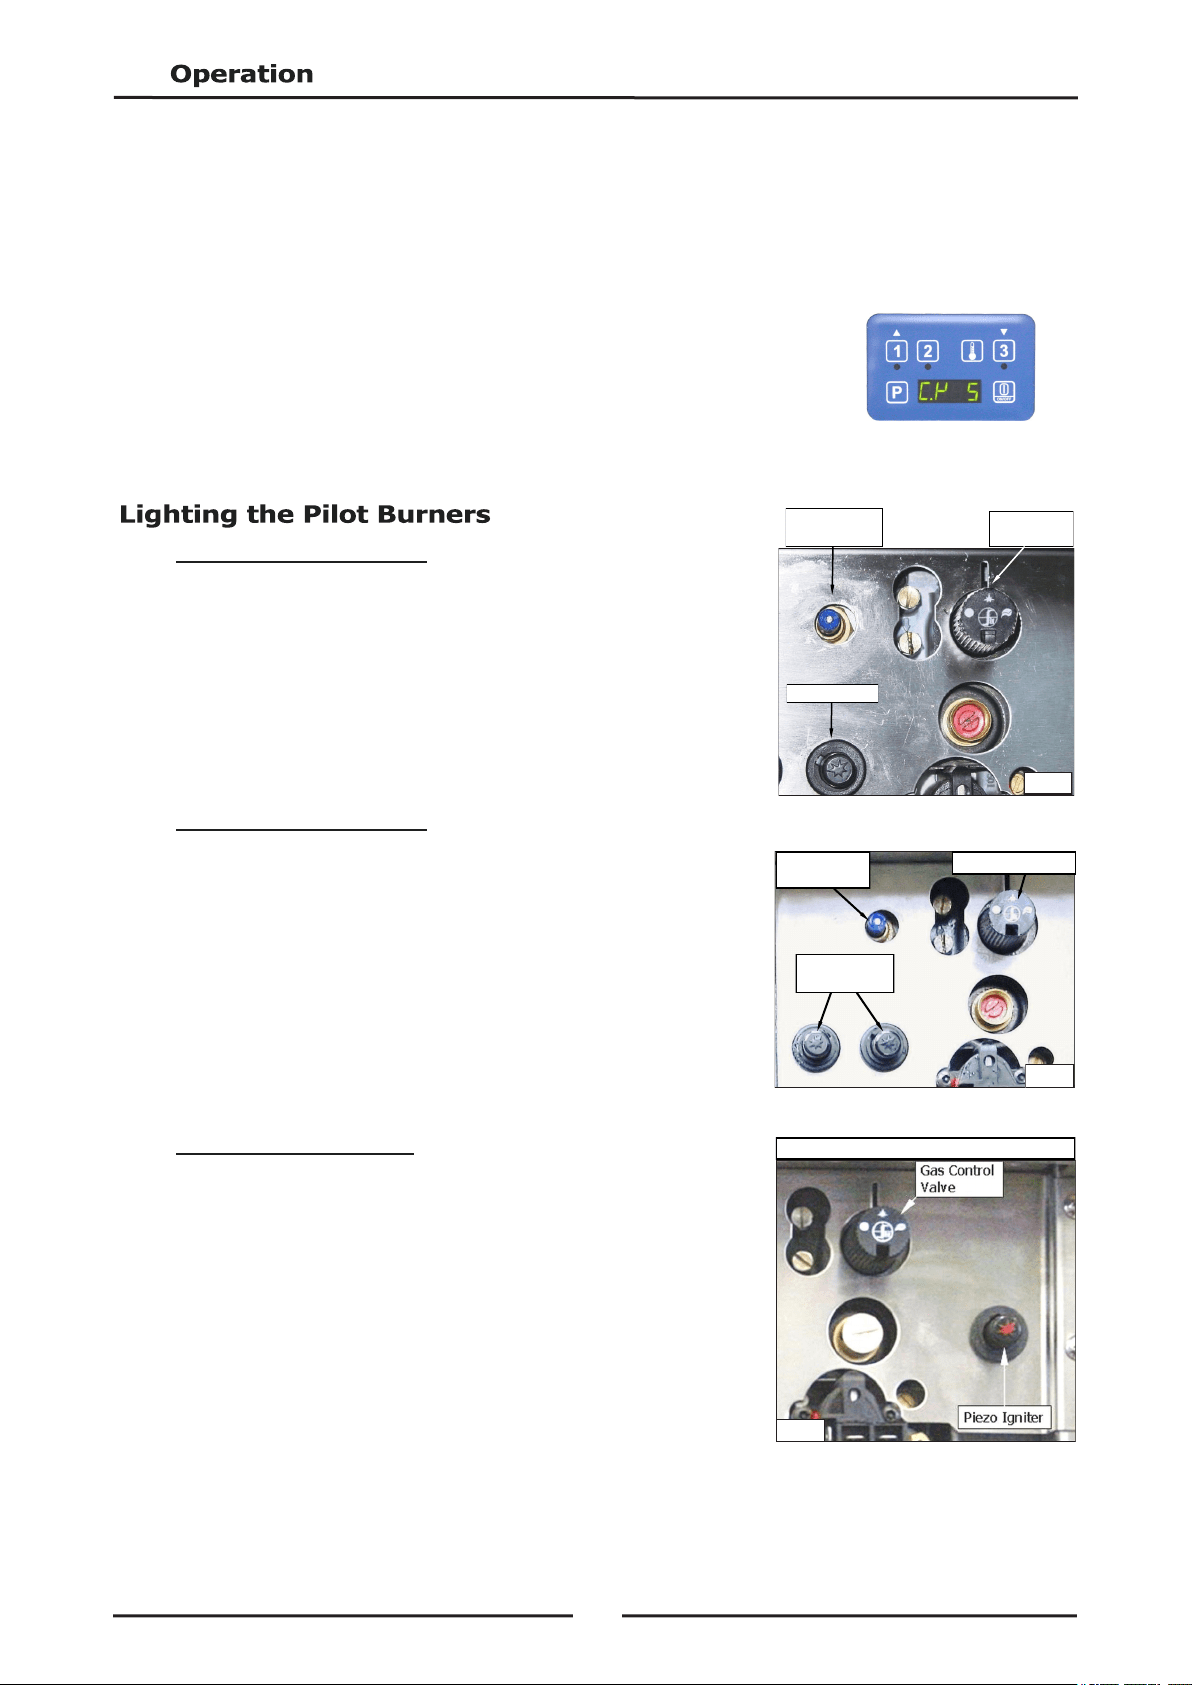
GT45 Fryer (Single Tank)
1. Rotate gas control knob to Pilot position and hold knob
depressed.
2. At the same time hold flame failure button depressed.
3. Depress piezo igniter until right hand pilot ignites.
4. Hold gas control knob and flame failure button depressed for
approx. 10 to 15 seconds after igniting pilot burner, then
release, both pilot burners should remain alight.
5. If pilot burners do not ignite, repeat Items 1 to 4 above.
GT60 Fryer (Single Tank)
1. Rotate gas control knob to Pilot position and hold knob
depressed.
2. At the same time hold flame failure button depressed.
3. Depress right and left hand piezo igniters until right and left
hand pilots ignite.
4. Hold gas control knob and flame failure button depressed for
approx. 10 to 15 seconds after igniting pilot burners, both pilot
burners should remain alight.
5. If pilot burners do not ignite, repeat Items 1 to 4 above.
GT46 Fryer (Twin Tank)
1. Rotate gas control knob to 'PILOT' position and hold knob
depressed.
2. Depress the piezo igniter until pilot ignites.
3. Continue holding the gas control knob depressed for approx. 10
to 15 seconds after igniting pilot burner, pilot burner should
remain alight.
4. If pilot burner does not ignite, repeat Items 1 to 3 above.
5. To ignite the second pilot burner, repeat Items 1 to 3 above.
Flame Failure
Button
Gas Control
Valve
Fig 5
Piezo Igniter
Gas Control Valve
Left & Right
Piezo Igniters
Flame Failure
Button
Fig 6
Fig 7
Only Right Hand Valve Shown
Loading ...
Loading ...
Loading ...