
Loading ...
Loading ...
Loading ...
22
5. Line Set Installation
WARNING
• R-404A itself is not ammable at atmospheric pressure and temperatures up to
176°F (80°C).
• R-404A itself is not explosive or poisonous. However, when exposed to high
temperatures (open ames), R-404A can be decomposed to form hydrouoric
acid and carbonyl uoride both of which are hazardous.
• Do not use silver alloy or copper alloy containing arsenic.
• Use an electronic leak detector or soap bubbles to check for leaks. Add a trace of
refrigerant to the line set tubing through the service valve access ports (ifusing
an electronic leak detector), and then raise the pressure using nitrogen gas
(140PSIG). Do not use R-404A as a mixture with pressurized air for leak testing.
NOTICE
• Do not open any service valve until the line set installation is complete and leak
tested.
• Ensure that there are no traps and no kinks in the line set.
• Do not coil extra line set.
a) Line Set Up to 66' (20 m)
1) Route the factory line set or appropriate size copper tubing. When eld fabricating,
insulate the copper tubes separately. Leave a service loop behind the icemaker to allow
the icemaker to be pulled out for service. See Fig. 7.
Note: • The service loop is not considered an oil trap.
• The maximum line length for the standard line sizes and refrigerant charge is
66' (20 m). With larger line sizes and/or additional refrigerant, the maximum line
length is 100' (30.5 m). For details, see "II.G.4 Line Set Size and Refrigerant
Charge."
2) Remove any extra line set length, then insulate the two copper tubes separately.
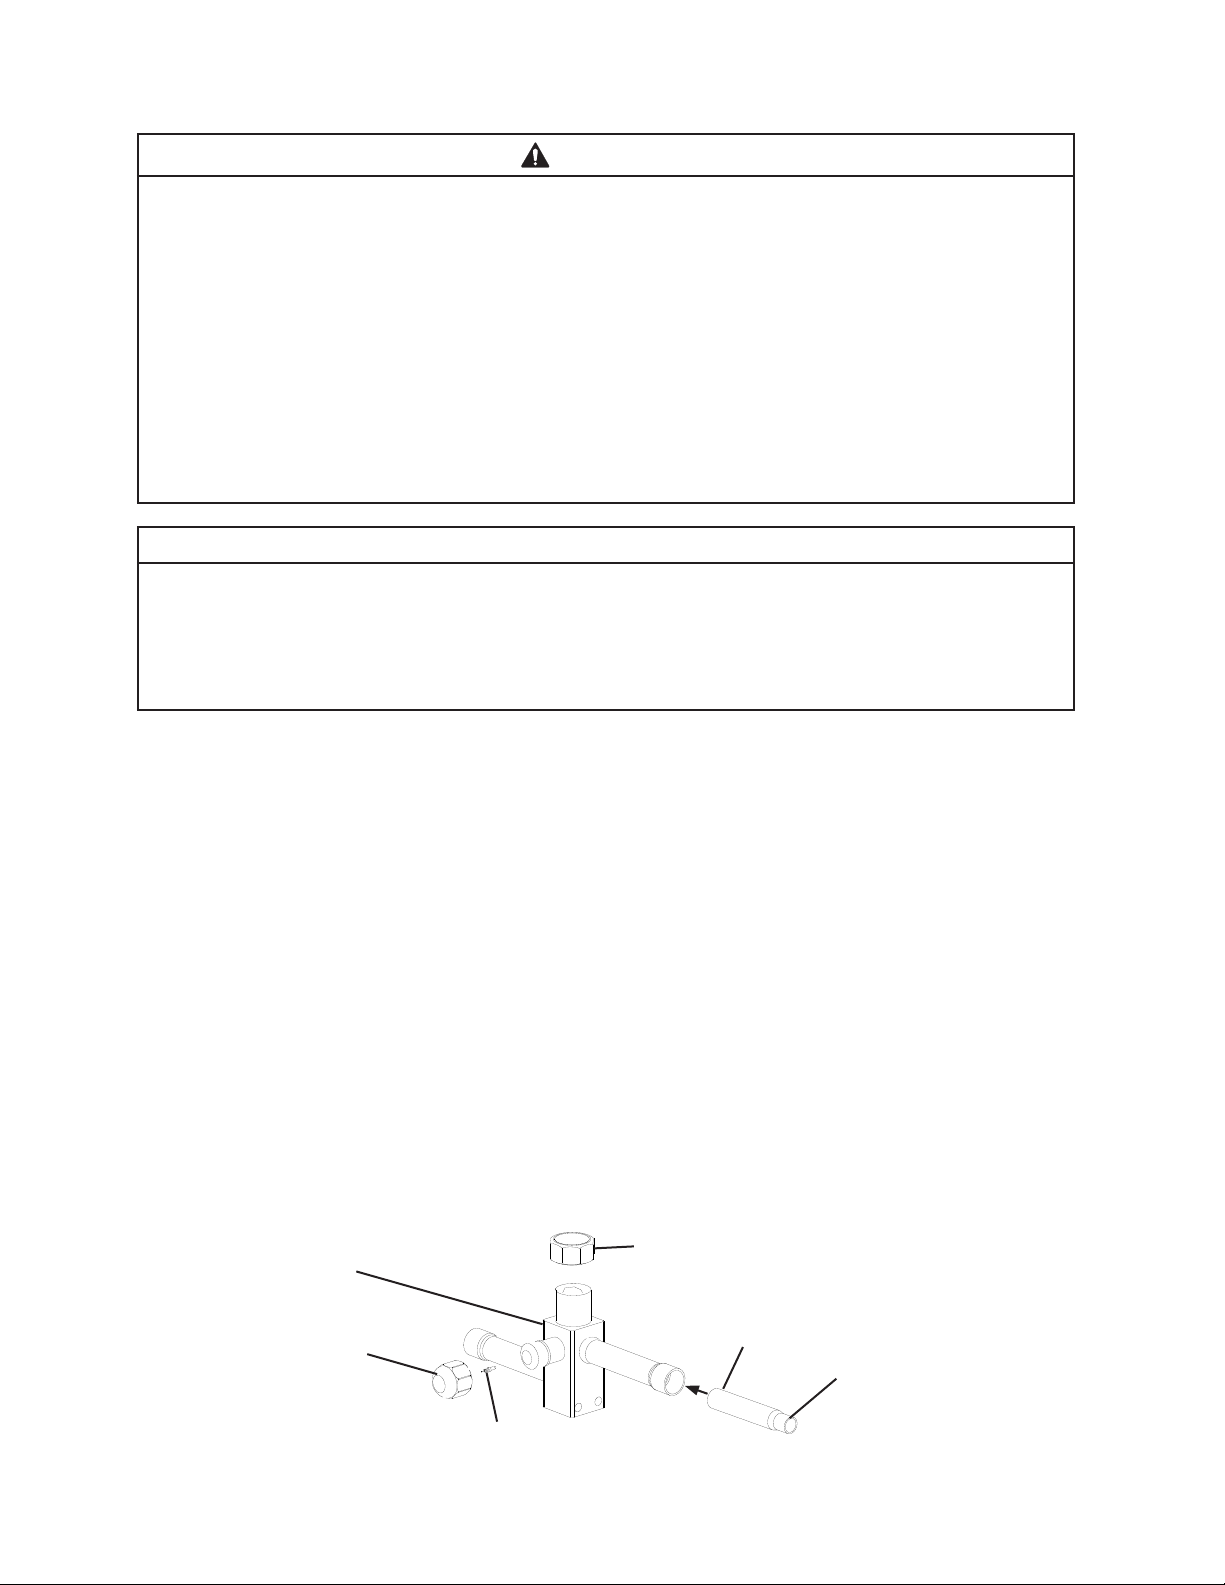
3) Remove the Schrader valves from the icemaker service valves. Next, remove the
straight copper tube from the icemaker accessory bag and place it in the icemaker
liquid line service valve with the smaller end of the straight copper tube facing outward.
See Fig. 10. Note: The smaller diameter must be facing outward. Next, place the liquid
line copper tube into the straight copper tube.
Service Valve CapCondenser Unit Discharge Line
Service Valve
Access Valve Cap
Shrader Valve
Straight Copper Tube
Smaller Diameter End
Fig. 10
Loading ...
Loading ...
Loading ...