Loading ...
Loading ...
Loading ...
Page 7
OPERATION
USING THE TOOL WITH THE ROUTER
BASE
Set the tool base on the workpiece without
the trimmer bit making any contact. Turn
the tool on and wait until the bit attains full
speed. Move the tool forward over the
while moving the tool.
When cutting the edge, be sure to keep the
workpiece surface on the left side of the
trimmer bit in the feed direction.
1
Fig.7
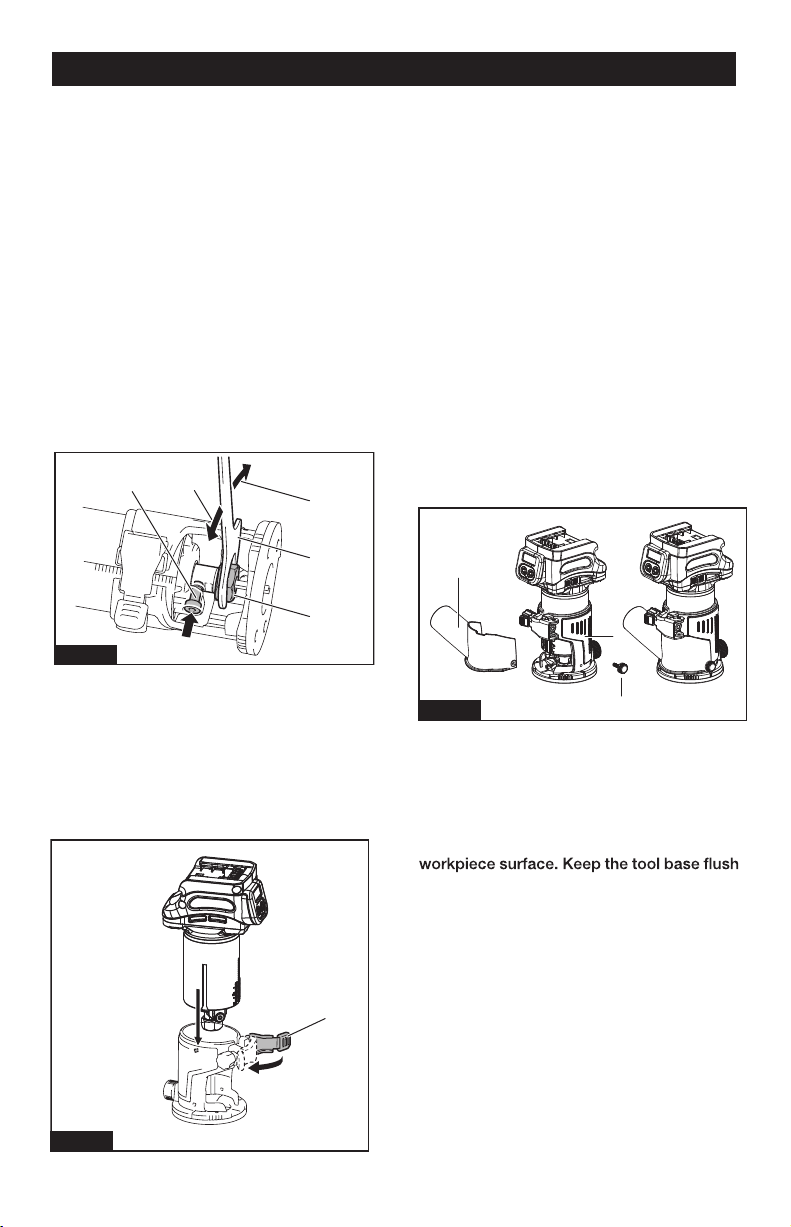
INSTALLING OR REMOVING ROUTER BIT
NOTICE: Do not tighten the collet nut
without inserting the bit. The collet cone
may break.
Insert the trimmer bit all the way into the
collet cone. Press the shaft lock and tighten
the collet nut with the wrench.
■Fig.6: 1. Shaft lock
■
Fig.8:
DUST HOOD INSTALLATION
1. Dust hood
2. Thumb screw
3. Router base
2. Loosen
3. Tighten
4. Wrench
5. Collet nut
NOTE: The shaft lock may not return to the
original position when you tighten the collet
nut at the installation of the trimmer bit. The
shaft lock returns to the original position
when you start the tool.
INSTALLING OR REMOVING THE ROUTER
BASE
2.
Close the lock lever.
3.
Attach the dust nozzle to the
trimmer
base, and then tighten the thumb screw.
To remove the base, follow the installation
procedure in reverse.
1
2
3
4
5
Fig.6
Fig.8
1. Open the lock lever of the trimmer base,
then insert the tool into the trimmer base
and align the groove on the tool with the
protrusion on the trimmer base.
1. Locate dust hood.
2. As shown in above diagram, place hood to
the bottom right until the holes line up.
3. Insert and tighten thumb screw.
4. Check to ensure attachment is secure, then
attach a 1 1/4” vacuum hose (not included).
1
2
3
■Fig.7: 1. Lock lever
CAUTION: When using the tool with the trim
mer base, be sure to install the dust nozzle
on the router base.
Loading ...
Loading ...
Loading ...