Loading ...
Loading ...
Loading ...
BODYAND HAND POSITION (Fig. S)
Proper positioning of your body and hands when operating
the miter saw will make cutting easier and safer. Never
place hands near the cutting area. Place hands at least
8-3/4" away from the path of the blade. Hold workpiece
firmly against the fence to prevent movement toward the
blade. Keep hands in position until the trigger has been
released and the blade has completely stopped. Before
making a cut, with the power switch inthe OFF position
bring the saw blade dov_ to the workpiece to see the
cutting path of the blade.
* Keep children away. Keep all visitors a safe
distance from the miter saw. Make sure bystanders
are clear of the miter saw and workpiece.
• Don't force the tool. It will do the job better and
safer at its designed rate. Feed the saw into the
workpiece slowly with a firm downward motion.
Before freeing jammed material.
• TurnswitchOFF.
• Unplugthe miter saw,
• Wait for all moving parts to stop.
Alter finishing a cut.
• Keep holding the power head down.
• Release the switch, and wait for all moving
parts to stop before moving your hands.
• If the blade doesn't stop within 6 seconds,
unplug the saw and follow the instructions in
THE TROUBLESHOOTING GUIDE section for
adjusting the blade brake before using the
saw again.
Fig. S
/--,, l-<
!_7%'1.t!.,, _)"
_t .Y \_ J
8-3/4" 8-3/4"
TURNING THE SAW ON (Fig. "r)
Depress the trigger switch (1) to turn on the miter saw.
started.
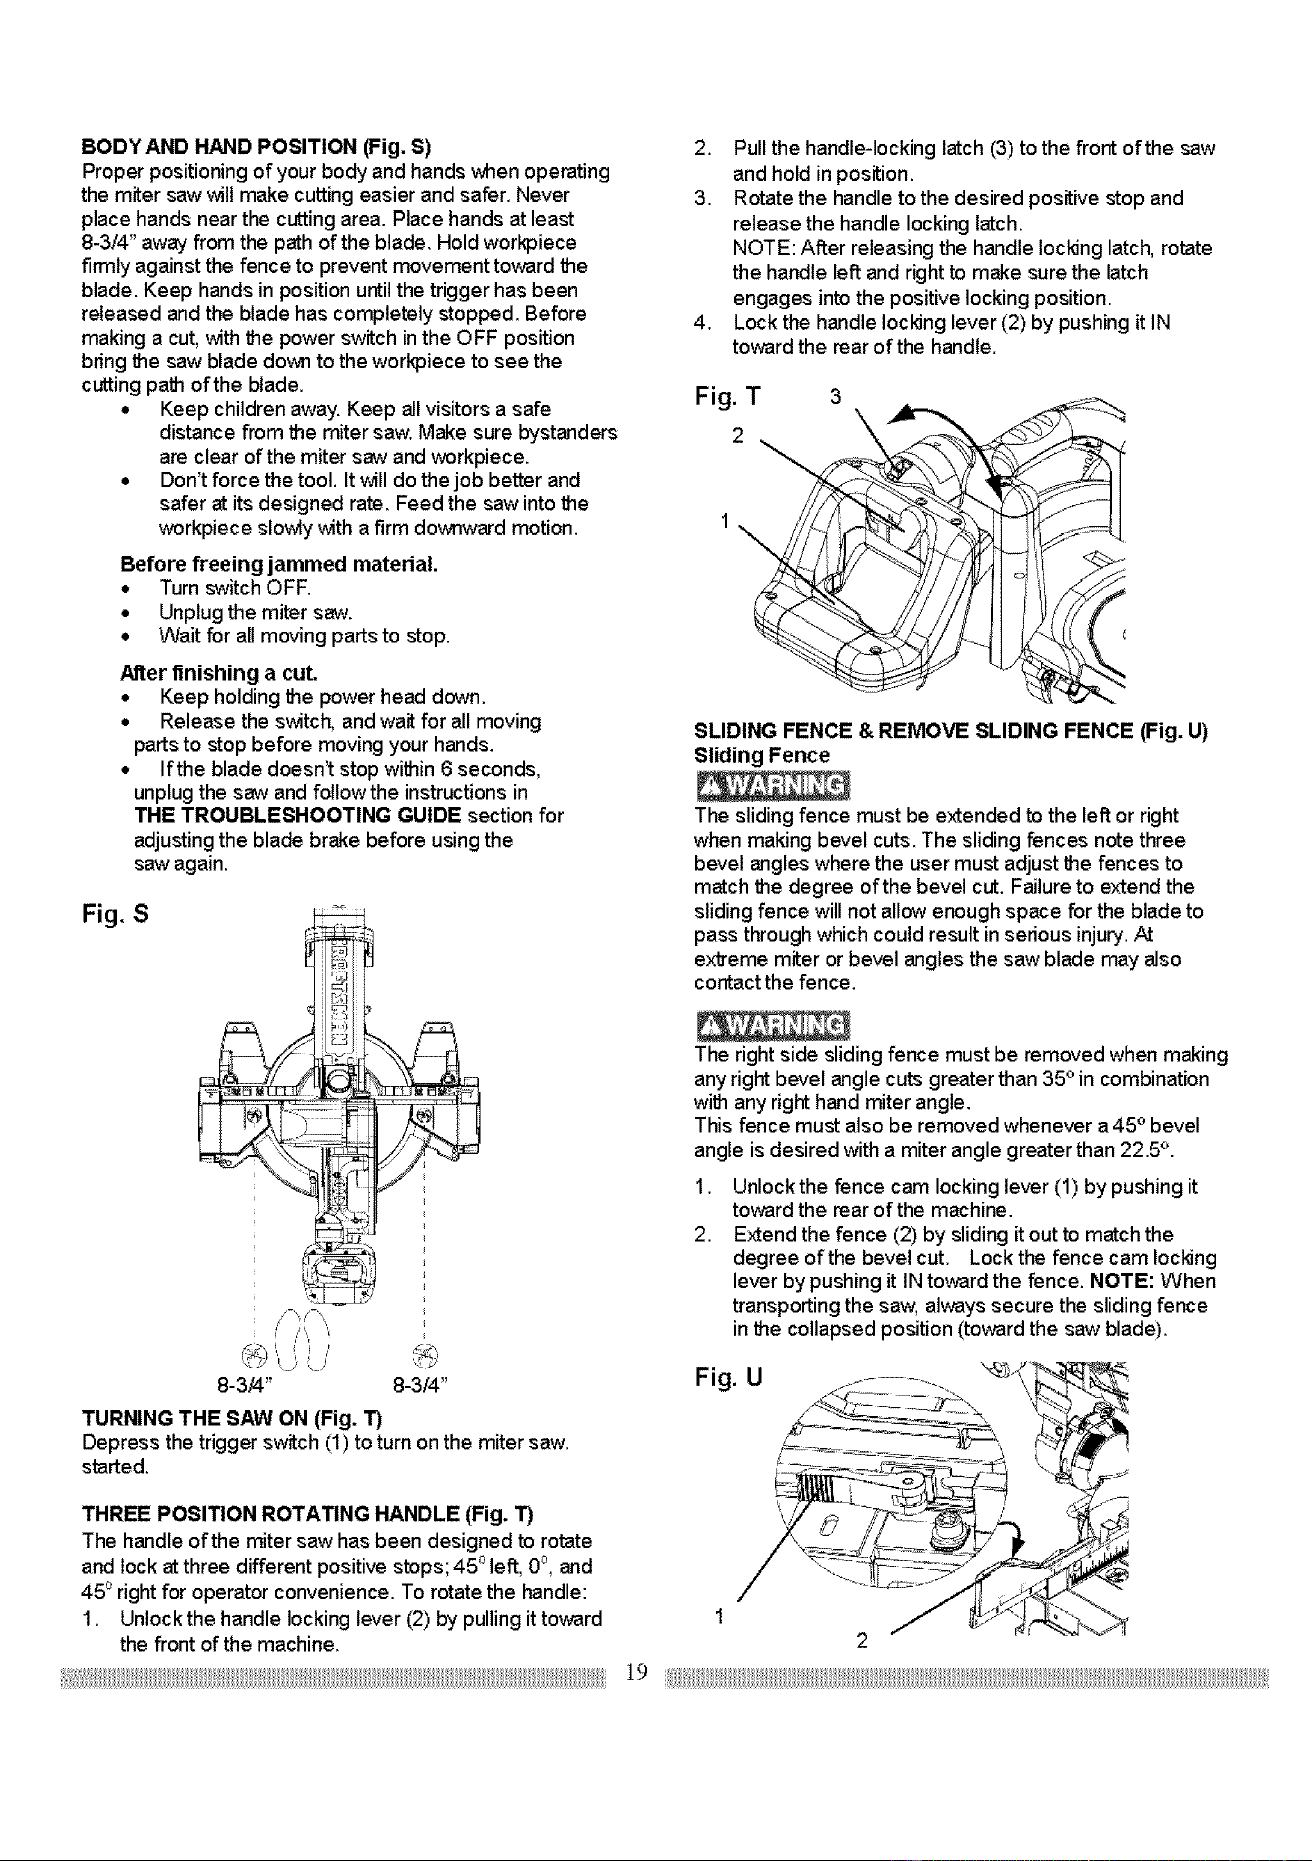
2. Pull the handle-locking latch (3) to the front of the saw
and hold in position.
3. Rotate the handle to the desired positive stop and
release the handle locking latch.
NOTE: After releasing the handle locking latch, rotate
the handle left and right to make sure the latch
engages into the positive locking position.
4. Lock the handle locking lever (2) by pushing it IN
toward the rear of the handle.
Fig, T
2
SLIDING FENCE & REMOVE SLIDING FENCE (Fig. U)
Sliding Fence
The sliding fence must be extended to the left or right
when making bevel cuts. The sliding fences note three
bevel angles where the user must adjust the fences to
match the degree ofthe bevel cut. Failure to extend the
sliding fence will not allow enough space for the blade to
pass through which could result in serious injury. At
ex_eme miter or bevel angles the saw blade may also
contact the fence.
The right side sliding fence must be removed when making
any right bevel angle cuts greater than 35 ° in combination
with any right hand miter angle.
This fence must also be removed whenever a 45 ° bevel
angle is desired with a miter angle greater than 22.5 °.
l,
2.
Unlock the fence cam locking lever (1) by pushing it
toward the rear of the machine.
E_end the fence (2) by sliding it out to match the
degree of the bevel cut. Lock the fence cam locking
lever by pushing it IN toward the fence. NOTE: When
transporting the saw, always secure the sliding fence
in the collapsed position (toward the saw blade).
THREE POSITION ROTATING HANDLE (Fig. 1")
The handle of the miter saw has been designed to rotate
and lock at three different positive stops; 45 ° left, 0 °, and
45 °right for operator convenience. To rotate the handle:
1. Unlock the handle locking lever (2) by pulling ittoward
the front of the machine.
1
2
Loading ...
Loading ...
Loading ...