Loading ...
Loading ...
Loading ...
ASSEM BLY INSTRUCTIONS
To avoid injury, do not connect this miter saw to the
power source until it is completely assembled and
adjusted, and you have read and understood this
Operators Manual.
UNLOCKING THE SLIDE CARRIAGE (Fig, A)
Afl_r removing the saw from the carton, loosen the
slide carriage lock knob. When transporting or storing
the miter saw, the slide carriage should always be
locked in position. The carriage lock handle (1) is
located on the right side of the slide carriage.
Fig. A
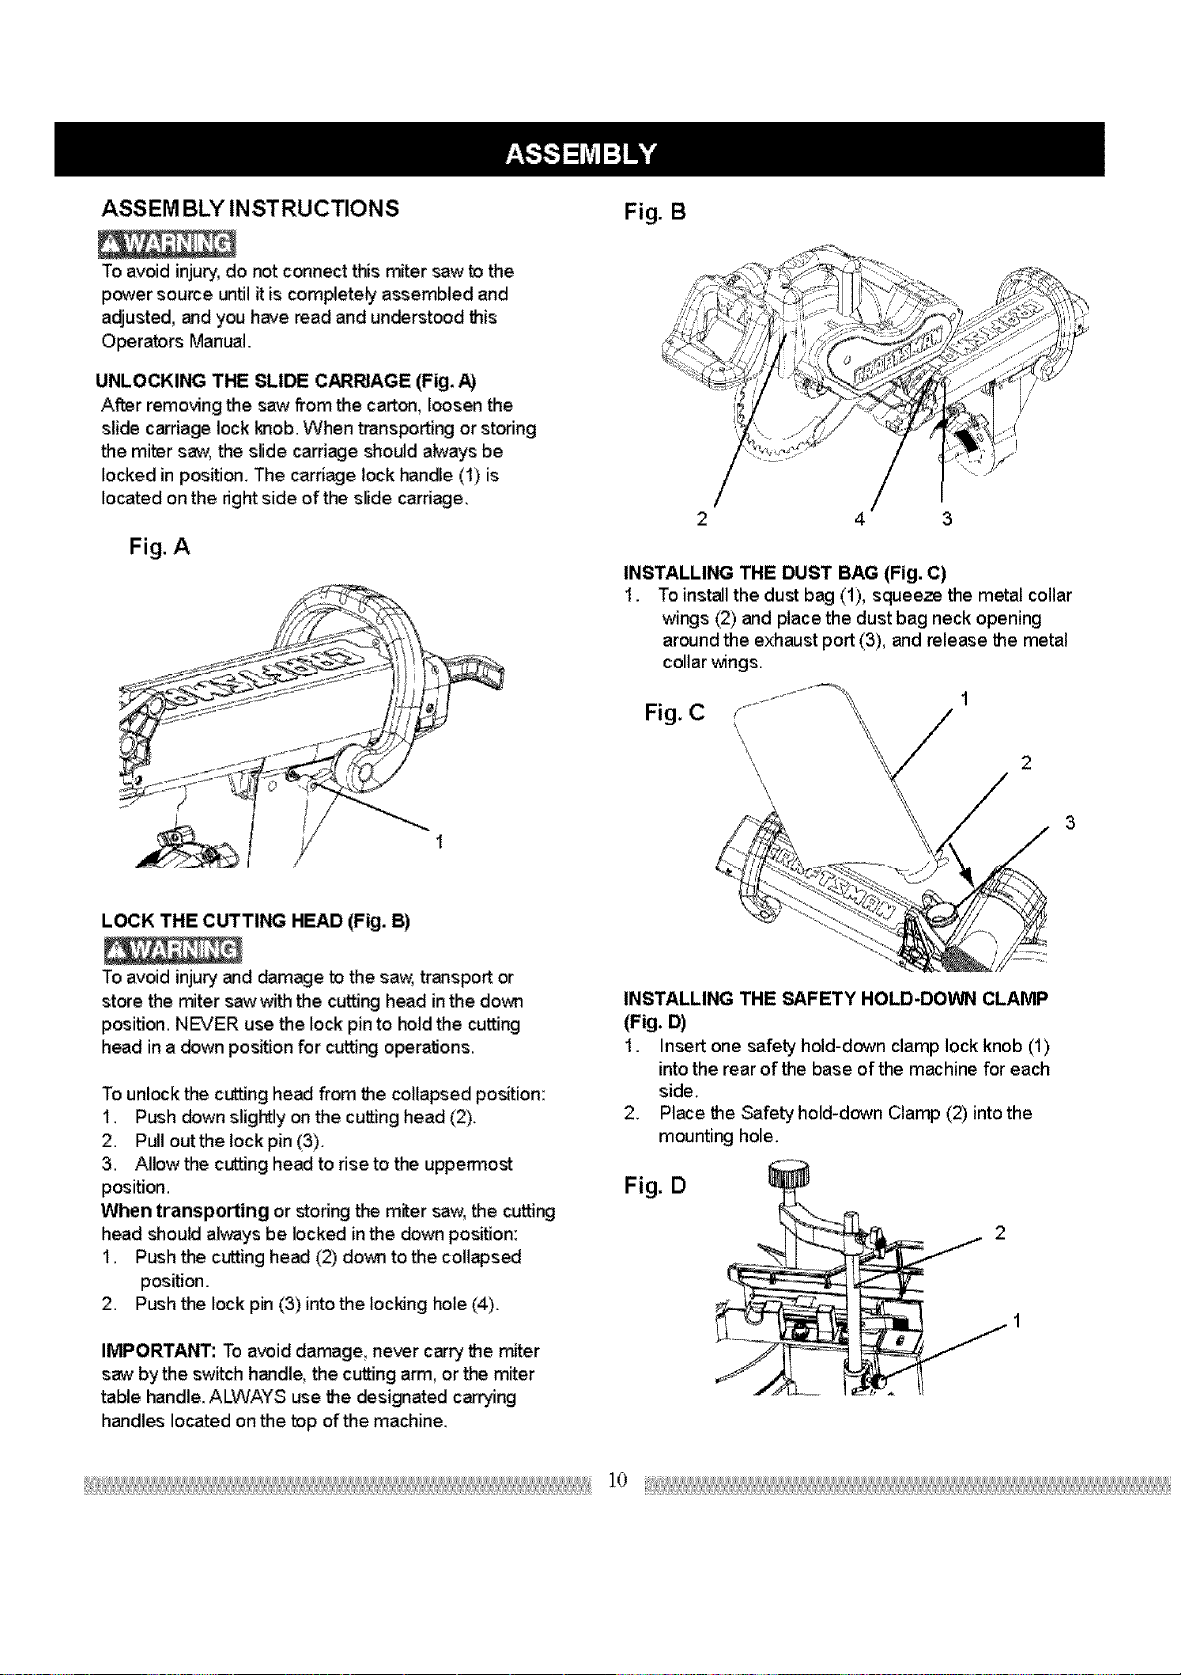
LOCK THE CUTTING HEAD (Fig. B)
To avoid injury and damage to the saw, transport or
store the miter saw with the cutting head in the down
position. NEVER use the lock pin to hold the cutting
head in a down position for cutting operations.
To unlock the cutting head from the collapsed position:
1. Push down slightly on the cutting head (2).
2. Pull outthelockpin (3).
3. Allow the cutting head to rise to the uppermost
position.
When transporting or storing the miter saw, the cutting
head should always be locked in the down position:
1. Push the cutting head (2) down to the collapsed
position.
2. Push the lock pin (3) into the locking hole (4).
IMPORTANT: To avoid damage, never carry the miter
saw by the switch handle, the cutting arm, or the miter
table handle. ALWAYS use the designated carrying
handles located on the top of the machine.
Fig. B
/
4
INSTALLING THE DUST BAG (Fig. C)
1. To install the dust bag (1), squeeze the metal collar
wings (2) and place the dust bag neck opening
around the exhaust port (3), and release the metal
collar wings.
Fig. C
\
\
INSTALLING THE SAFETY HOLD-DOWN CLAMP
(Fig. D)
1. Insert one safety hold-down clamp lock knob (1)
intothe rear of the base of the machine for each
side.
2. Place the Safety hold-down Clamp (2) intothe
mounting hole.
Fig. D
Loading ...
Loading ...
Loading ...