Loading ...
Loading ...
Loading ...
1.
1.
2. S
4. I I
I I
5. ._ Ii
7.
9. Jam nut
NOTE: Mounting hardware is not included with this
tool. Bolts nuts, washers, & screws must be
purchased separately.
Fig. I
Miter saw base
Hex head bolt
Rubber washer
Flat washer
Workbench
Flat washer
Lock"washer
Hex nut
For portable use, place the saw on a 3/4" thick
piece of plywood. Bolt the base of the miter saw
securely to the plywood using the mounting holes
on the base. Use C-clamps to clamp this mounting
board to a stable work surface at the worksite. (Fig,
J)
Fig. J
i
REMOVING OR INSTALLING THE BLADE
Only use a 12-inch diameter blade.
To avoid injury from an accidental start, make sure
the switch is in the OFF position and plug is not
connected to the power source outlet.
REMOVING (Fig. K, L, lVl)
1. Unplug the saw from the outlet
2. Raise the miter saw to the upright position.
3. Raise the lower clear plastic blade guard (!) to the
uppermost position. (Fig, K)
4. While holding the lower blade guard, loosen the
cover plate screw (2) with a Phillips screwdriver.
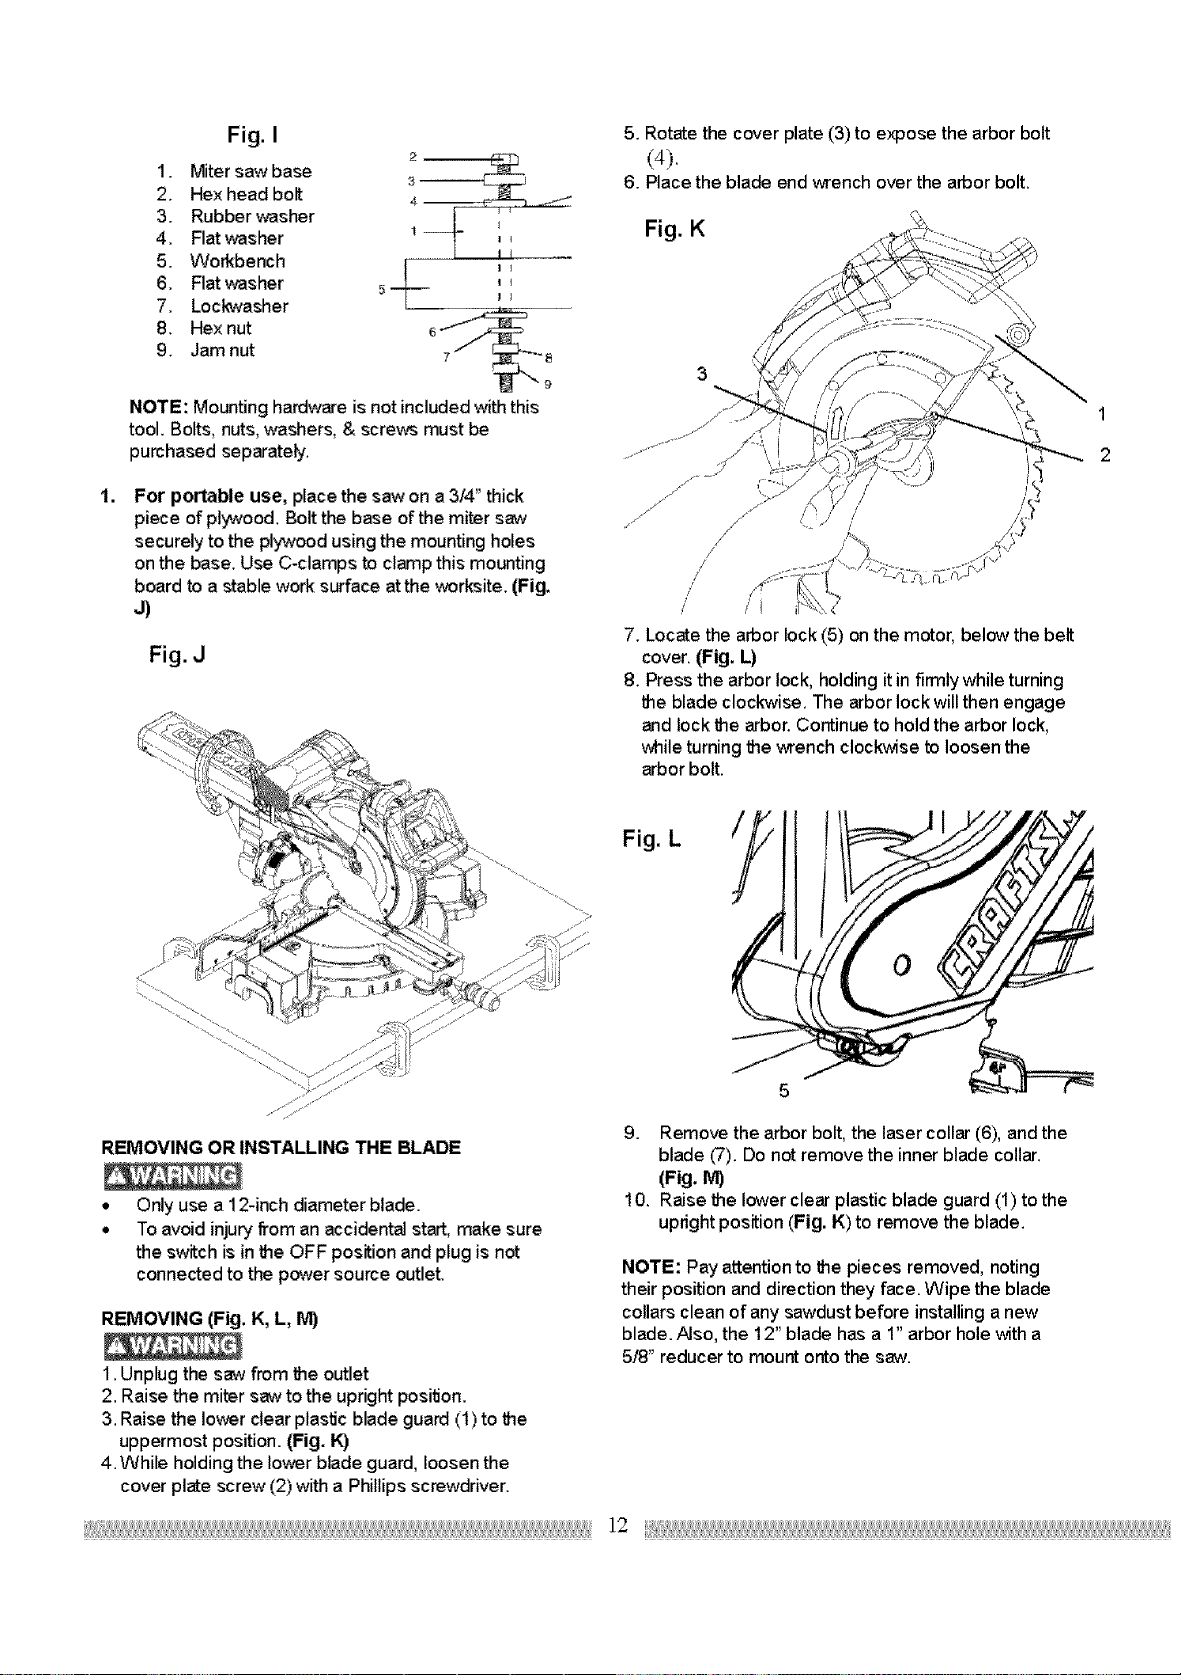
5. Rotate the cover plate (3) to expose the arbor bolt
(4).
6. Place the blade end wrench over the arbor bolt.
Fig. K
/*
/
/
7. Locate the arbor lock (5) on the motor, below the belt
cover. (Fig. L)
8. Press the arbor lock, holding it in firmly while turning
the blade clockwise. The arbor lock will then engage
and lock the arbor. Continue to hold the arbor lock,
while turning the vcrenchclockwise to loosen the
arbor bolt.
1
2
9. Remove the arbor bolt, the laser collar (6), and the
blade (7). Do not remove the inner blade collar.
(Fig. IV])
10. Raise the lower clear plastic blade guard (1) to the
upright position (Fig. K) to remove the blade.
NOTE: Pay attention to the pieces removed, noting
their position and direction they face. Wipe the blade
collars clean of any sawdust before installing anew
blade. Also, the 12" blade has a 1" arbor hole with a
5/8" reducer to mount onto the saw.
Loading ...
Loading ...
Loading ...