Loading ...
Loading ...
Loading ...
18
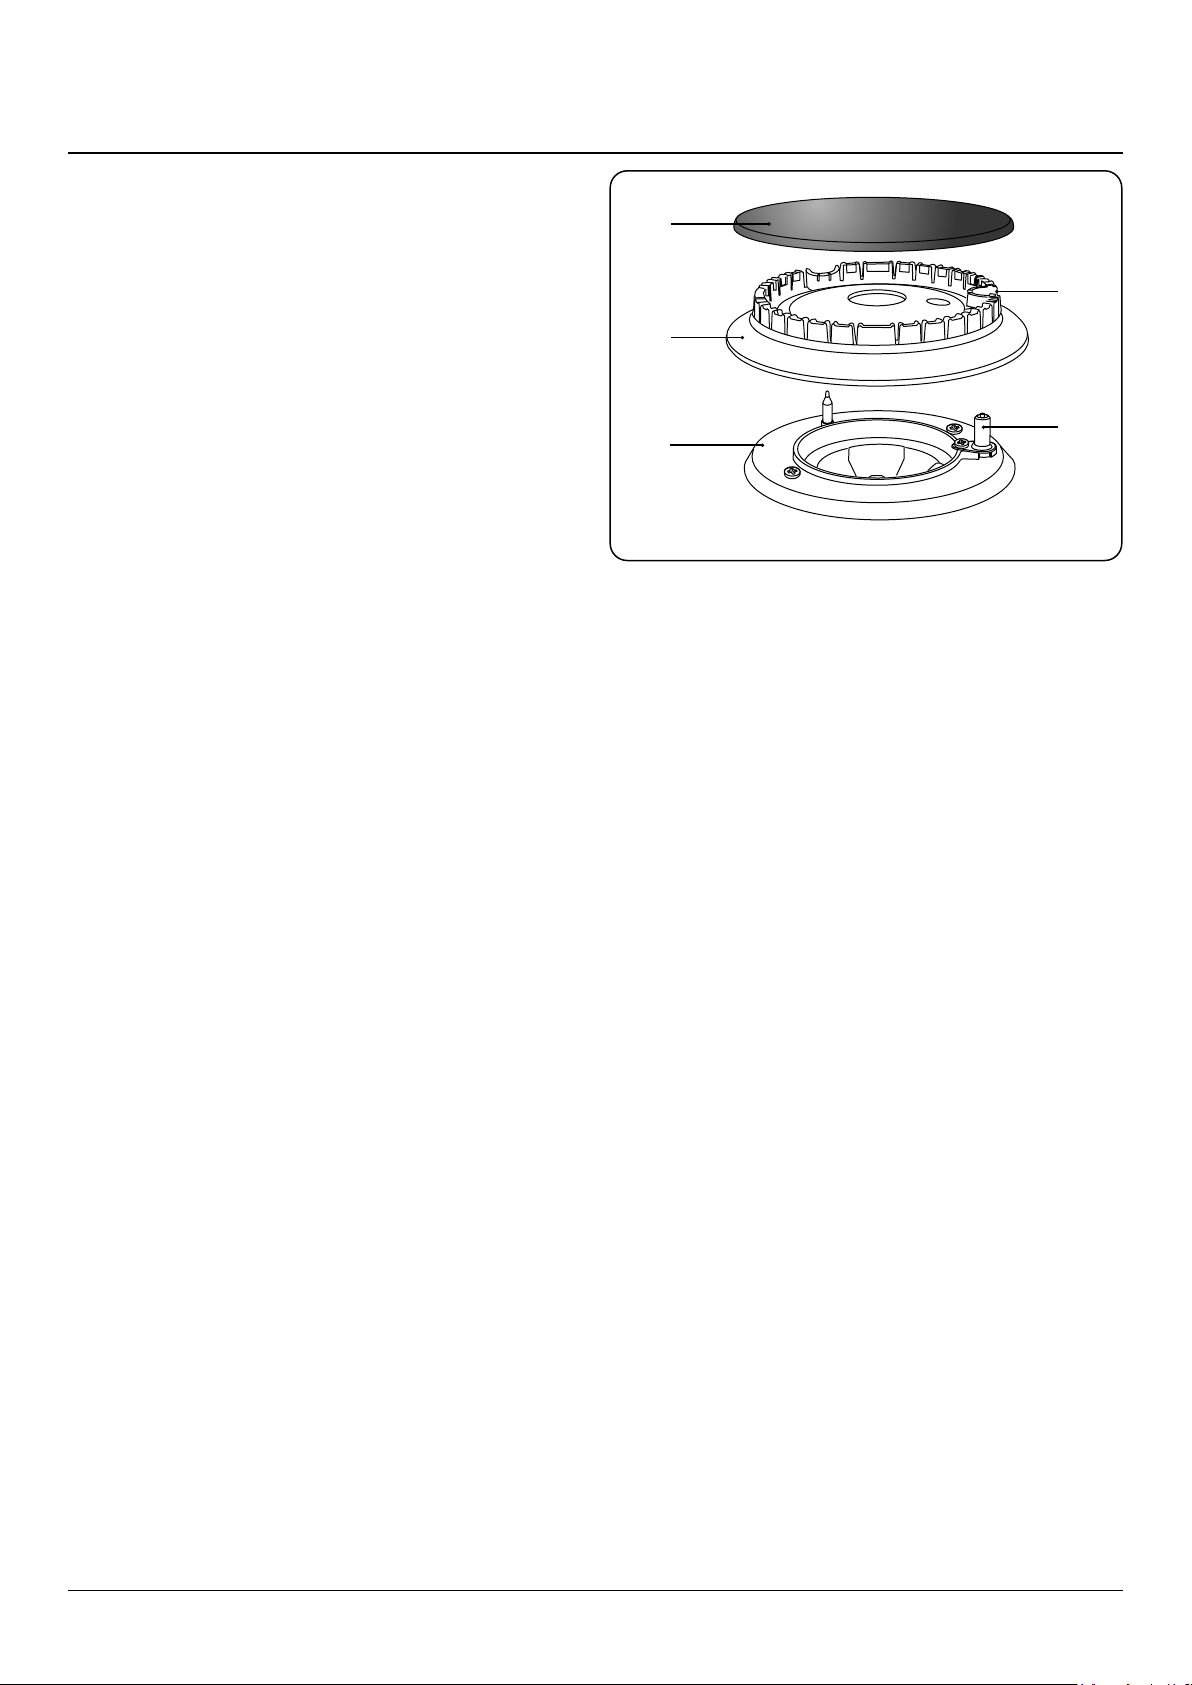
ArtNo.311-0032 Burner layout FSD
A
B
C
D
E
Isolate the electricity supply before carrying out any major
cleaning. Allow the cooker to cool.
n
NEVER use paint solvents, washing soda, caustic
cleaners, biological powders, bleach, chlorine based
bleach cleaners, coarse abrasives or salt.
n
DO NOT mix dierent cleaning products – they may
react together with hazardous results.
All parts of the cooker can be cleaned with hot soapy water
– but take care that no surplus water seeps into the
appliance.
Remember to switch the electricity supply back on and reset
the clock before reusing the cooker.
Daily care
Cleaning the cooker is not a welcomed chore, but it has to be
done to maintain eciency and appearance. Remember it
is better to wipe up any spills as they occur, this will prevent
them burning on and becoming more dicult to remove
later.
n
Make sure the ow of combustion and ventilation
air to the cooker is unobstructed – for example by
build-up of fats or grease.
On Natural gas the hotplate burner ames should be a bluish
colour with, at most, a slight yellowish fringe.
On LP gas the ames may be “softer”. The hotplate burner
ames may have a slight yellowish tip.
If the ame burns with a long white tip you should call for
service.
Cleaning for spills
For spills and boil-overs that occur while cooking, turn o the
burner as soon as possible and allow it to cool. Do not clean
until the area is completely cooled down. Wipe up spills as
soon as possible.
DO NOT allow surplus water to seep into the cooker.
Hotplate burners
The burner heads and caps can be removed for cleaning.
n
DO NOT put the burner heads in a dishwasher.
Make sure they are absolutely dry before replacing.
Single ring burners
When retting the burner head, make sure that the notch
lines up with the electrode or hole in the base. Check that the
burner head is level and that the cap is tted centrally on the
burner head (Fig. 6.1).
6. Cleaning your cooker
A – Cap, B – Head, C – Notch, D – Base, E – Electrode
Fig. 6.1
Loading ...
Loading ...
Loading ...