Loading ...
Loading ...
Loading ...
EN
18
Installation
www.bora.com
Installation rotated by 180°
Rotate the cooktop by 180°.
Conduct the installation as described.
Change the installation direction in the configuration
menu (see Configuration menu).
INFO If the device is installed rotated by 180°, the
connections for the control knob and the
automatic extraction system are at the front.
INFO The scope of delivery includes sufficiently long
cables.
5.5.3 Sealing the cooktop
Ensure that no silicone sealant gets under the cooktop.
1
Fig. 5.15 Silicone sealant with ush installation
[1] Black, heat-resistant silicone sealant
1
Fig. 5.16 Silicone sealant with surface mounting
[1] Black, heat-resistant silicone sealant
5.5.4 Establishing communications
The device components are connected using the flat-
ribbon cable supplied in the scope of delivery.
Create the connection between the cooktop and the
control knobs.
Create the connection between the cooktop and the
cooktop extractor.
Connecting the cooking zones
INFO
Ex works, the left control knob is intended for
operating the front cooking zone and the right
control knob for operating the rear cooking zone.
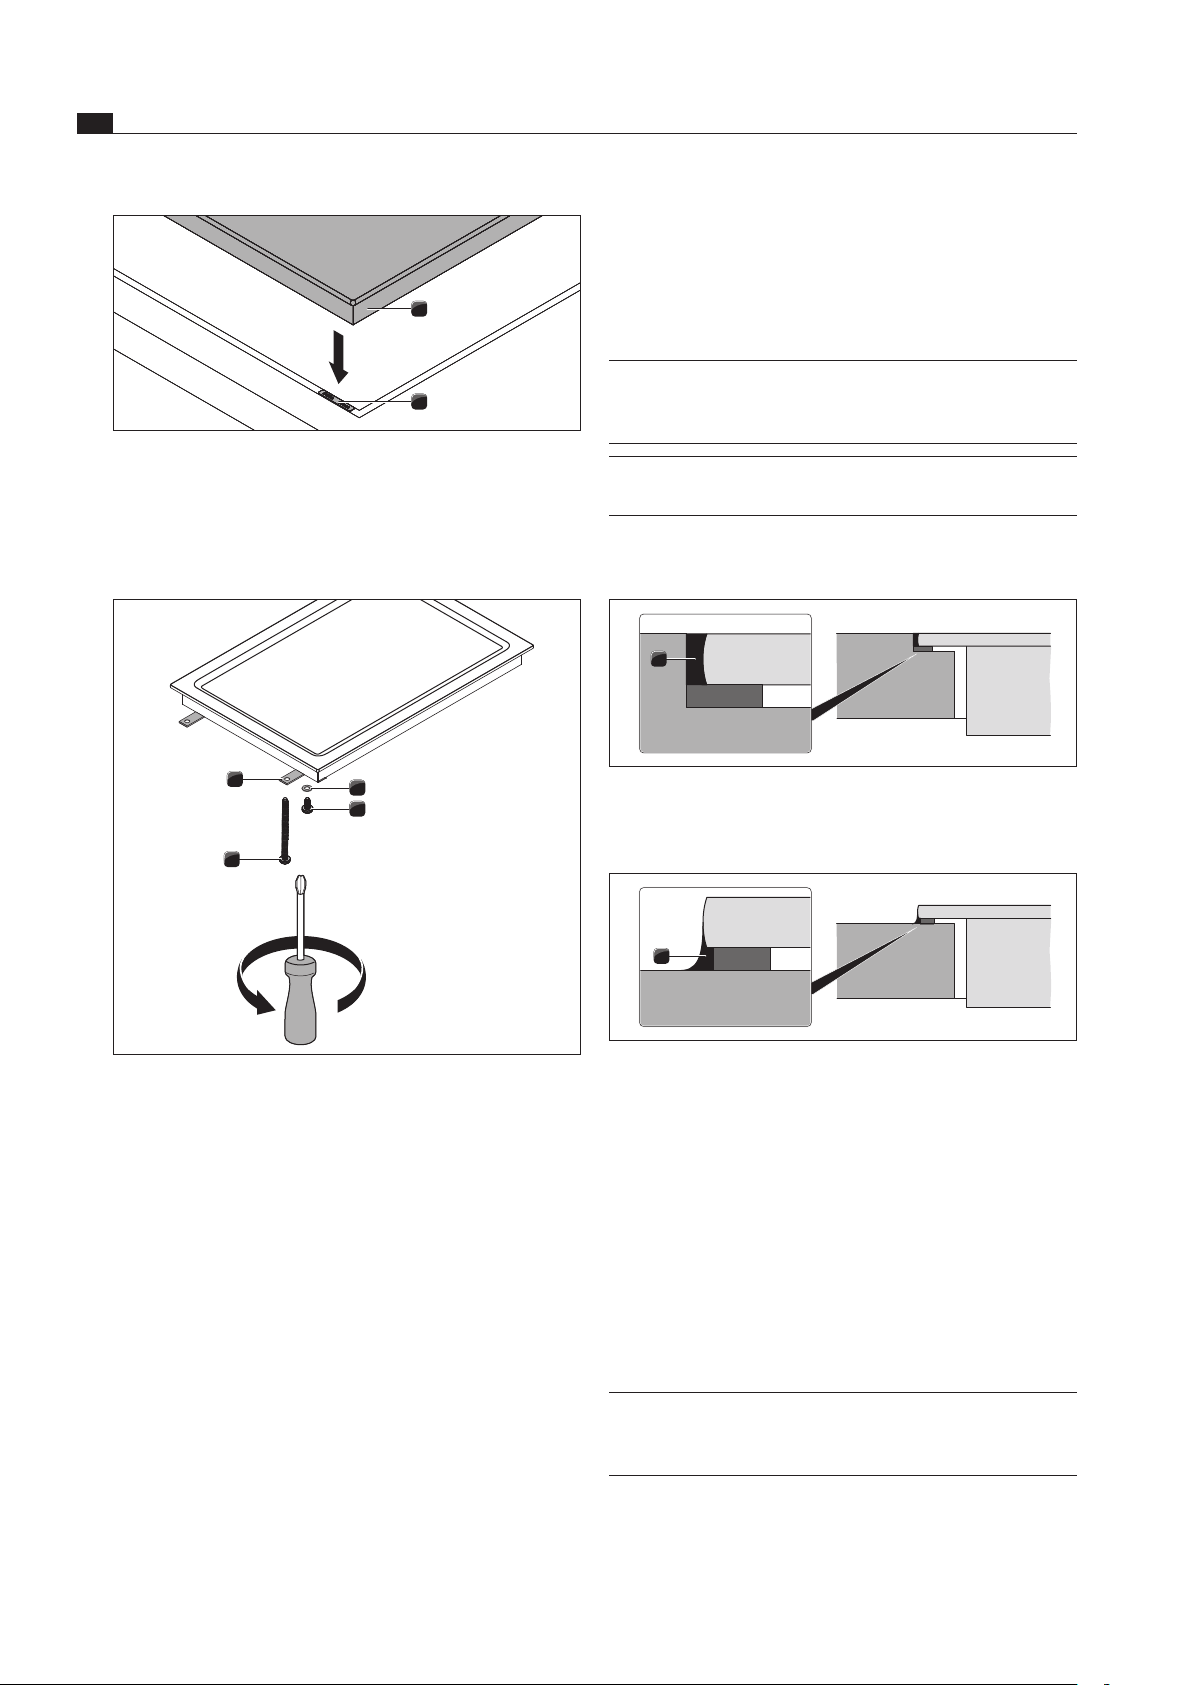
1
2
Fig. 5.13 Cooktop and height adjustment plates
[1] Cooktop
[2] Height adjustment plates
If applicable, insert the height adjustment plates [2].
3
2
2
1
4
Fig. 5.14 Mounting brackets
[1] Mounting bracket
[2] Washer
[3] Screw
[4] Screw (60 mm)
Affix the cooktop using the mounting brackets [1].
Use the screws [3] and [4] and the washer [2] to
tighten the mounting brackets with max. 10 Nm.
Check that the cooktop is positioned correctly.
Once all of the installation work is complete, seal the
devices with black, heat-resistant silicone sealant.
Loading ...
Loading ...
Loading ...