Loading ...
Loading ...
Loading ...
9
Assemble the parts:
1. Place the work bowl on a flat, dry, stable
surface near an electrical outlet with the
same specifications as the hand blender.
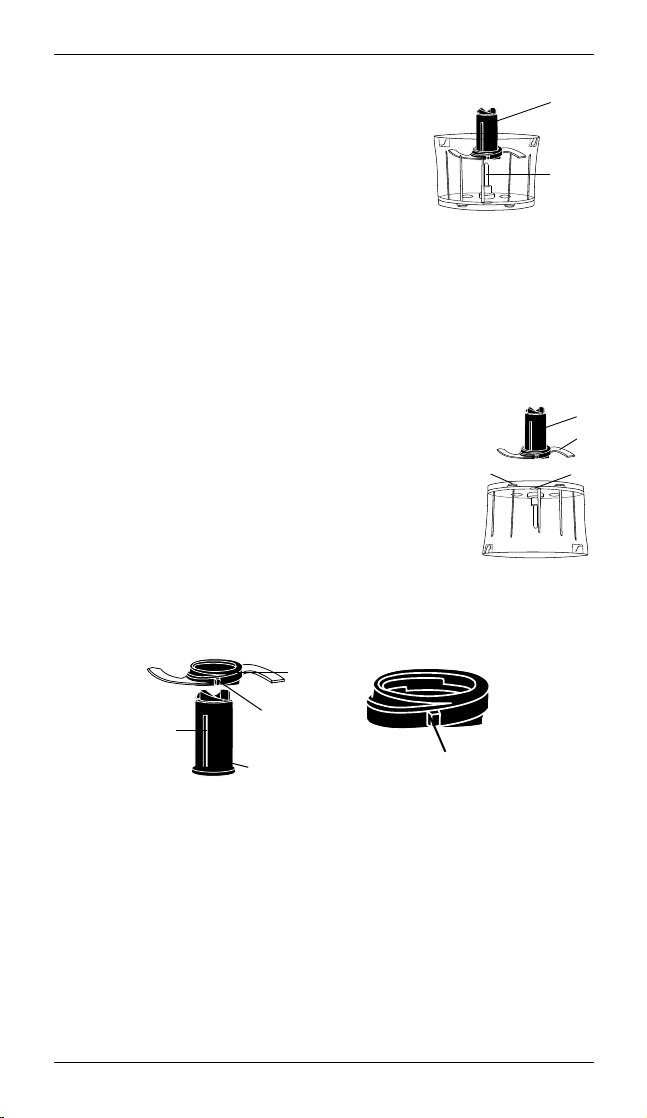
2. The fully assembled two-piece metal
blade assembly (A) should be attached to
the bottom of the work bowl. If not, slide
it onto the metal shaft (B) in the bowl.
IF METAL BLADE RING (C) HAS NOT BEEN ATTACHED TO PLASTIC
SHEATH (D), OR TO SAFELY REASSEMBLE BLADE ASSEMBLY
AFTER USE AND CLEANING, CAREFULLY FOLLOW THESE
INSTRUCTIONS:
Assembling the Blade Ring
ALWAYS HOLD THE BLADE RING BY THE CENTRAL HUB’S
HOLDING GRIPS (E). DO NOT TOUCH THE RAZOR-
SHARP BLADES!
To assemble using base of bowl to turn blade:
1. Turn work bowl upside down and stand the
sheath (D) on the raised round nub in the center
of bowl bottom.
2. Place the metal blade ring (C) over the sheath, lining up the two
notches in the interior of the center hub with the two ridges (F) on
either side of the sheath. Let the blade ring slide to the bottom
of the sheath.
3. Grasp the top of the sheath firmly and turn counterclockwise to
lock the blade into place on the sheath. The three rubberized
nubs will guide the blade ring without you needing to touch it.
4. To remove the blade from the sheath, stand the metal blade
assembly on the overturned work bowl and turn the sheath
clockwise to unlock the blade. Holding the central hub by the
grips, carefully lift the blade ring off the sheath.
To assemble turning blade by hand:
1. Carefully place the metal blade ring (C) over the sheath (D), lining
up the two notches in the interior of the center hub with the two
A
B
C
D
F
E
E
D
C
RUBBER
NUBS
CENTER
NUBS
Loading ...
Loading ...
Loading ...