Loading ...
Loading ...
Loading ...
• Press and release a remote control button.
- LED on power head stops blinking.
• Press and release same remote button again.
- LED goes out. Remote is now programmed.
2. Program multi-button remote control
• Repeat step 1 ("program one-button remote" for
each button).
3. Operate remote control
• Point remote control at door
- Door moves
• Press button again
- Door stops
• Press button again
- Door reverses
cose cyc÷
4. Erasing aJJreceiver memory
• Press and hold learn code button on
power head
- 10 seconds or until light goes out
- Memory is erased
• Program door operator again
• Press remote control button once within
30 seconds
- LED on power head stays lit
• Press remote control button again
- LED on power head goes out and remote
control is programmed
secon@ py_;_g,/_;.#_mmF_'_gh,s_ss e4 Ffpy_s_gy_;_mm_;g
Learn
indicator
Radio
Learn
o
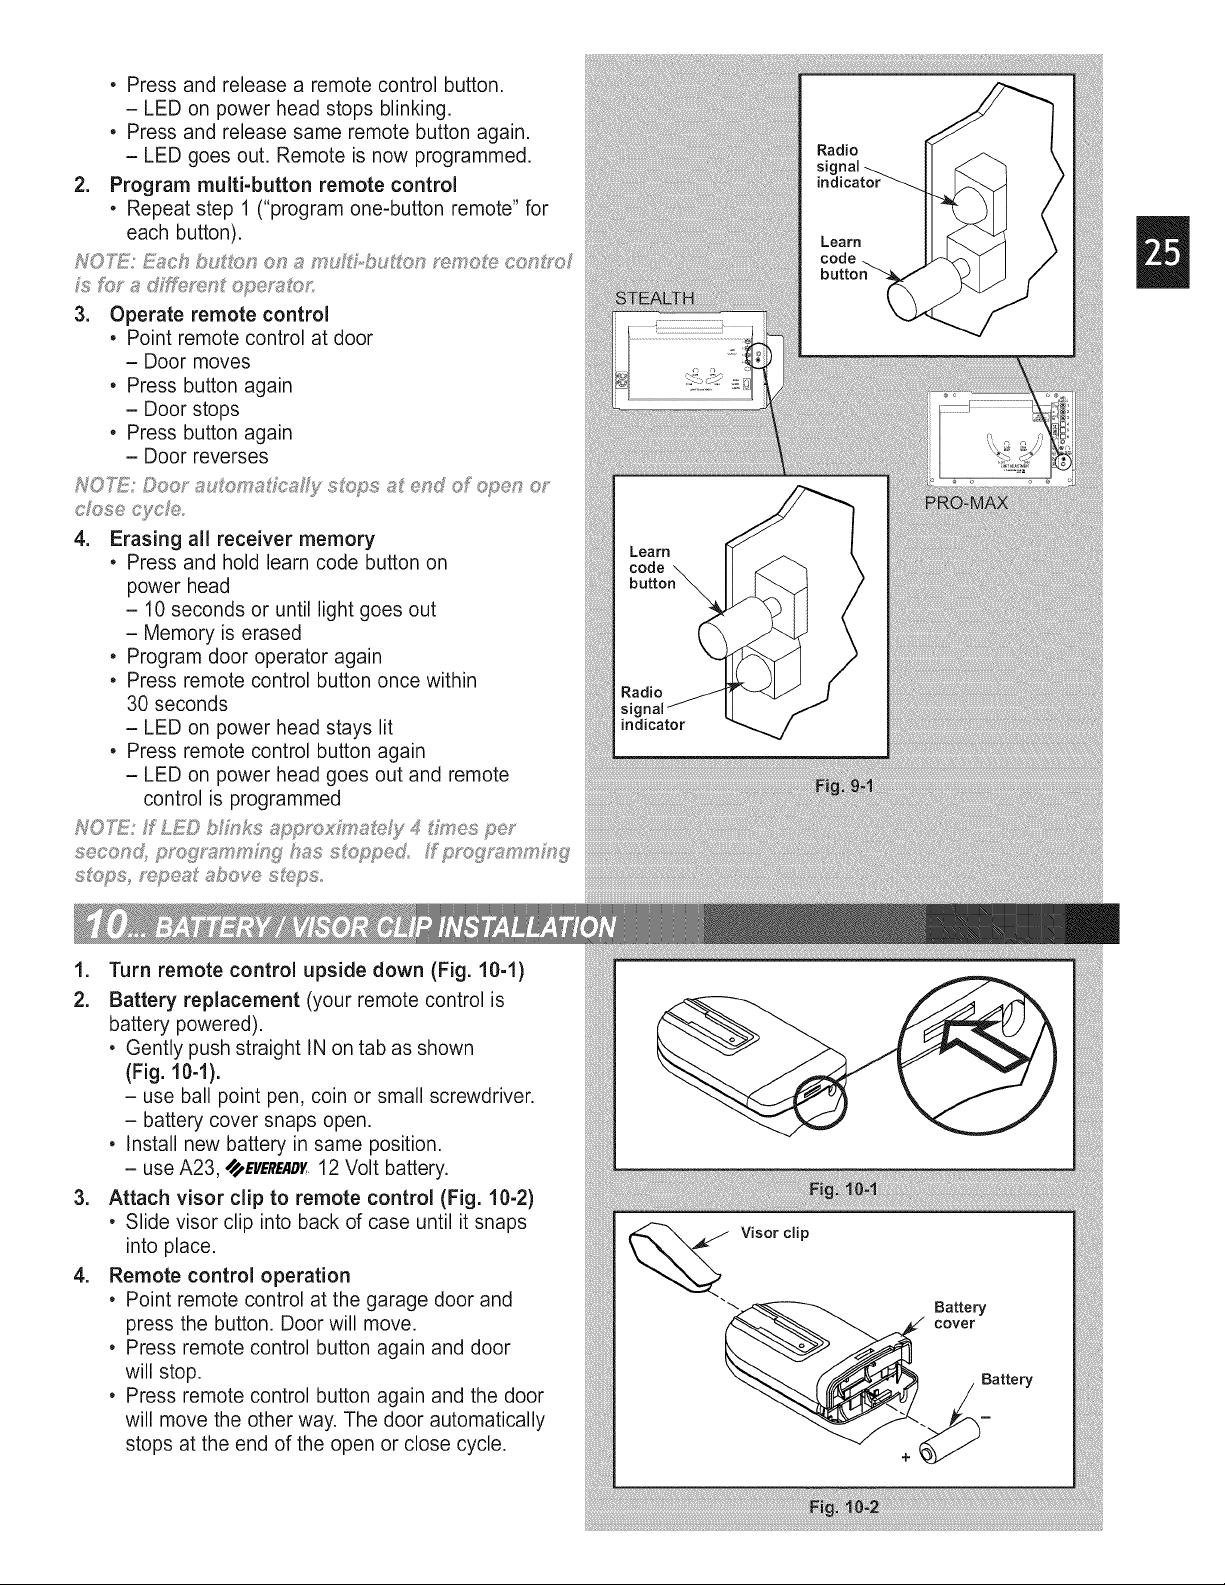
1. Turn remote control upside down (Fig. 10-1)
2. Battery replacement (your remote control is
battery powered).
• Gently push straight IN on tab as shown
(Fig. 10-1).
- use ball point pen, coin or small screwdriver.
- battery cover snaps open.
• Install new battery in same position.
- use A23, _,EIIEREAD[ 12 Volt battery.
3. Attach visor clip to remote control (Fig. 10-2)
• Slide visor clip into back of case until it snaps
into place.
4. Remote control operation
• Point remote control at the garage door and
press the button. Door will move.
• Press remote control button again and door
will stop.
• Press remote control button again and the door
will move the other way. The door automatically
stops at the end of the open or close cycle.
Visor clip
"_-_ Battery
__ cover
_ / Battery
Loading ...
Loading ...
Loading ...