Loading ...
Loading ...
Loading ...
Top of Door
@
Top of Door
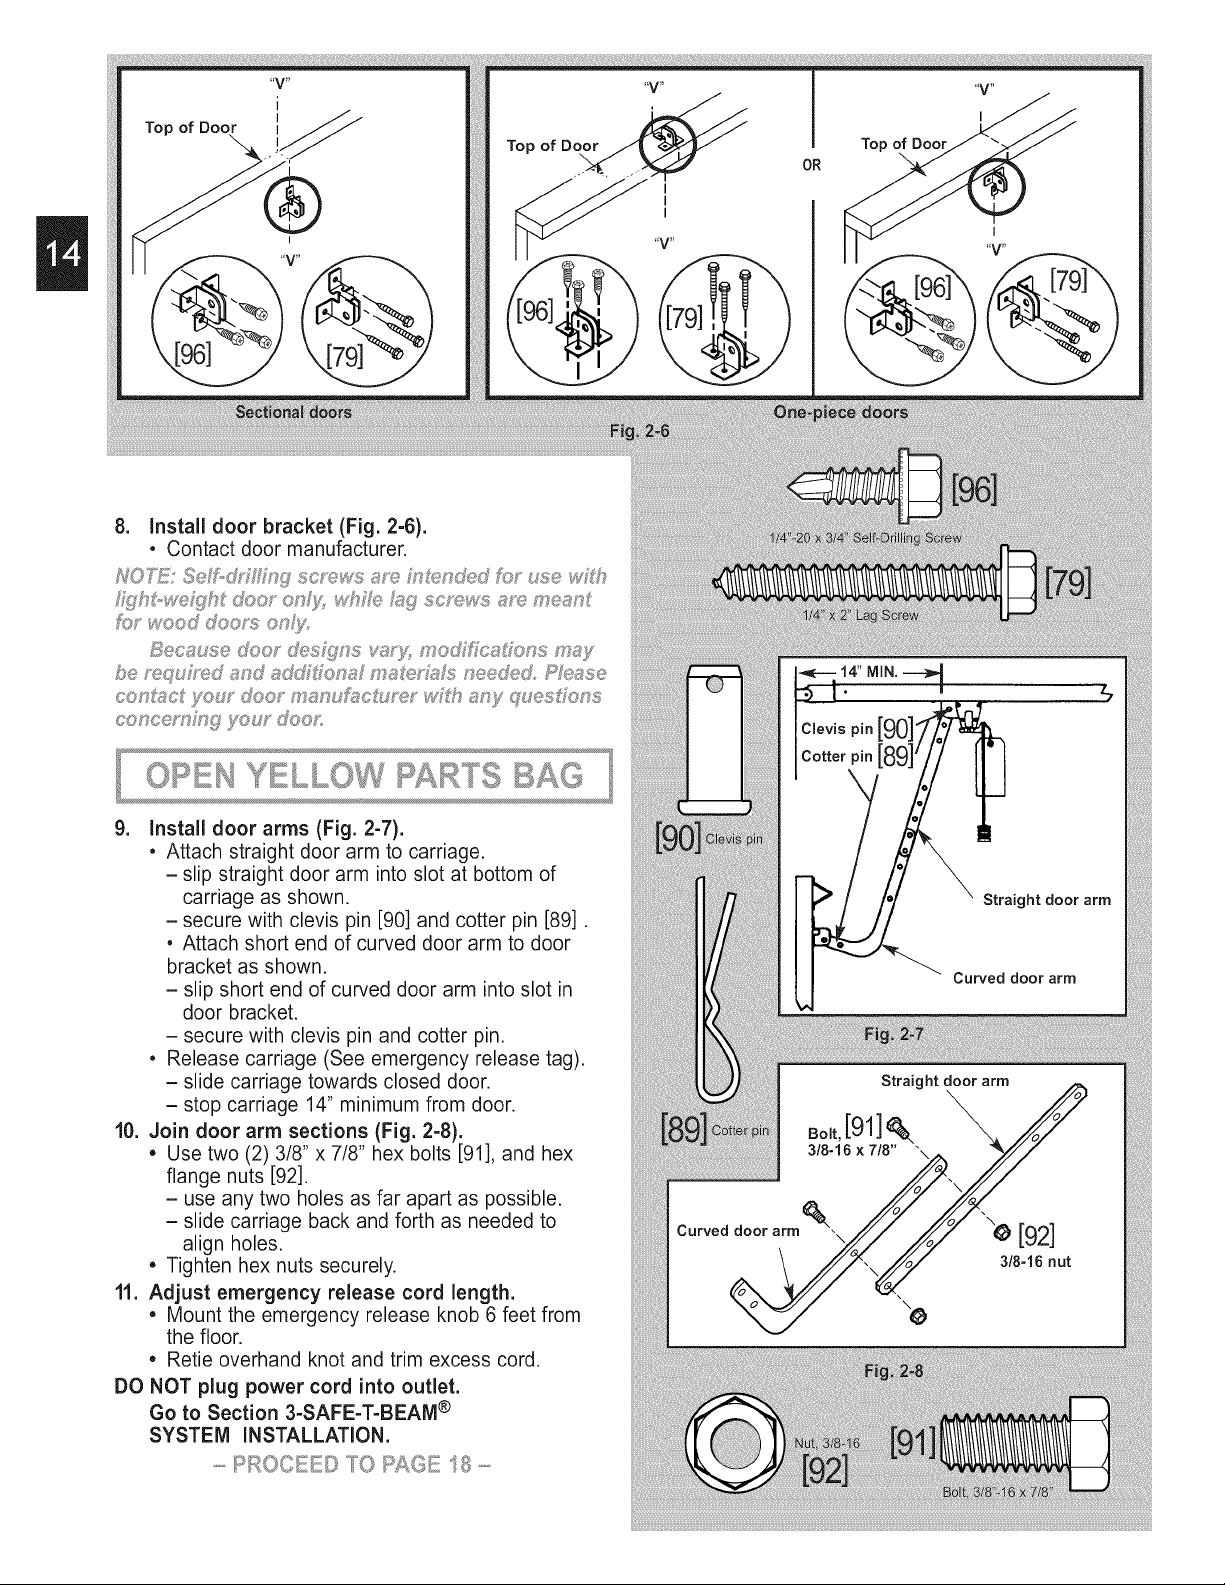
8. Install door bracket (Fig. 2-6).
, Contact door manufacturer.
9. Install door arms (Fig. 2-7).
• Attach straight door arm to carriage.
- slip straight door arm into slot at bottom of
carriage as shown.
- secure with clevis pin [90] and cotter pin [89].
• Attach short end of curved door arm to door
bracket as shown.
- slip short end of curved door arm into slot in
door bracket.
- secure with clevis pin and cotter pin.
• Release carriage (See emergency release tag).
- slide carriage towards closed door.
- stop carriage 14" minimum from door.
10. Join door arm sections (Fig. 2-8).
Use two (2) 3/8" x 7/8" hex bolts [91], and hex
flange nuts [92].
- use any two holes as far apart as possible.
- slide carriage back and forth as needed to
align holes.
• Tighten hex nuts securely.
11. Adjust emergency release cord length.
• Mount the emergency release knob 6 feet from
the floor.
• Retie overhand knot and trim excess cord.
DO NOT plug power cord into outlet.
Go to Section 3-SAFE-T-BEAM ®
SYSTEM INSTALLATION.
I
I
I
OR
Top of Door
14" MIN.
%
Straight door arm
Curved door arm
Straight door arm
Curved door arm
[92]
3/8-16 nut
Loading ...
Loading ...
Loading ...