Loading ...
Loading ...
Loading ...
ASSEMBLY
STEP3: Install Forward Clutch Cable
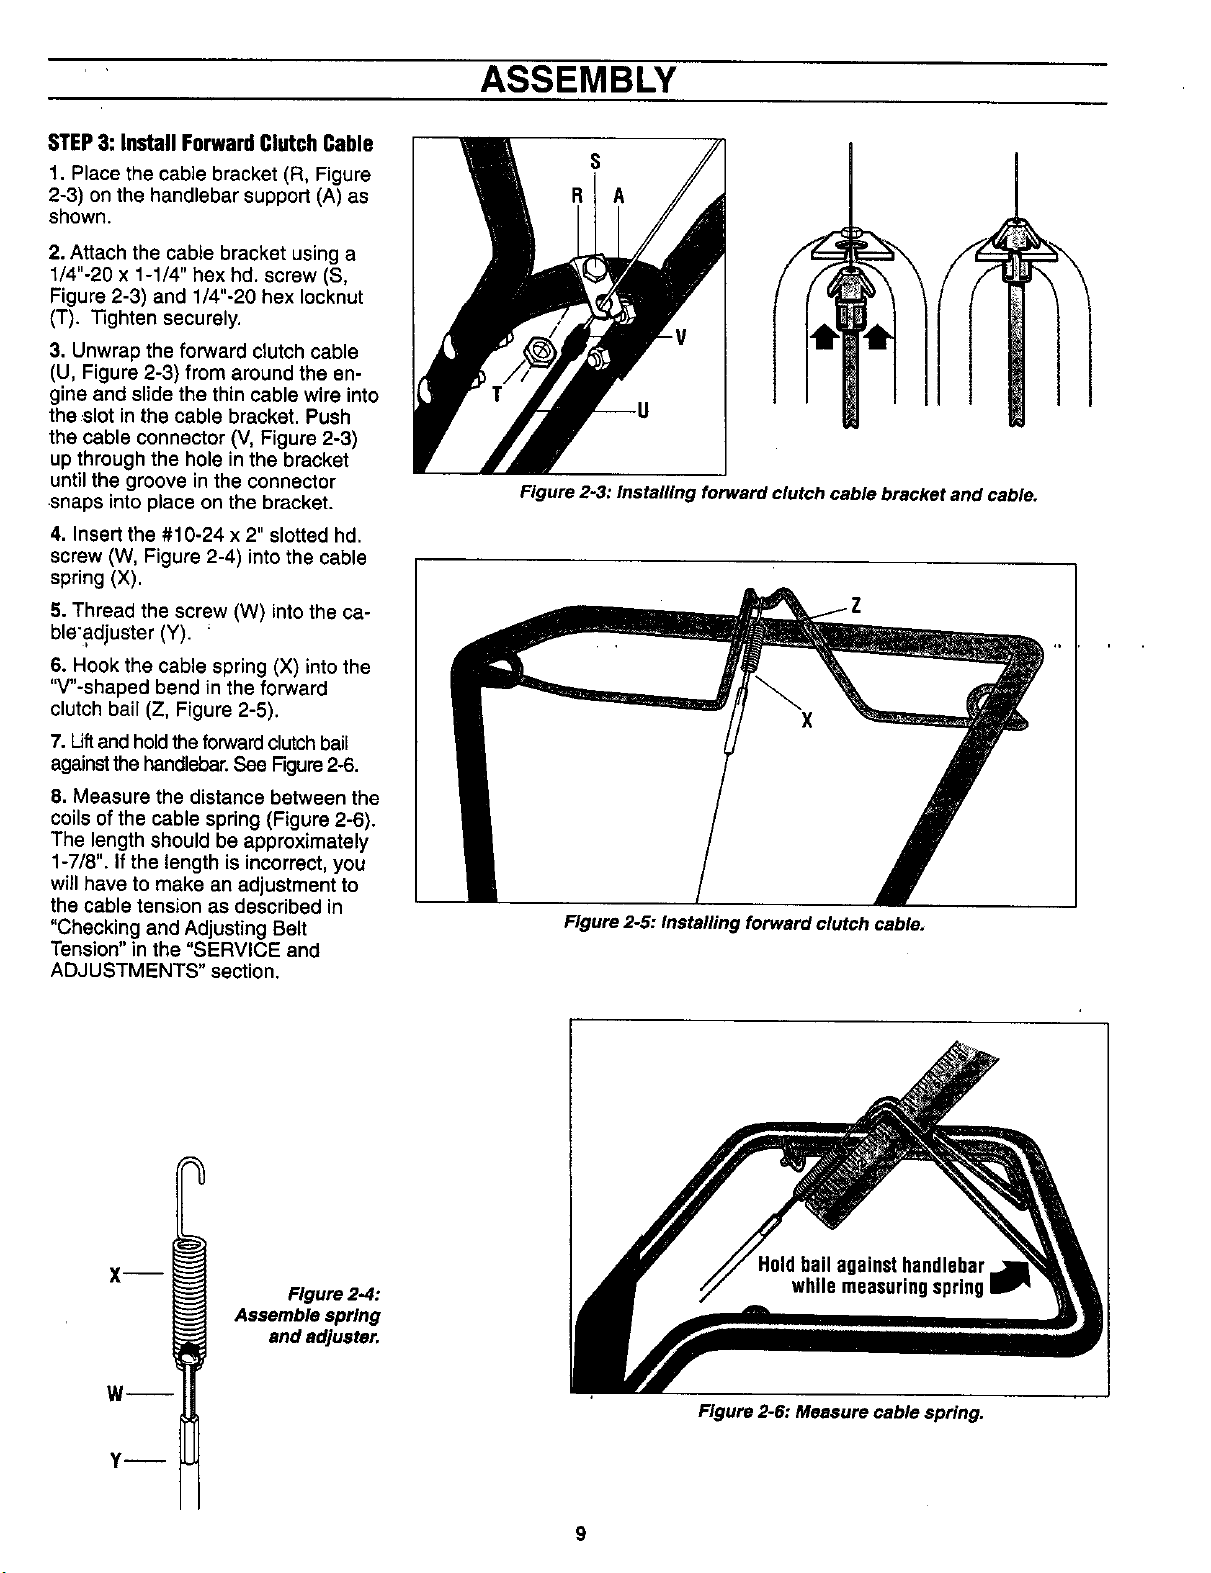
1. Place the cable bracket (R, Figure
2-3) on the handlebar support (A) as
shown.
2. Attach the cable bracket using a
1/4"-20 x 1-1/4" hex hd. screw (S,
Figure 2-3) and 1/4"-20 hex Iocknut
(T). _ghten securely.
3. Unwrap the forward clutch cable
(U, Figure 2-3) from around the en-
gine and slide the thin cable wire into
the .slot in the cable bracket. Push
the cable connector (V, Figure 2-3)
up through the hole in the bracket
until the groove in the connector
snaps into place on the bracket.
4. Insert the #10-24 x 2" slotted hd.
screw (W, Figure 2-4) into the cable
spring (X).
5. Thread the screw (W) into the ca-
ble'adjuster (Y). '
6. Hook the cable spring (X) into the
"V"-shaped bend in the forward
clutch bail (Z, Figure 2-5).
7. Uftand hold the forward clutch bail
against the handlebar.See Figure2-6.
8. Measure the distance between the
coils of the cable spring (Figure 2-6).
The length should be approximately
1-7/8". If the length is incorrect, you
will have to make an adjustment to
the cable tension as described in
"Checking and Adjusting Belt
Tension" in the "SERVICE and
ADJUSTMENTS" section.
Figure 2-3: Installing forward clutch cable bracket and cable.
Figure 2-5: Installing forward clutch cable.
Figure 2-4:
Assemble spring
and adjuster.
9
Figure 2-6: Measure cable spring.
Loading ...
Loading ...
Loading ...