Loading ...
Loading ...
Loading ...
SERVICE AND ADJUSTMENTS
2. Work the belt over the transmis-
sion pulley. Make sure the belt
goes in the groove in the transmis-
sion pulley.
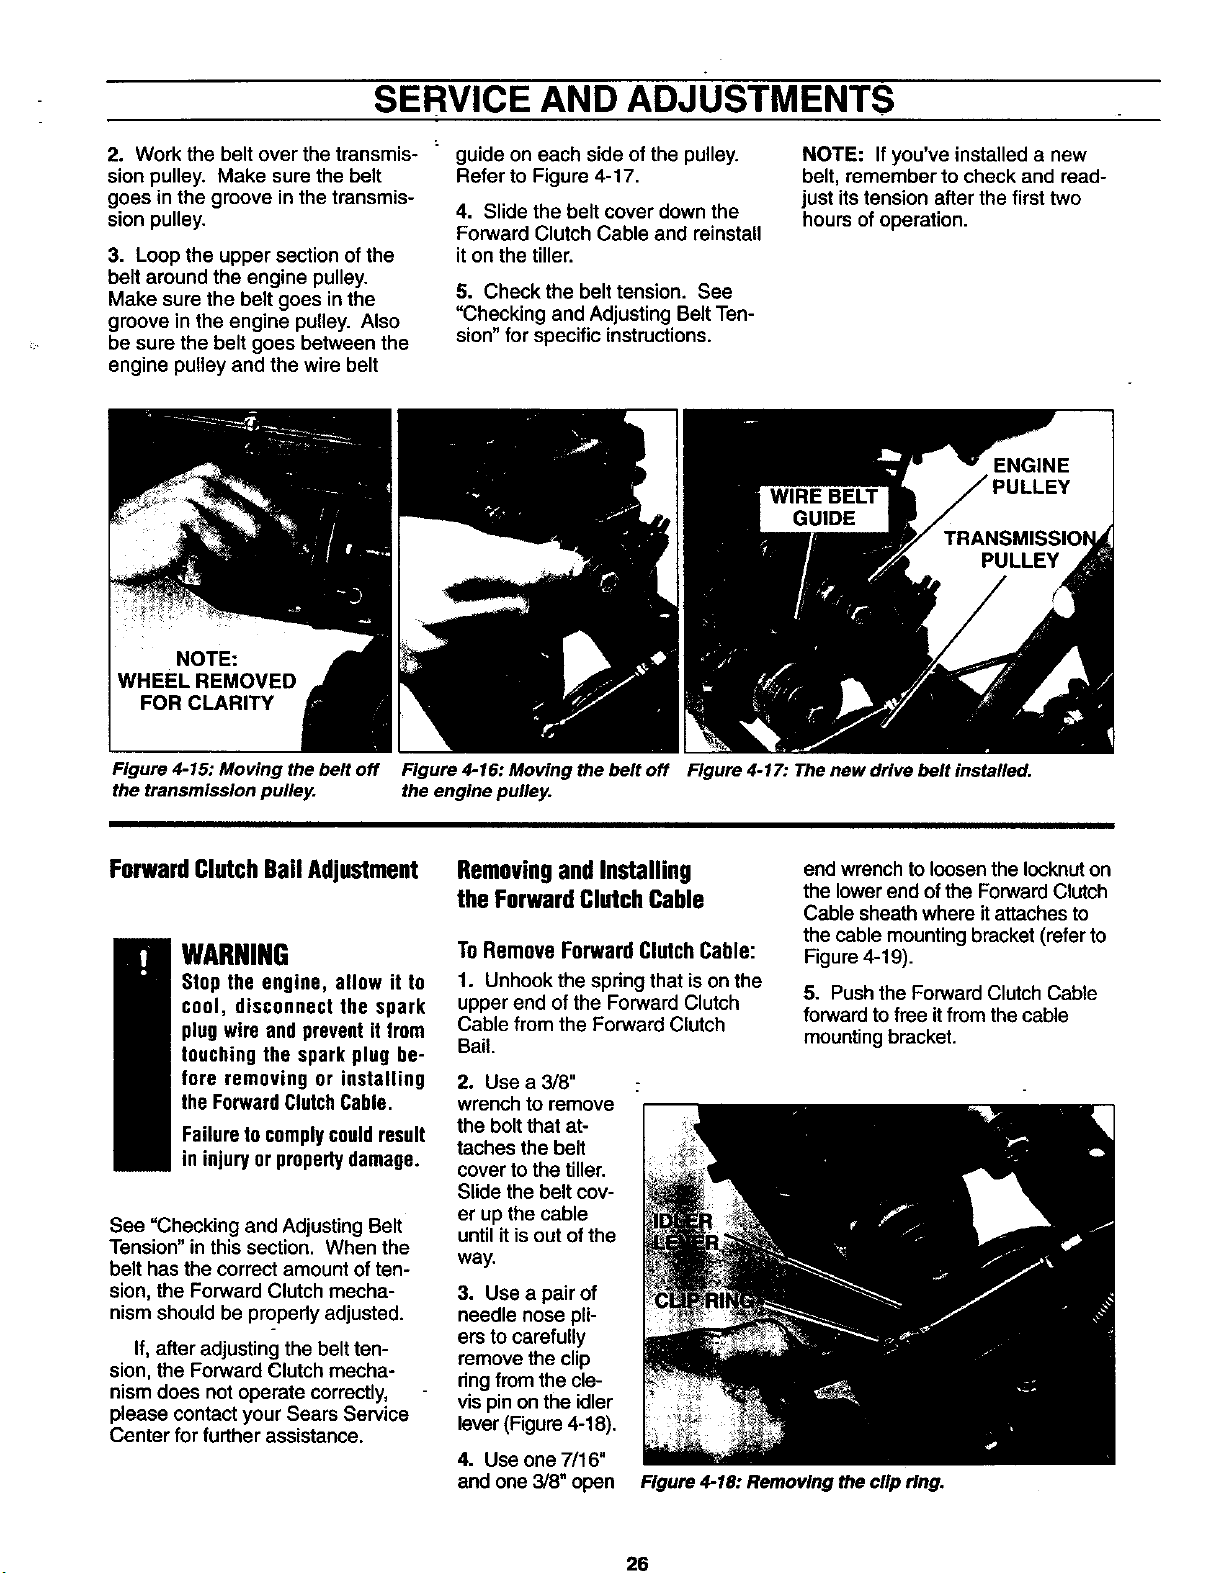
3. Loop the upper section ofthe
belt around the engine pulley.
Make sure the belt goes in the
groove in the engine pulley. Also
be sure the belt goes between the
engine pulley and the wire belt
guide on each side of the pulley.
Refer to Figure 4-17.
4. Slide the belt cover down the
Forward Clutch Cable and reinstall
it on the tiller.
5. Check the belt tension. See
"Checking and Adjusting Belt Ten-
sion" for specific instructions.
NOTE: If you've installed a new
belt, remember to check and read-
just its tension after the first two
hours of operation.
NOTE:
VHEEL REMOVED
FOR CLARITY
Figure 4-15: Moving the belt off Figure 4-16: Moving the belt off Figure 4-17: The new drive belt installed.
the transmission pulley, the engine pulley.
ForwardClutchBailAdjustment
WARNING
Stop the engine, allow it to
cool, disconnect the spark
plugwire and preventit from
touching the spark plug be-
fore removing or installing
the ForwardClutchCable.
Failuretocomplycouldresult
in injuryor propertydamage.
See =Checking and Adjusting Belt
Tension" in this section. When the
belt has the correct amount of ten-
sion, the Forward Clutch mecha-
nism should be properly adjusted.
If, after adjusting the belt ten-
sion, the Forward Clutch mecha-
nism does not operate correctly,
please contact your Sears Service
Center for further assistance.
RemovingandInstalling
the ForwardClutchCable
ToRemoveForwardClutchCable:
1. Unhook the spring that is on the
upper end of the Forward Clutch
Cable from the Forward Clutch
Bail.
2. Use a 3/8"
wrench to remove
the boltthat at-
taches the belt
cover to the tiller.
Slide the belt cov-
er up the cable
until it isout ofthe
way.
3. Use a pair of
needle nose pli-
ers to carefully
remove the clip
ring from the cle-
vis pinon the idler
lever (Figure4-18).
4. Use one 7/16"
and one 3/8" open
end wrenchto loosen the Iocknuton
the lower end of the Forward Clutch
Cable sheath where it attaches to
the cable mountingbracket (refer to
Figure4-19).
5. Push the Forward Clutch Cable
forward to free itfrom the cable
mountingbracket.
Figure 4-18: Removing the clip ring.
26
Loading ...
Loading ...
Loading ...