Loading ...
Loading ...
Loading ...
-C'CLAMPS FEATHERBOARD
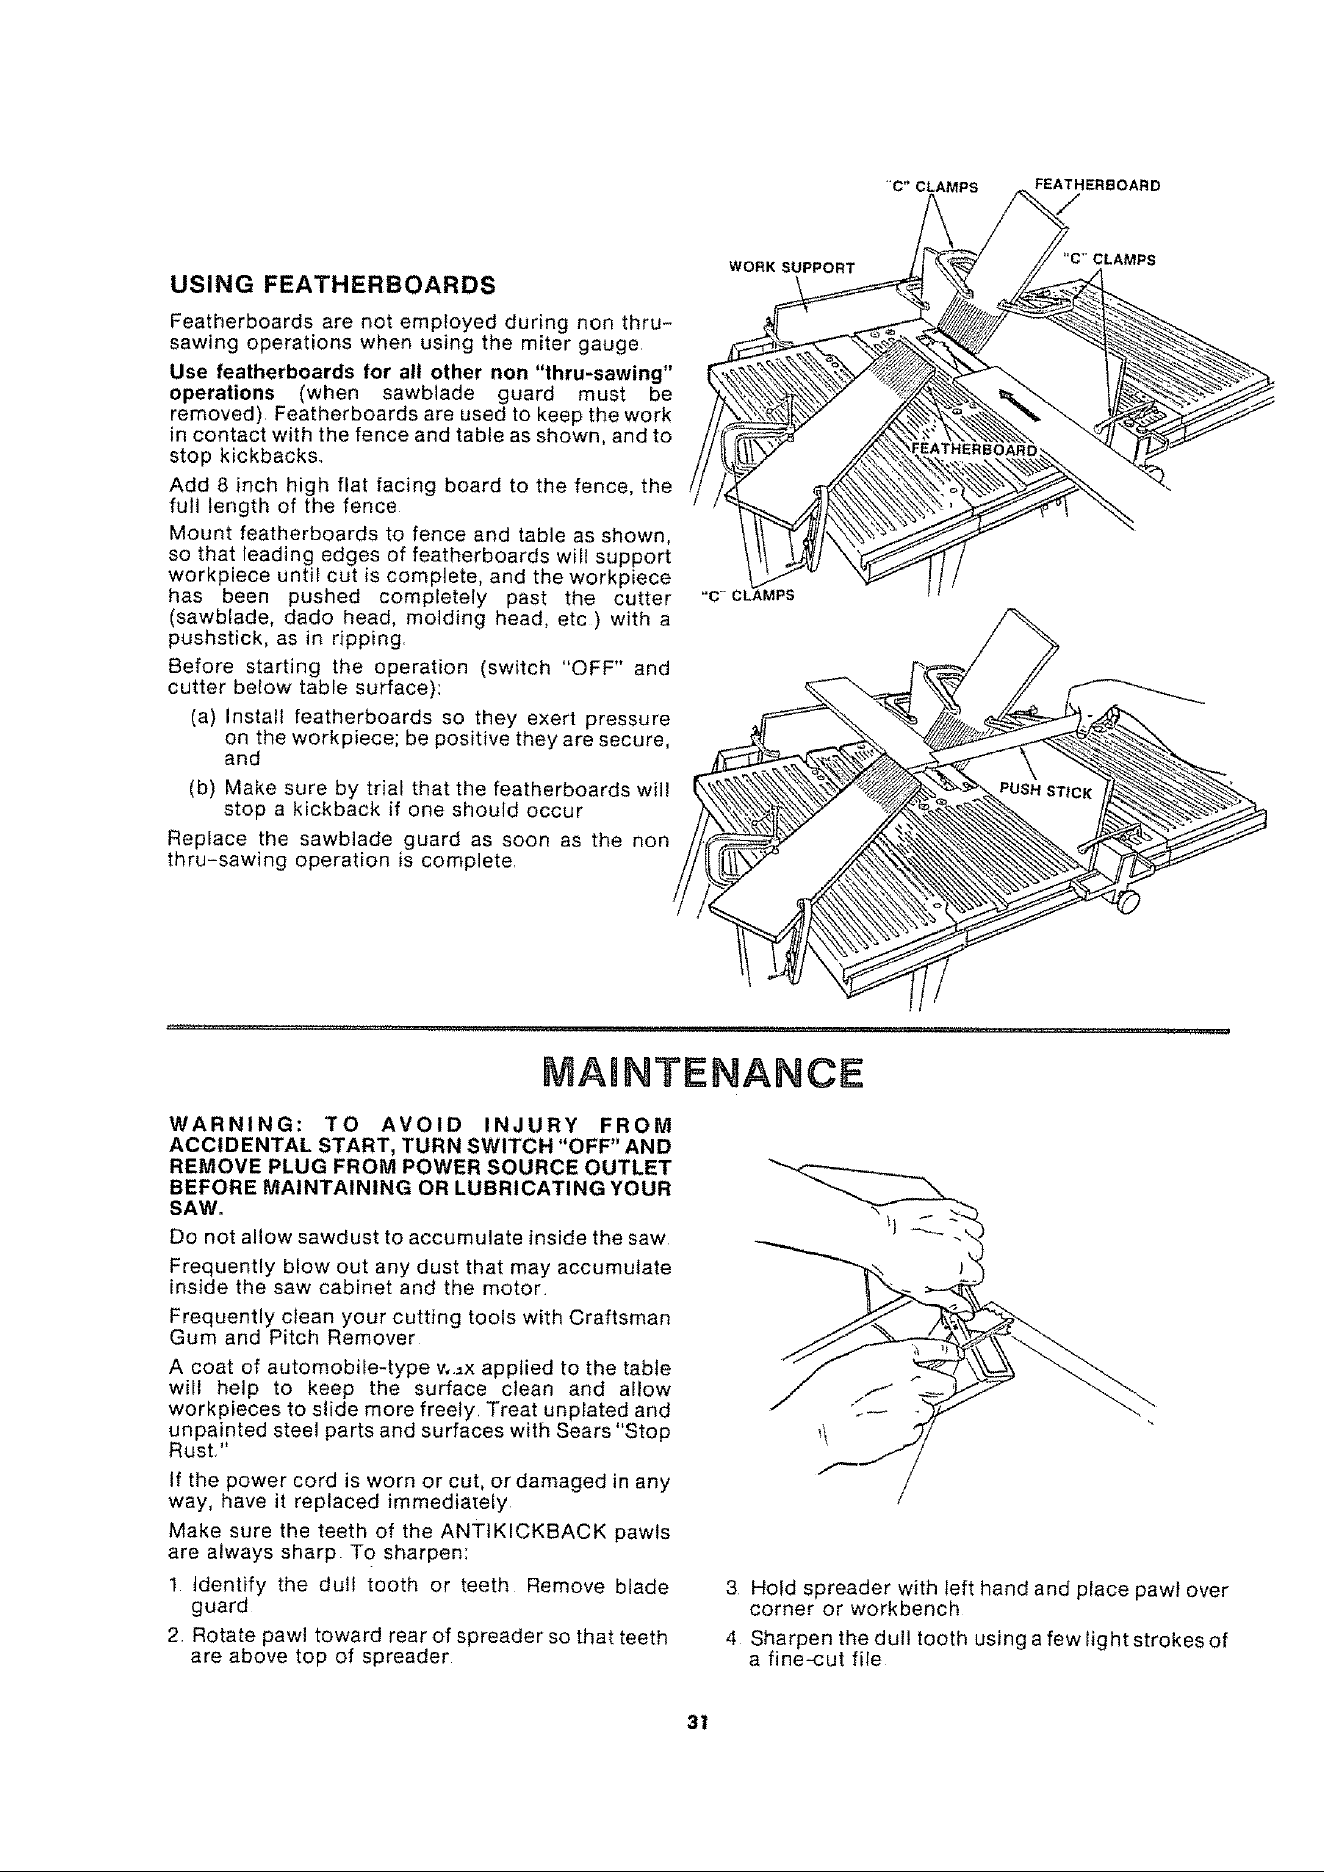
USING FEATHERBOARDS
Featherboards are not employed during non thru-
sawing operations when using the miter gauge
Use featherboards for all other non "thru-sawing"
operations (when sawblade guard must be
removed) Featherboards are used to keep the work
in contact with the fence and table as shown, and to
stop kickbacks,,
Add 8 inch high fiat facing board to the fence, the
full length of the fence
Mount featherboards to fence and table as shown,
so that leading edges of featherboards will support
workpiece until cut is complete, and the workpiece
has been pushed completely past the cutter
(sawbtade, dado head, molding head, etc ) with a
pushstick, as in ripping,
Before starting the operation (switch "OFF" and
cutter befow table surface):
(a) install featherboards so they exert pressure
on the workpiece; be positive they are secure,
and
(b) Make sure by trial that the featherboards will
stop a kickback if one should occur
Replace the sawblade guard as soon as the non
thru-sawing operation is complete,
WORK SUPPORT
"C'*CLAMPS
MAmNTENANCE
WARNING: TO AVOID INJURY FROM
ACCIDENTAL START, TURN SWITCH "OFF" AND
REMOVE PLUG FROM POWER SOURCE OUTLET
BEFORE MAINTAINING OR LUBRICATING YOUR
SAW.
Do not allow sawdust to accumulate inside the saw
Frequently blow out any dust that may accumulate
inside the saw cabinet and the motor
Frequently clean your cutting tools with Craftsman
Gum and Pitch Remover
A coat of automobile-type v,,=x applied to the table
will hetp to keep the surface clean and allow
workpieces to slide more freely, Treat unplated and
unpainted steel parts and surfaces with Sears "Stop
Rust,"
If the power cord is worn or cut, or damaged in any
way, have it replaced immedia[efy
Make sure the teeth of the ANTtKICKBACK pawls
are always sharp To sharpen:
t Identify the dull tooth or teeth Remove blade
guard
2, Rotate pawl toward rear of spreader so that teeth
are above top of spreader
3 Hold spreader with left hand and place pawl over
corner or workbench
4 Sharpen the dull tooth using a few light strokes of
a fine-cut file
31
Loading ...
Loading ...
Loading ...