Loading ...
Loading ...
Loading ...
13
STEP 3 - INSTALLING THE TRIMS
AND LEVELLING
FOR SINGLE & DUAL REFRIGERATOR
INSTALLATIONS
Trim kit installation
Single unit installation – non french door models
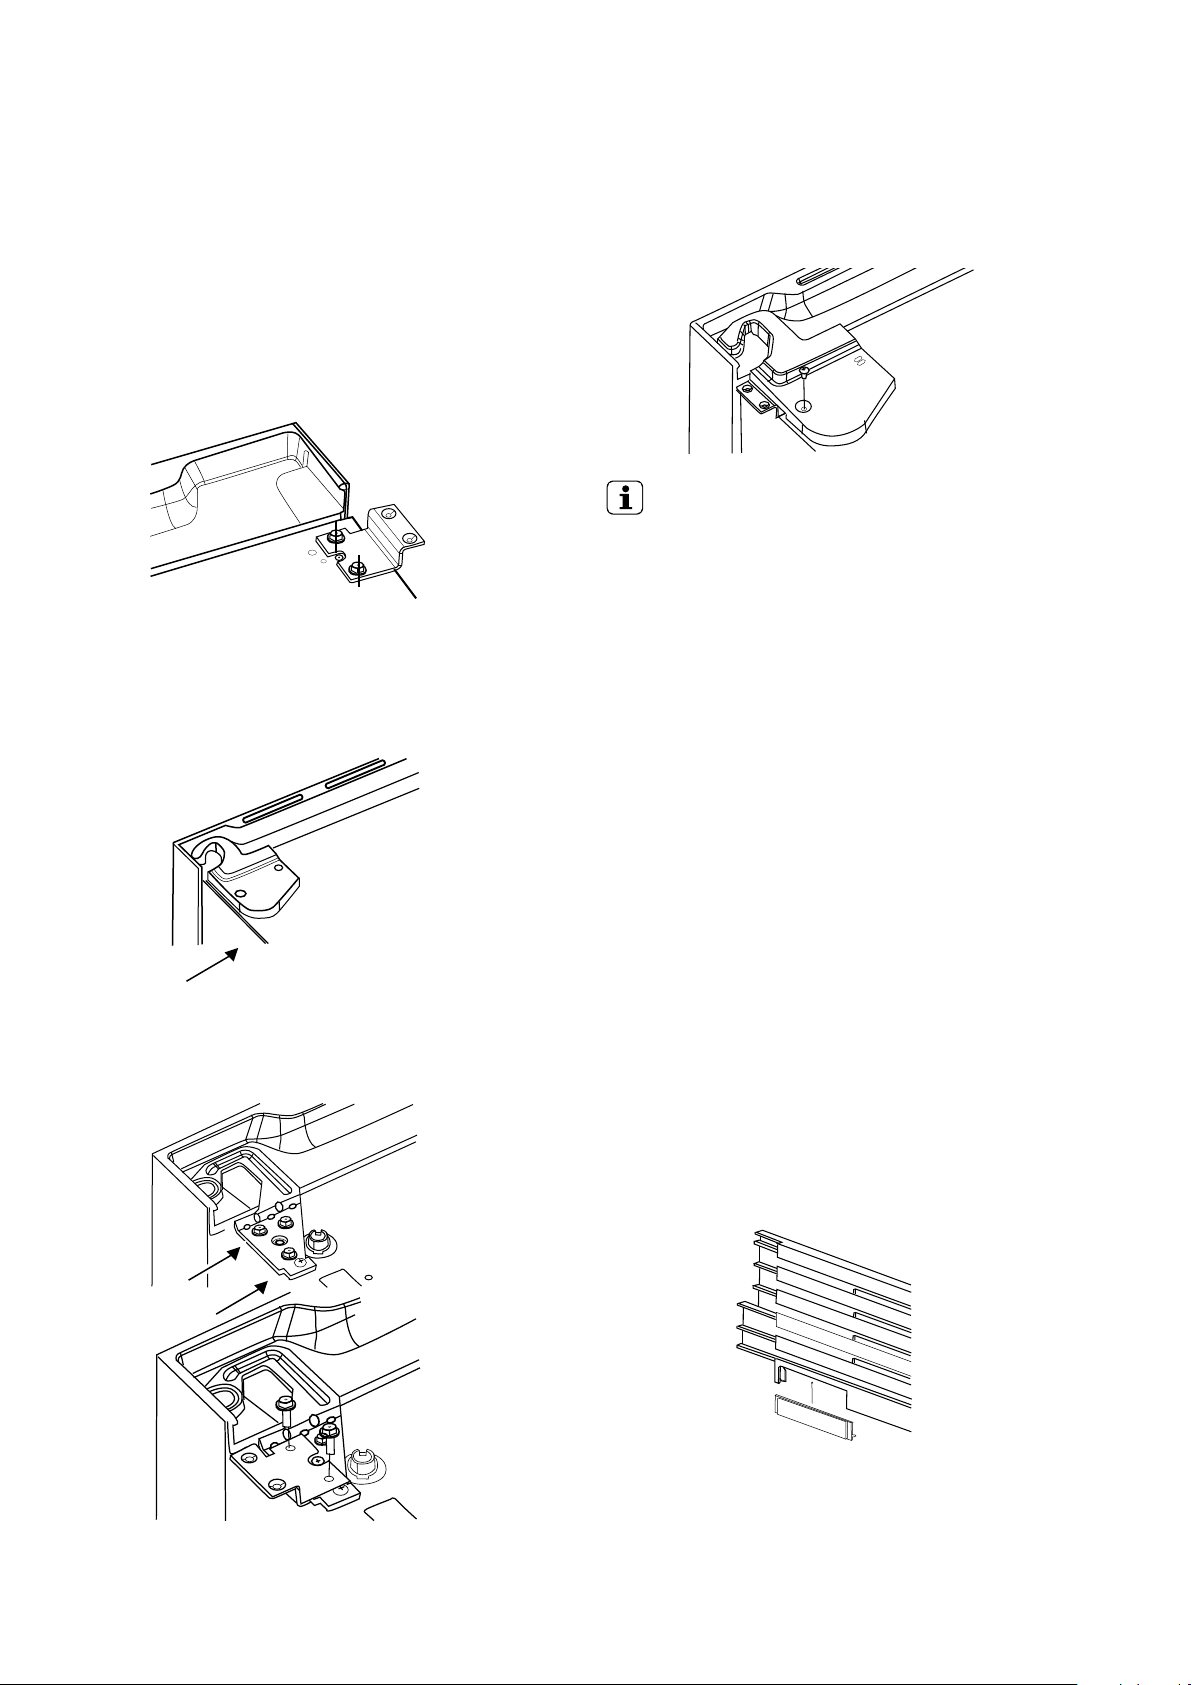
Attaching the bracket – non hinge side
a. Attach the bracket to the unit using two screws.
Single and dual installations
Attaching the bracket – hinge side
a. Remove outer screw from top hinge cover and save
for later. Remove the top hinge cover and discard.
(Fig. 18)
b. Remove the two screws shown. Attach the bracket
to the top hinge using the removed screws.
Recommended screw torque 8Nm.
c. Assemble the Replacement Top Hinge Cover to the
Top Hinge using the screw removed from factory
fitted Top Hinge Cover. (Fig. 20)
2X8H
IMPORTANT
Door alignment
a. Push refrigerator(s) into final position to check
alignments.
b. Align refrigerator cabinet(s) using the leveller assembly
using the adjuster bolt to raise or lower the rear roller
c. Raise front using leg leveller (N.B. you will need to
wind back up to move refrigerators forward)
d. Align top doors by loosening top hinge - tighten
screws.
e. Pull refrigerator(s) forward to complete final steps
French and Dual door Installations
a. (French Door model Only) Attach the bracket LH and
Replacement Top Hinge Cover on the other door
hinge as well.
b. (Dual Installation Only) Attach the bracket and
Replacement Top Hinge Cover on door hinge side of
second are refrigerator as well.
Top Trim Install
Single installation only Non-French door models
Attach Insert Top Trim to top trim by pushing into the slot
on the non-hinge side of the refrigerator.
Figure 17
Figure 20
Figure 21
Figure 18
Figure 19
Loading ...
Loading ...
Loading ...