Loading ...
Loading ...
Loading ...
10 electrolux.com.au
STEP 1 - INSTALLING THE
LEVELLING SYSTEM
Leveling system install
Preparing non-door hinge side
a. Tape door(s) to cabinet (to maintain door alignment)
and lay refrigerator(s) on its back on packaging
material or a drop cloth to prevent damage.
b. Remove large levelling nut by turning anti clockwise
past the stop (discard)
c. Remove the two outside screws (1&2) and roller
assembly (discard). Remove the two inside screws
(3&4) (keep) and discard the foot base
4
1
2
3
5
Figure 2
d. Remove screw (5) on the compressor base
e. Attach replacement foot base to the refrigerator to
the two holes at the front of the refrigerator using
two of the removed screws (See Figure 3)
Figure 3
f. Discard the factory fitted base and remaining screws.
g. For french door models, repeat the steps ‘b’ to ‘d’ on
other side of the refrigerator
Preparing door hinge side (non french door models)
a. Remove large levelling nut by turning anti-clockwise
past the stop (discard). Remove the two outside
screws and roller assembly (discard). remove the two
inside screws (keep) and discard hinge assembly.
b. Ensuring the doors are properly aligned, attach the
Hinge Base included in the Trim Kit using removed
screws 3 and 4 (Fig 4). For Right Hand models, use
‘Hinge Base Right Assy’ and for Left Hand models,
use ‘Hinge Base Left Assy’
FOR SINGLE AND DUAL
REFRIGER ATOR INSTALLATIONS
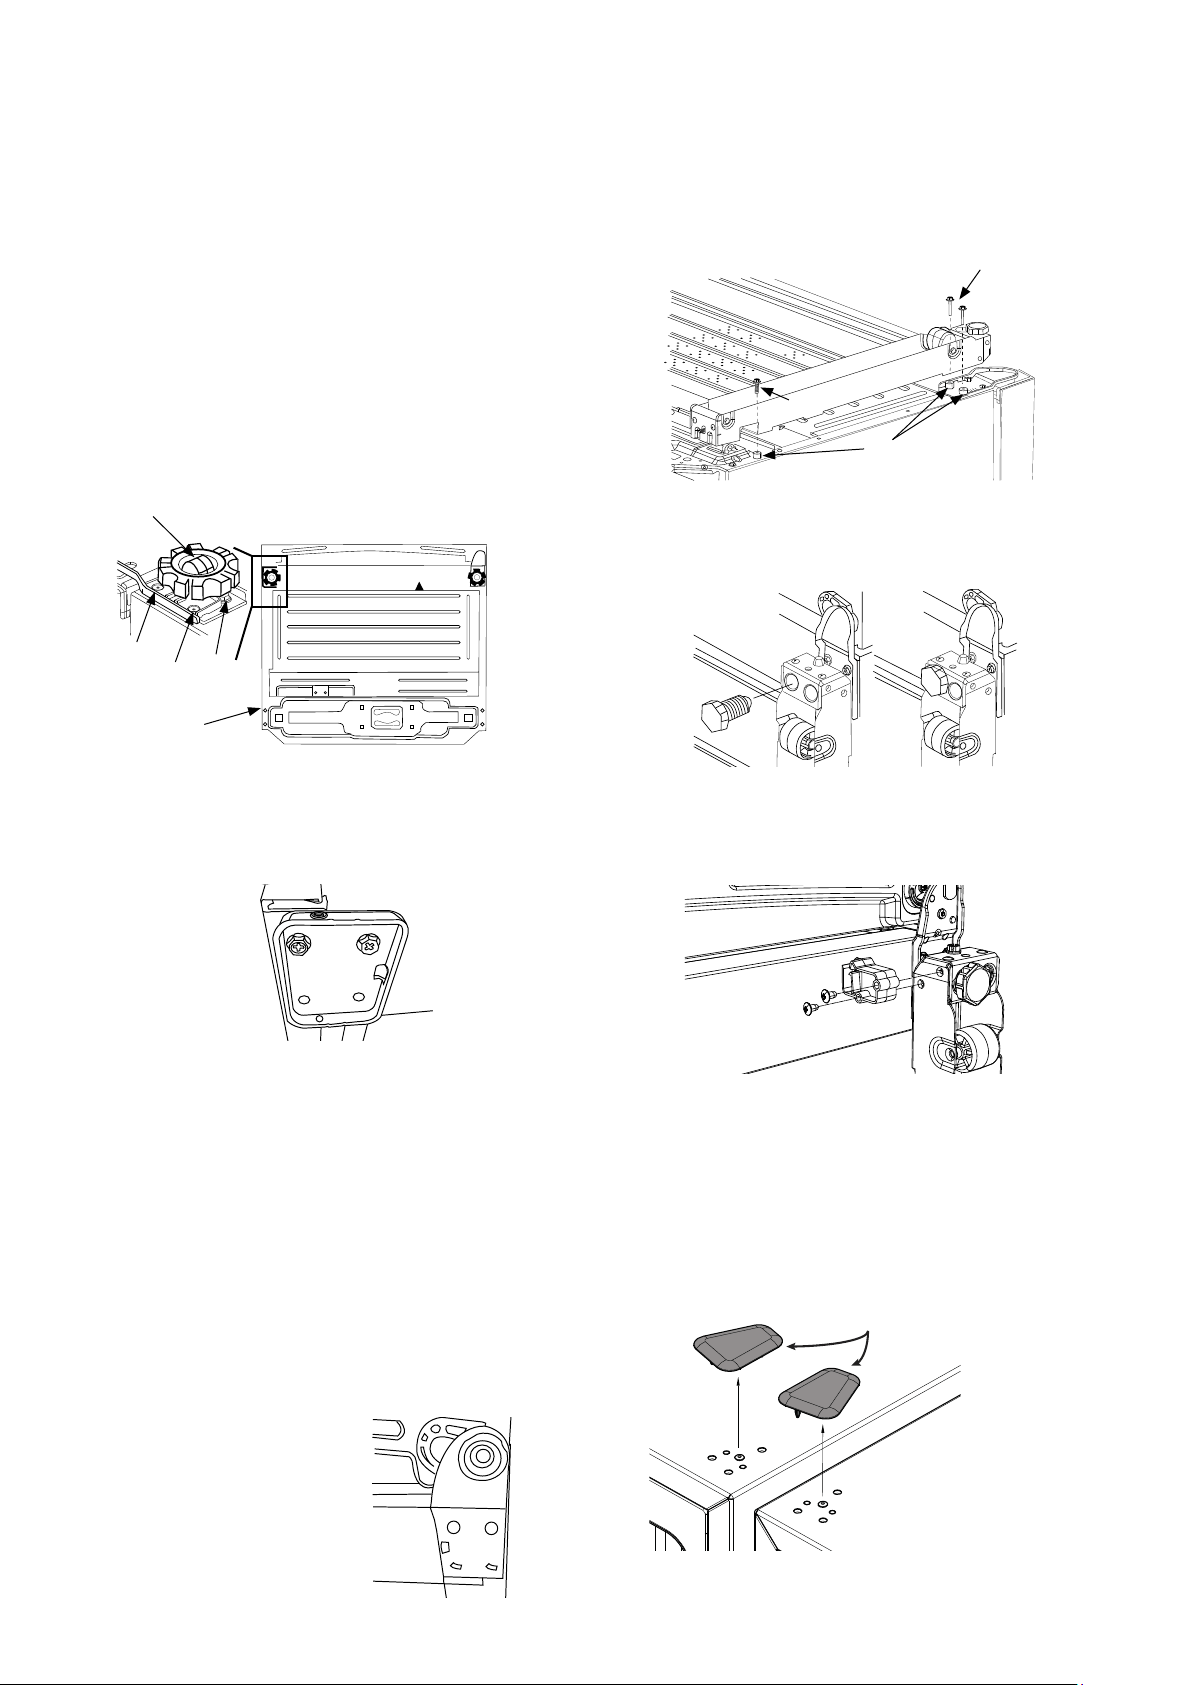
Attaching the levelling systems (2 per refrigerator)
a. The leveller assembly attaches to the refrigerator with
3 spacers (1H) and 3 screws 9H and 3H (Fig 5).
b. Ensuring slotted adjusting bolt is at the front, align
the side of the leveller assembly to the side of the
refrigerator.
2 x 9h
1 x 3h
3 x 1h
Figure 5
c. Attach Leg leveller to the leveller hole farthest from
the cabinet side face and wind it up fully. (Fig 6)
Figure 6
d. Attach Clip Trim Bottom to the inside of each leveller
assembly using screws 9H
e. Repeat the procedure to fix the other levelling system
to other side of the refrigerator.
Stand the appliance(s) to vertical position.
Your refrigerators are delivered with hole covers that cover
the screw holes. These holes are located on the top of the
refrigerator, opposite from the door hinge. Carefully remove
these covers, care must be taken to avoid damaging the
refrigerators surface. Use the pry slot at the rear of the cover.
remove covers
Ensure tapped
hole is on the
outside of
refrigerator
(recommended
torque 8Nm)
(recommended
torque 8Nm)
(recommended
torque 8Nm)
9H
Figure 4
Figure 7
Figure 8
Loading ...
Loading ...
Loading ...