Loading ...
Loading ...
Loading ...
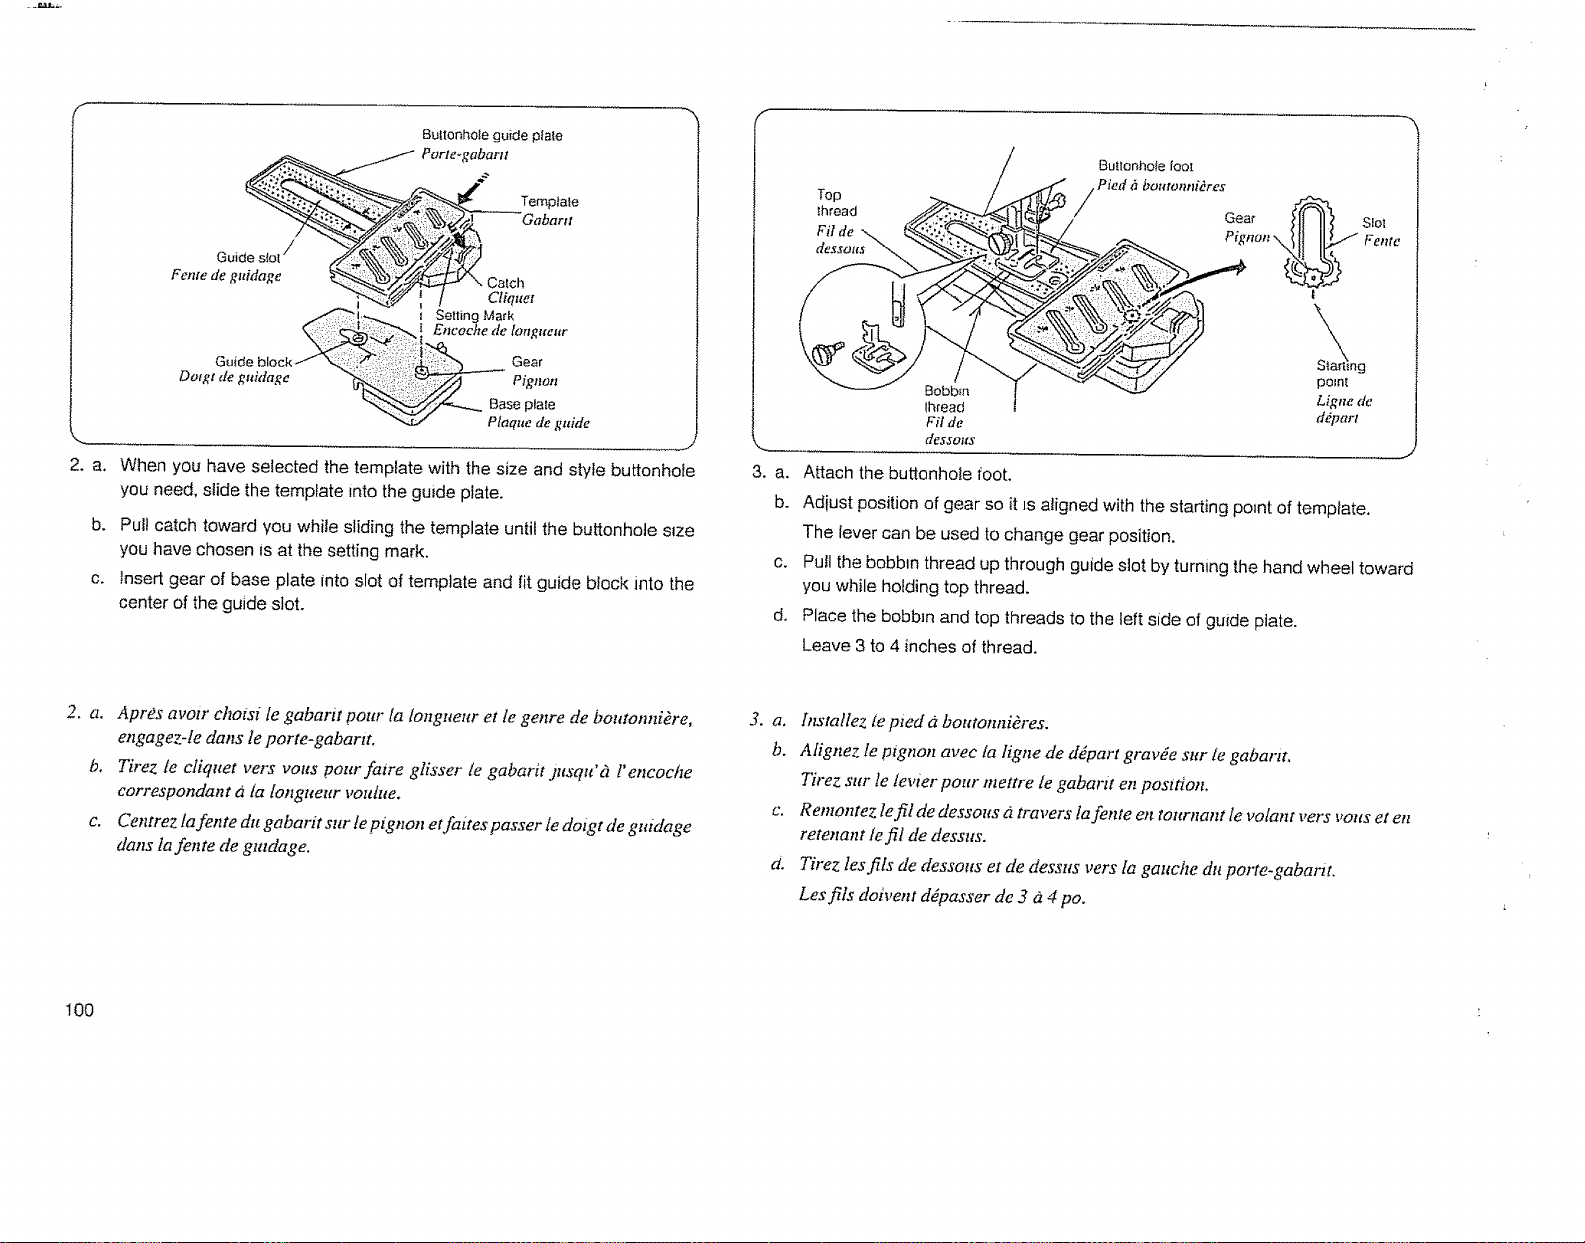
2.a.
Bultonhofe guide plale
_ Porte-gabartt
emptate
c°t,.,-,,
_1,,...... I Setling Mark
{__ l Encache tie longueur
Guide block Gea
Dotgt tie guidage Pignon
"%__.,..,., Base plate
Plaque de guide
When you have selected the template with the size and style buttonhole
you need, slide the template into the guide plate.
b. Pull catch toward you while sliding the template until the buttonhole s_ze
you have chosen is at the setting mark.
c. Insert gear of base plate into slot of template and fit guide block into the
center of the guide slot.
Ihread
Ell de
dessous
3. a. Attach the buttonhole foot.
b.
C.
d.
Butlanho_e foot
___ Pied 1_boutonnieres
/ Gear _'_ SIO!
P'="°""411I',1
Ligne de
d_part
J
Adjust position of gear so it Js aligned with the starting point of template.
The lever can be used to change gear position.
Pull the bobbin thread up through guide slot by turning the hand wheel toward
you while holding top thread.
Place the bobbin and top threads to the left side of guide plate.
Leave 3 to 4 inches of thread.
2. a. AprOs avotr choisi te gabarit pour [a longueur et le genre de boutonni&e,
engagez-le dans te porte-gabarit,
b. Tirez te cliquet vers vous pour fatre glisser le gabarit jttsqu'_ l'encoche
correspondant glta fongtteur vouhte,
c. Centrez ta fente du gabarit sur te pignon et faites passer le dotgt de guidage
dans la fente de gutdage.
, a,
b.
C,
d.
hzstattez te pted ¢tboutonnidres.
Atignez le ptgnon avec ta 1igne de ddpart gravde sur le gabartt.
Tirez sttr le levier pour mettre te gabartt en postllon.
Remontez lefit de dessous atravers ta fente en tournant [e volant vers vous et en
retenant le fil de dessus.
Tirez les fifs de dessous et de dessus vers ta gauche du porte-gabarit.
Les fifs doivent d#passer de 3 a 4 po,
!0o
Loading ...
Loading ...
Loading ...