
Loading ...
Loading ...
Loading ...
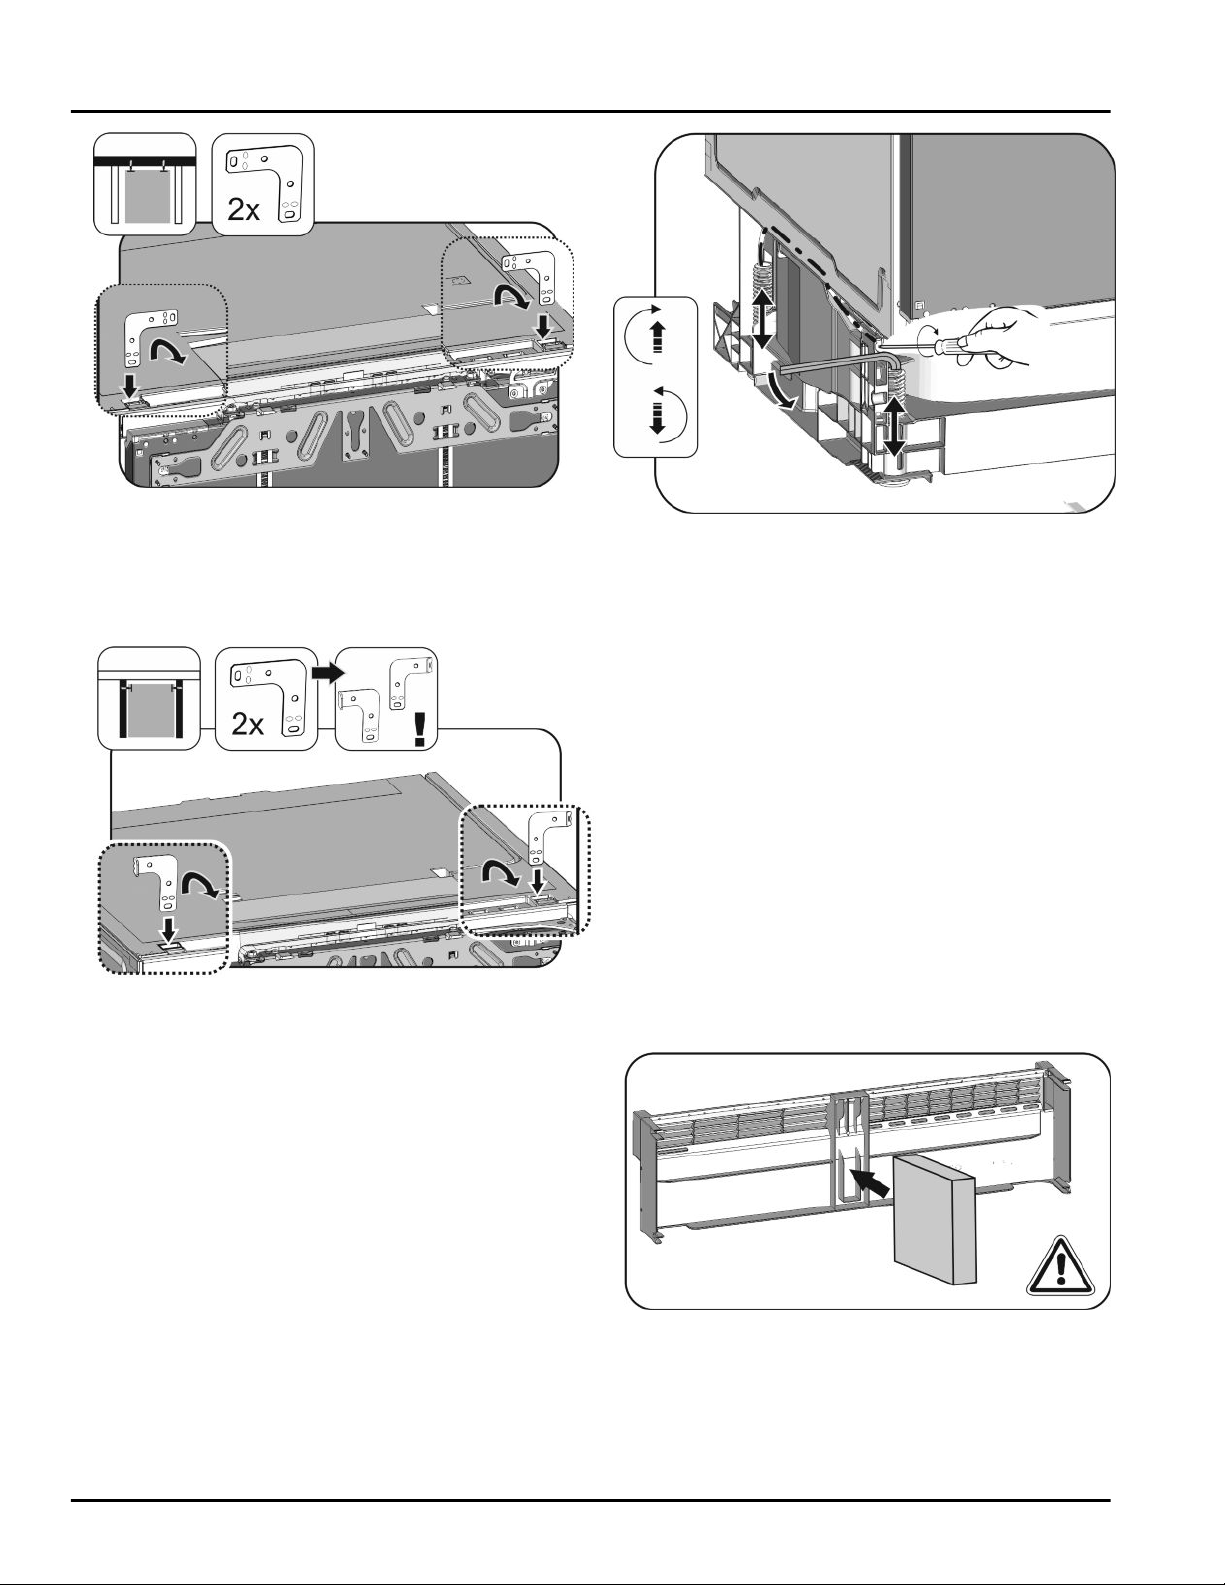
Fig. 10
u
Insert the bracket in the opening in the top of the appli-
ance and turn it forward.
u
Push the appliance into the recess and align it, see
Aligning the appliance.
Side fastening:
Fig. 11
u
Turn both brackets prior to assembly on one end. Insert
the straight side in the opening in the top of the appli-
ance and turn it forward.
u
Push the appliance into the recess and align it, see
Aligning the appliance.
Aligning the appliance
Fig. 12
u
Unscrew the rear adjusting feet with a screwdriver and
the front adjusting feet with an Allen key 8 in an alter-
nating manner until they are below the worktop.
u
Align the appliance vertically, using a spirit level.
w
The distance between the front edge of the unit side
wall and the appliance itself is 1-5/8 '' (41.5 mm) on
both sides.
w
If there is no cabinet side panel, align it with the work
top.
In units with door stop components (knobs,
sealing lips, etc.)
u
Subtract the additional distance (for depth of the door
stop components) from the 1-5/8 '' (41.5 mm) insertion
depth.
u
Unscrew the rear adjusting feet with a screwdriver and
the front adjusting feet with an Allen key 8 (for screwed
in adjusting feet) or screwdriver (with unscrewed
adjusting feet) in an alternating manner as far as
possible. The maximum adjustment distance is 2-3/8 ''
(60 mm).
w
The appliance is aligned vertically
w
The appliance is blocked slightly in the recess between
the floor and the worktop.
Fig. 13
u
Insert the foam element in the appliance plinth trim -
functionally important for separate air currents!
Start-up
* Depending on model and options 9
Loading ...
Loading ...
Loading ...