Loading ...
Loading ...
Loading ...
°lc oFYou.
SOFTENER
I
A
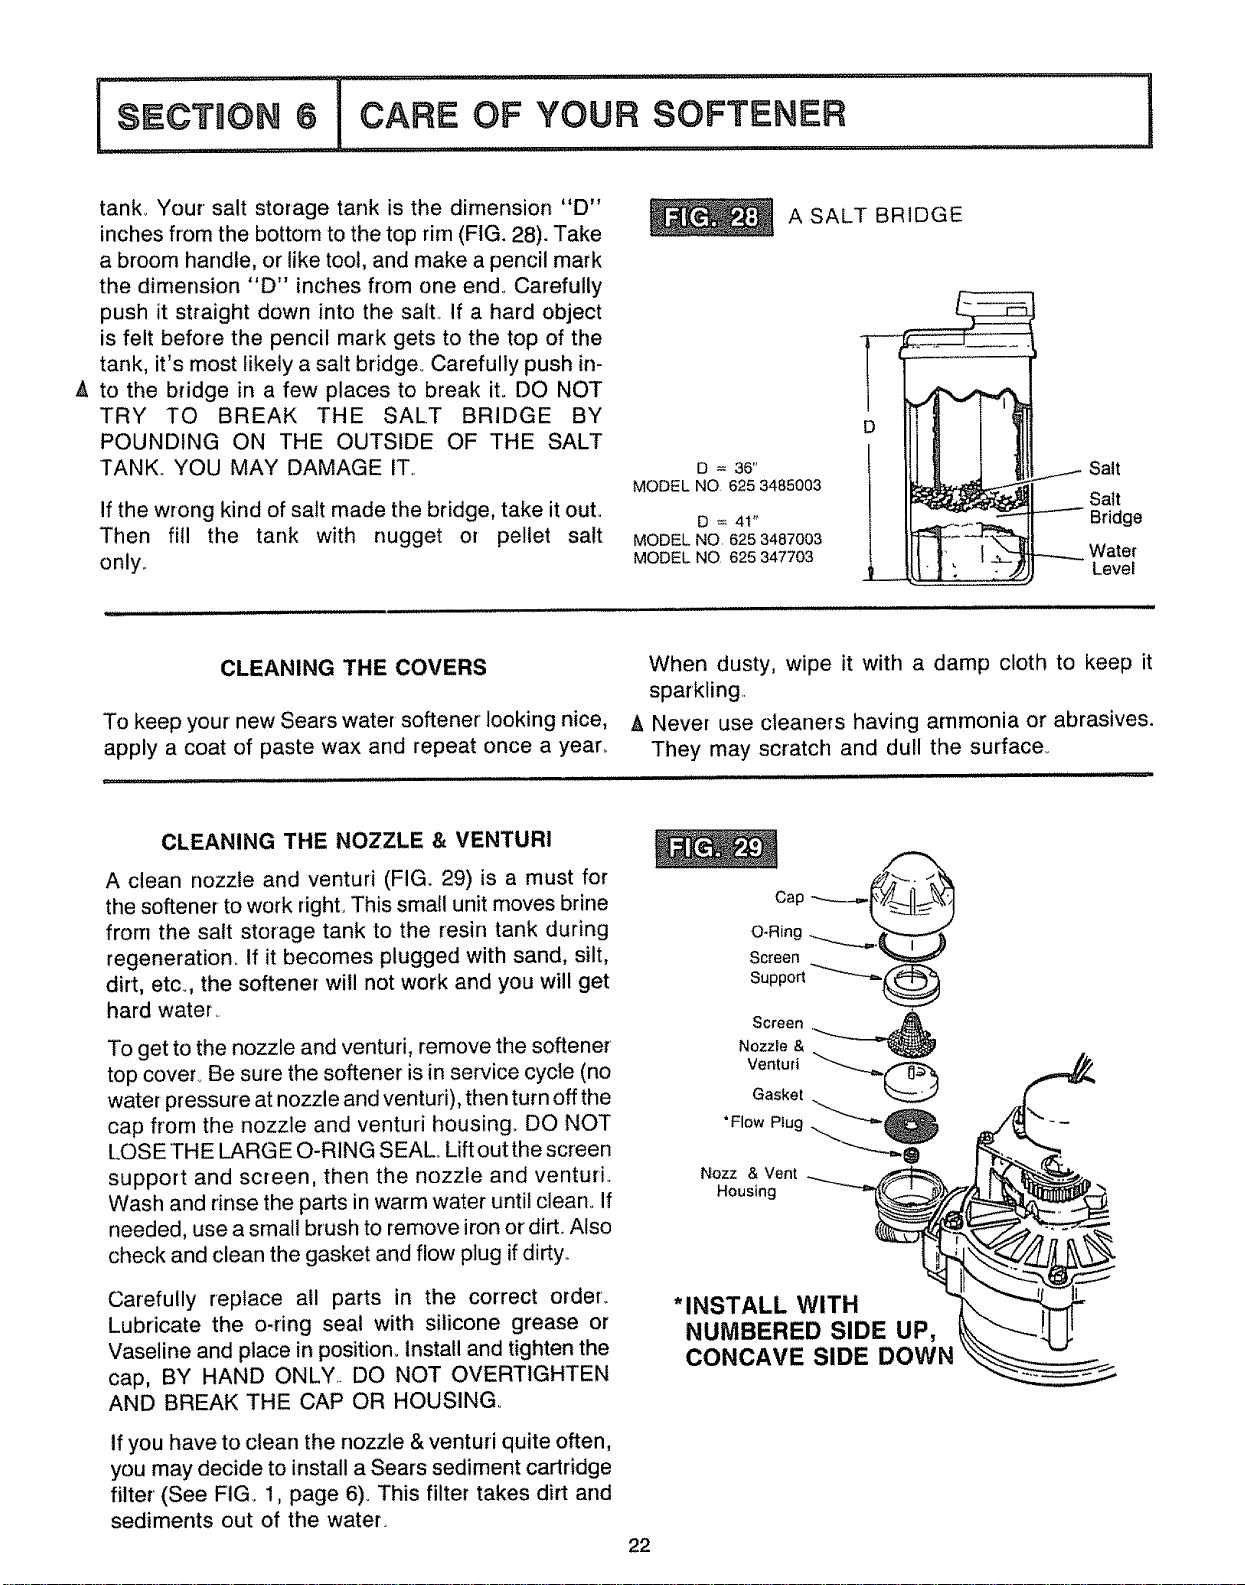
tank. Your salt storage tank is the dimension "D"
inches from the bottom to the top rim (FIG. 28). Take
a broom handle, or like tool, and make a pencil mark
the dimension "D" inches from one end. Carefully
push it straight down into the salt. If a hard object
is felt before the pencil mark gets to the top of the
tank, it's most likely a salt bridge. Carefully push in-
to the bridge in a few places to break it. DO NOT
TRY TO BREAK THE SALT BRIDGE BY
POUNDING ON THE OUTSIDE OF THE SALT
TANK.. YOU MAY DAMAGE IT_
if the wrong kind of salt made the bridge, take it out.
Then fill the tank with nugget or pellet salt
only.
A SALT BRIDGE
D = 36"
MODEL NO 625 3485003
D = 41"
MODEL NO, 625 3487003
MODEL NO 625 347703
Salt
Satt
----- Bridge
Water
Level
CLEANING THE COVERS
To keep your' new Sears water softener looking nice,
apply a coat of paste wax and repeat once a year°
When dusty, wipe it with a damp cloth to keep it
sparkling.
A Never use cleaners having ammonia or abrasives.
They may scratch and dull the surface_
...................... i
CLEANING THE NOZZLE & VENTURI
A clean nozzle and venturi (FIG. 29) is a must for
the softener to work right. This srnall unit moves brine
from the salt storage tank to the resin tank during
regeneration. If it becomes plugged with sand, silt,
dirt, etc., the softener will not work and you will get
hard water.
To get to the nozzle and venturi, remove the softener
top cover. Be sure the softener is in service cycfe (no
water pressure at nozzle and venturi), then turn off the
cap from the nozzle and venturi housing. DO NOT
LOSE THE LARG E O-RING SEAL. Lift out the screen
support and screen, then the nozzle and venturi.
Wash and rinse the parts in warm water until clean. If
needed, use a small brush to remove iron or dirt° Also
check and clean the gasket and flow plug if dirty.
Carefully replace atl parts in the correct order.
Lubricate the o-ring seal with silicone grease or
Vaseline and place in position. Install and tighten the
cap, BY HAND ONLY. DO NOT OVERTIGHTEN
AND BREAK THE CAP OR HOUSING°
tf you have to clean the nozzle & venturi quite often,
you may decide to install a Sears sediment cartridge
filter' (See FIG. 1, page 6). This filter takes dirt and
sediments out of the water.
22
O-Ring
Screen
Support
Screen ,______
Nozzle &
Ventud
Gasket
Plug
"Flow "_"_-_ O
Nozz & Vent ___ ,,_
Housing
*INSTALL WITH
NUMBERED SIDE UP,
CONCAVE SIDE DOWN
Loading ...
Loading ...
Loading ...