Loading ...
Loading ...
Loading ...
!
C. BYPASS VALVE, ITEM NO. 65/42-3437- If
not already done, put a light coating of sili-
cone grease or Vaseline on the bypass valve
o-rings.
Push the bypass valve into the softener valve as far
as it will go (FIG. 4, 5 and 6)° SNAP THE 2 LARGE
HOLDING CLIPS INTO PLACE, FROM THE TOP
DOWN AS SHOWN. BE SURE THEY SNAP
FIRMLY IN PLACE, SO THE BYPASS VALVE WiLL
NOT PULL OUT. GO TO STEP 7.
BYPASS VALVE TURNED
DOWNWARD
l_ TURN BYPASS VALVE
UPSIDE DOWN TO
OUT CONNECT TO FLOOR
iN LEVEL PLUMBING
1=
aa
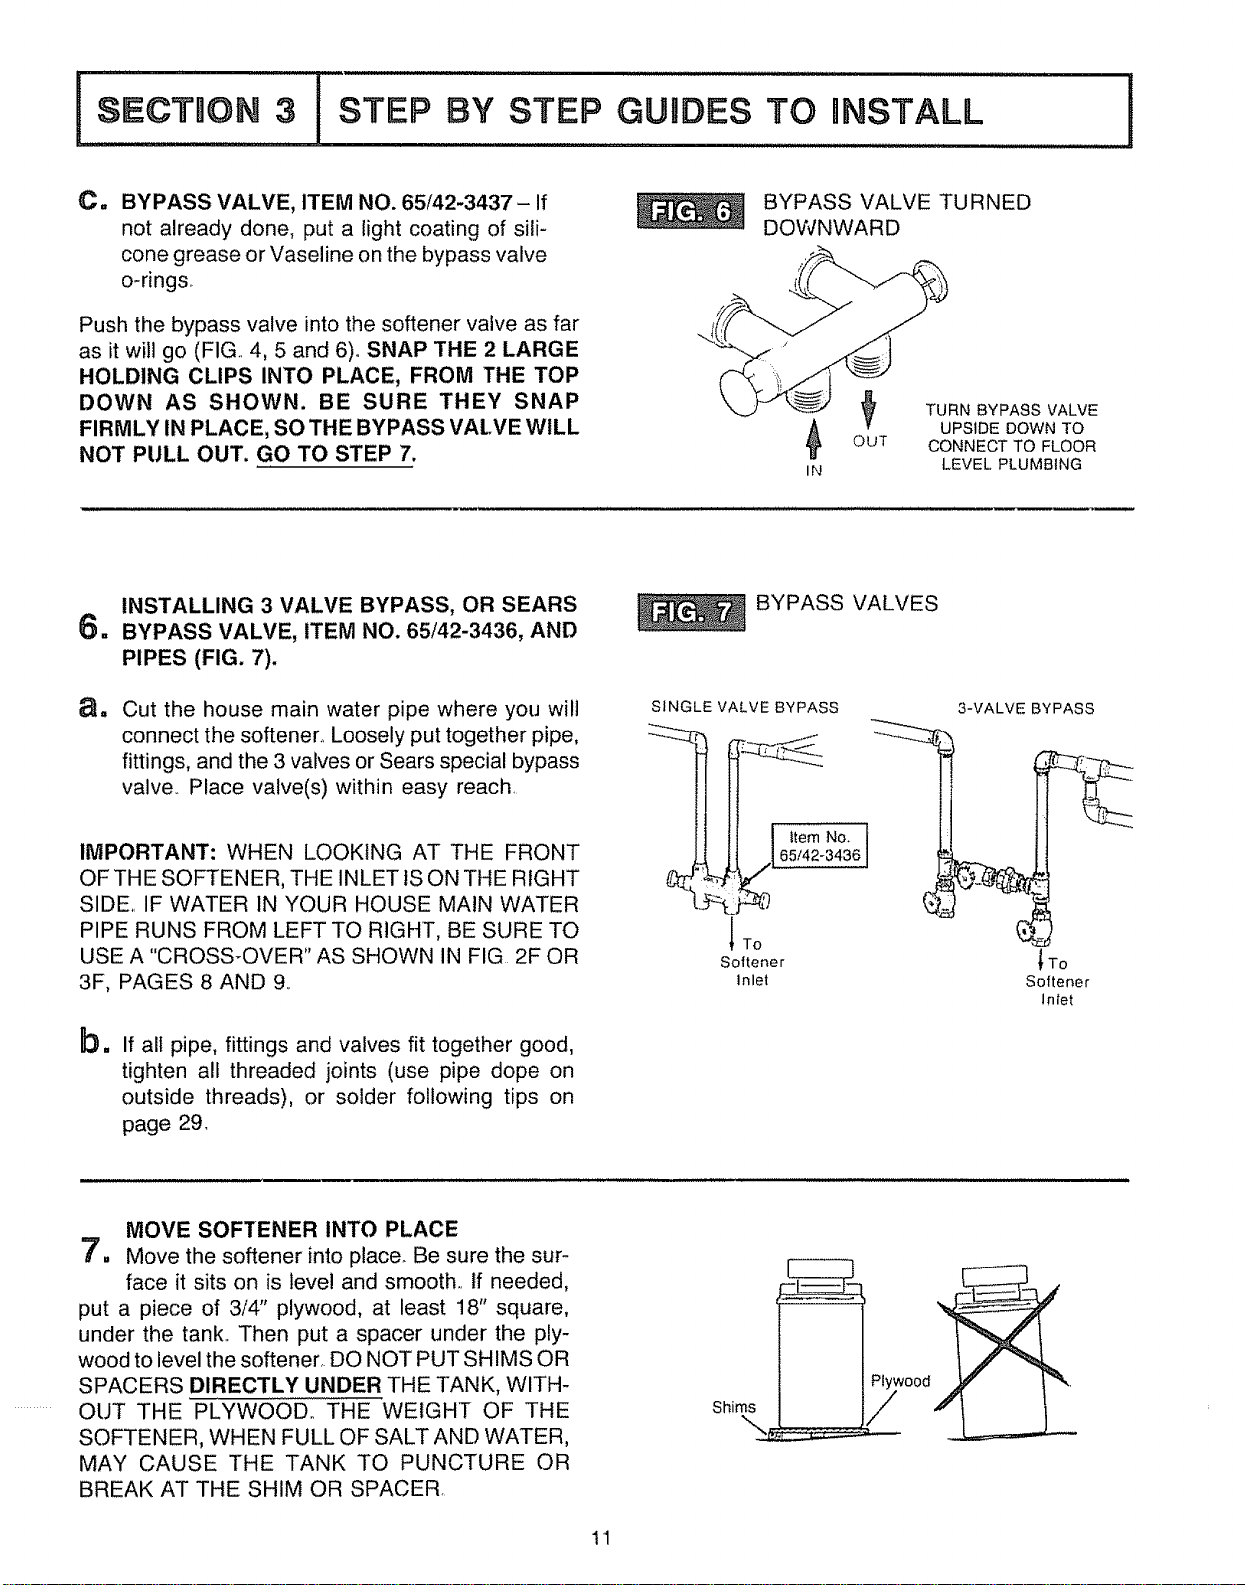
INSTALLING 3 VALVE BYPASS, OR SEARS
BYPASS VALVE, ITEM NO. 65/42-3436, AND
PIPES (FIG. 7).
Cut the house main water pipe where you will
connect the softener° Loosely put together pipe,
fittings, and the 3 valves or Sears special bypass
valve.. Place valve(s) within easy reach.
IMPORTANT: WHEN LOOKING AT THE FRONT
OF THE SOFTENER, THE INLET 1SON THE RIGHT
SIDE IF WATER IN YOUR HOUSE MAIN WATER
PIPE RUNS FROM LEFT TO RIGHT, BE SURE TO
USE A "CROSS-OVER '' AS SHOWN IN FIG 2F OR
3F, PAGES 8 AND 9.
bm
If all pipe, fittings and valves fit together good,
tighten all threaded joints (use pipe dope on
outside threads), or solder following tips on
page 29.
BYPASS VALVES
SINGLE VALVE BYPASS
| 65/42-34361
Softener
lnlet
3-VALVE BYPASS
_To
Softener
Inter
MOVE SOFTENER INTO PLACE
7, Move the softener into place. Be sure the sur-
face it sits on is level and smooth., tf needed,
put a piece of 3/4" plywood, at least 18" square,
under the tank_ Then put a spacer under the ply-
wood to level the softener, DO NOT PUT SHIMS OR
SPACERS DIRECTLY UNDER THE TANK, WITH-
............ OUT THE PLYWOOD,, THE WEIGHT OF THE
SOFTENER, WHEN FULL OF SALT AND WATER,
MAY CAUSE THE TANK TO PUNCTURE OR
BREAK AT THE SHIM OR SPACER,
Shims
,,_wood
11
Loading ...
Loading ...
Loading ...