Loading ...
Loading ...
Loading ...
Checkingand
adjustingthe
burners
The burners are tested and factory-set for
most efficient operation. However,
variations in gas supply and other
conditions may make minor adjustments
to air shutter or low flame setting
necessary. Adjustments must be done by
a qualified service technician.
NOTE: No adjustment can be made to
the infrared rotisserie burner (not used on
all models) or smoker tray burner(s).
Checking and adjusting the grill burner
flames requires removing the grate and
sear plates.
Sear burnerflame characteristics:
The flames of the grill burners and
surface burners (not used on all models)
should be blue and stable with no
excessive noise or lifting (L.Rtpropane
gas flames will have a slightly yellow tip).
A yellow flame indicates not enough air.
If flame is noisy or lifts away from the
burner, there is too much air. Some
yellow tips on flames when the burner is
set to HI setting are acceptable as long
as no carbon or soot deposits appear.
Check that burners are not blocked by
dirt, debris, insect nests, etc. and clean
as necessary. If they are clean, adjust air
shutters as needed.
IMPORTANT: Before adjusting air
shutters, let burners cool down.
Adjusting the air shutters:
1. Lightgrill using information in the
"Lighting the grill" section.
2. Observe flame to determine which
burners need adjustment and how the
flame is acting, See "Sear burner
flame characteristics" above.
3. Turn offthe valve and wait until grill
and burners are cool.
4. Remove grill grates, sear plates.
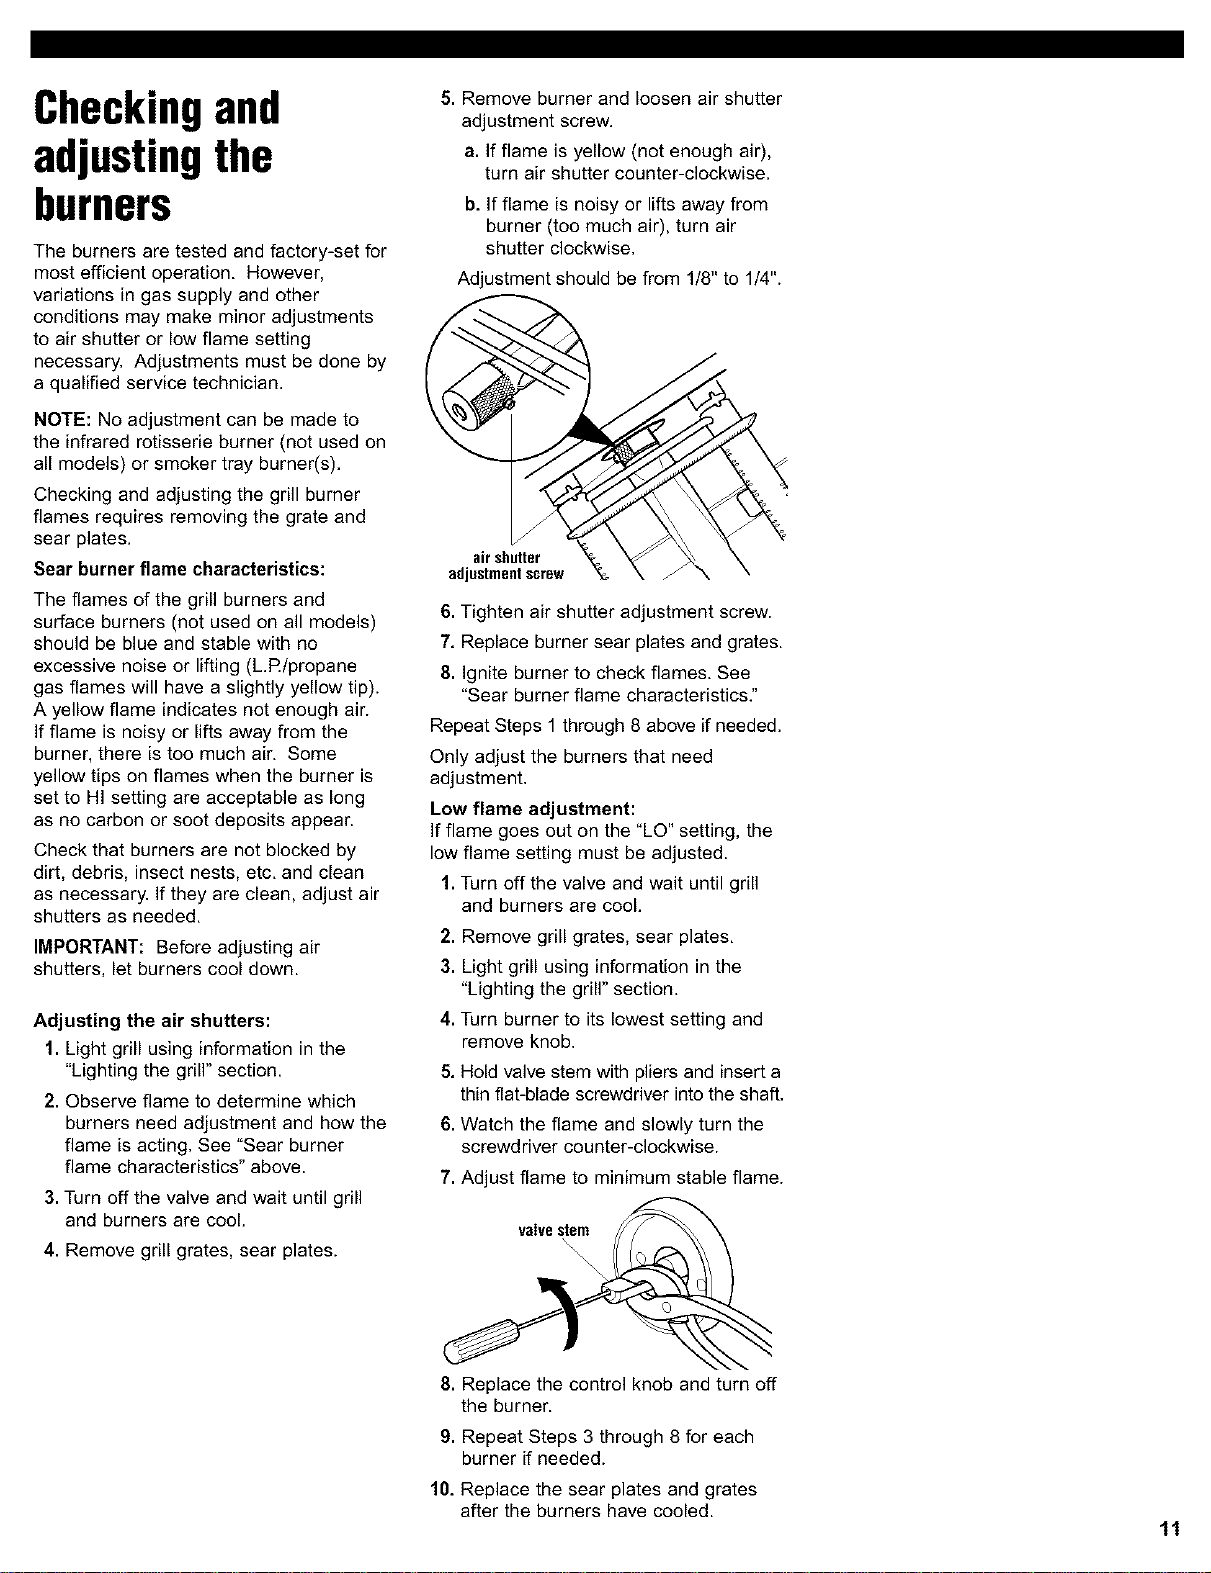
5. Remove burner and loosen air shutter
adjustment screw.
a. If flame is yellow (not enough air),
turn air shutter counter-clockwise.
b. ff flame is noisy or lifts away from
burner (too much air), turn air
shutter clockwise.
Adjustment should be from 1/8" to 1/4".
airshutter
adjustmentscrew
6. Tighten air shutter adjustment screw.
7. Replace burner sear plates and grates.
8. Ignite burner to check flames. See
"Sear burner flame characteristics."
Repeat Steps 1 through 8 above if needed.
Only adjust the burners that need
adjustment.
Low flame adjustment:
If flame goes out on the "LO" setting, the
low flame setting must be adjusted.
1. Turn offthe valve and wait until grill
and burners are cool.
2. Remove grill grates, sear plates.
3. Light grill using information in the
"Lighting the grill" section.
4. Turn burner to its lowest setting and
remove knob.
5. Hold valve stem with pliers and insert a
thin flat-blade screwdriver intothe shaft.
6. Watch the flame and slowly turn the
screwdriver counter-clockwise.
7. Adjust flame to minimum stable flame.
valves_
8. Replace the control knob and turn off
the burner.
9. Repeat Steps 3 through 8 for each
burner if needed.
10, Replace the sear plates and grates
after the burners have cooled.
11
Loading ...
Loading ...
Loading ...